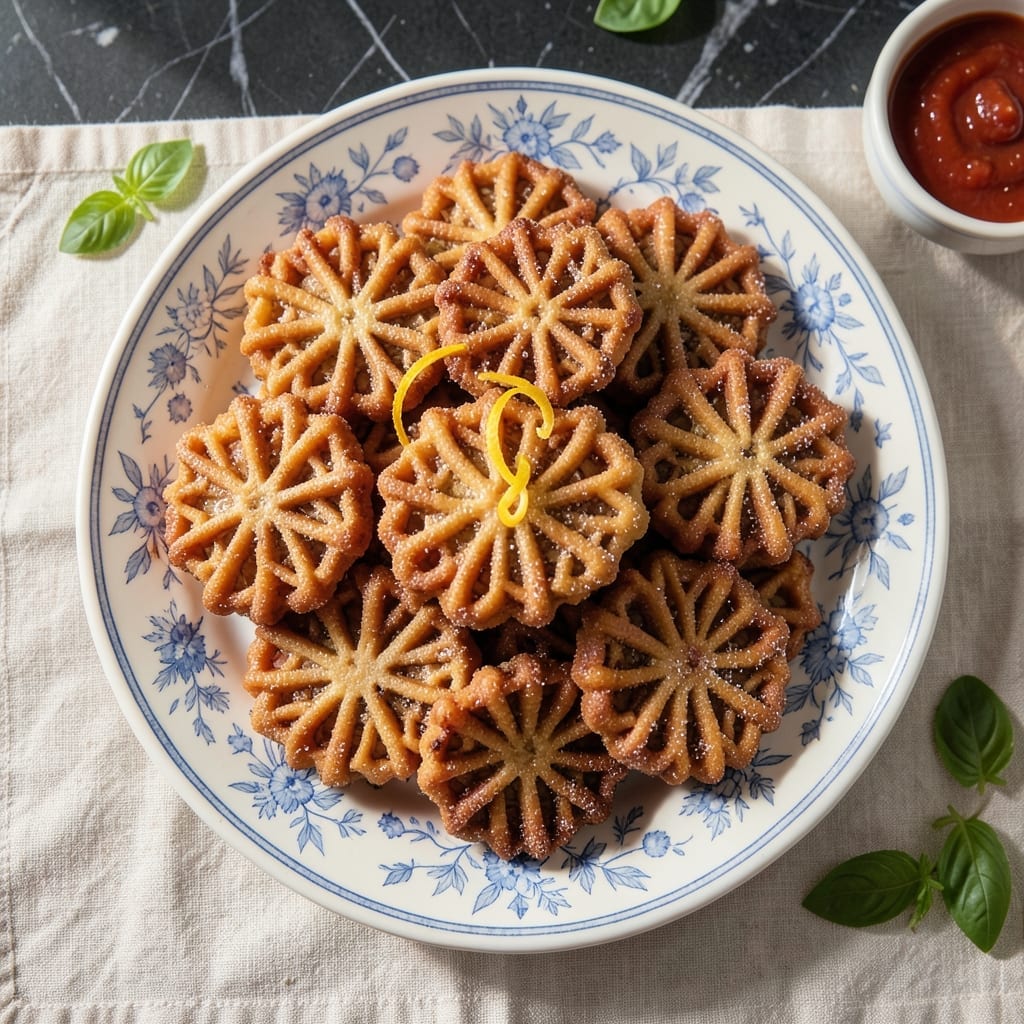
There’s something timeless about the delicate lace pattern of traditional pizzelle cookies. This recipe captures that signature crispy texture with a rich buttery flavor and subtle vanilla kiss that makes them irresistible.
Using a classic pizzelle iron ensures each wafer bakes evenly with perfect golden edges. The secret lies in the balance of butter and vanilla, creating cookies that are as beautiful as they are delicious.
Ingredients for Pizzelle Recipe with Butter
A handful of pantry staples and rich butter create these classic, crispy Italian wafers.
| Ingredient | Amount | Notes |
|---|---|---|
| All-Purpose Flour 🌾 | 2 cups | Sifted for smooth texture |
| Granulated Sugar 🍚 | ¾ cup | Fine white sugar preferred |
| Unsalted Butter 🧈 | 1 cup | Melted and cooled slightly |
| Large Eggs 🥚 | 3 whole | Room temperature for best results |
| Pure Vanilla Extract 🌿 | 2 tsp | High-quality for rich flavor |
| Baking Powder 🧂 | 1 tsp | Ensures light, crisp texture |
| Salt 🧂 | ¼ tsp | Fine sea salt or table salt |
| Anise Seeds 🌿 | 1 tbsp | Classic pizzelle flavor (optional) |
| Lemon Zest 🍋 | 1 tsp | Freshly grated for brightness |
| Powdered Sugar 🍚 | ¼ cup | For dusting finished cookies |
[recipe_ingredient_scaler]
The butter is non-negotiable here—use high-quality unsalted like Plugrá or Kerrygold. It delivers the rich flavor that defines pizzelle. The flour should be all-purpose; no need for anything fancy. Most grocery stores carry anise seeds in the spice aisle, but if you’re hunting for the best selection, Italian specialty markets often have fresh batches with more aromatic punch.
No anise? Substitute with almond extract at half the amount or skip it entirely—the vanilla still shines. Want a citrus twist? Double the lemon zest or add orange zest instead. The eggs must be room temperature for proper emulsion, so set them out 30 minutes before mixing. If you’re short on time, place them in warm water for 5 minutes.
Dough can be made 1 day ahead and refrigerated. Baked cookies stay crisp in an airtight container for up to 2 weeks. Dust with powdered sugar just before serving to keep the lace pattern visible and beautiful.
Why You’ll Love This Recipe
- One-Bowl Wonder: I mix the flour, sugar, melted butter, eggs, and vanilla in a single bowl—no fuss, no extra dishes piling up.
- Buttery Vanilla Bliss: The unsalted butter and pure vanilla create this rich, golden flavor that’s warm and nostalgic with every bite.
- Holiday Staple: These are my go-to for cookie swaps, gift boxes, or just a cozy afternoon with tea.
- Freezes Beautifully: I’ll bake a double batch and freeze half—still crisp and fresh-tasting weeks later when I need a quick treat.
Step-by-Step Instructions for Pizzelle With Butter
This method ensures perfectly crisp, golden-brown cookies with that signature vanilla-kissed flavor.
Step 1: Prepare the Pizzelle Batter
In a large mixing bowl, whisk together the 2 cups All-Purpose Flour, 0.75 cup Granulated Sugar, 1 tsp Baking Powder, and 0.25 tsp Salt until fully combined. The sifted flour ensures a smooth, lump-free batter that produces delicate cookies.
Create a well in the center and add the 3 whole Large Eggs, 1 cup Unsalted Butter (melted and cooled), 2 tsp Pure Vanilla Extract, 1 tbsp Anise Seeds, and 1 tsp Lemon Zest. Whisk everything together until the batter is smooth and slightly thick—it should pour easily but not be runny.
Step 2: Heat the Pizzelle Iron
Preheat your pizzelle iron according to the manufacturer’s instructions, typically to medium-high heat. I find that most irons take about 5-7 minutes to reach the ideal temperature. A properly heated iron is crucial for achieving that crisp texture—if it’s not hot enough, the cookies will be soft and doughy.
Lightly brush the iron plates with a thin layer of melted butter or nonstick spray before adding the batter. This prevents sticking and helps the cookies release cleanly with a golden, crisp finish. Avoid using too much fat, as it can pool and create uneven browning.
Step 3: Cook the Pizzelle
Using a spoon or small scoop, drop about 1 tablespoon of batter onto each patterned plate of the iron. Close the lid and press down firmly. Cook for 30-45 seconds or until the cookies are golden brown and the edges look crisp.
The timing can vary depending on your iron, so keep an eye on the first batch. You’ll know they’re ready when steam stops rising from the iron and the cookies have developed a uniform, rich color. Remove them carefully with a fork to avoid breaking the delicate patterns.
Step 4: Cool and Finish
Transfer the hot pizzelle to a wire rack to cool completely. Cooling them on a rack instead of a plate prevents condensation from making the cookies soggy. They’ll crisp up further as they cool, so resist the urge to taste-test too early!
Once fully cooled, dust the cookies lightly with 0.25 cup Powdered Sugar for a sweet, elegant finish. Serve them stacked or arranged on a platter, where their intricate patterns and crisp texture will be the star of any dessert spread.
Pro Tips For Making Pizzelle Recipe With Butter
- Soften Butter Right: Let the unsalted butter sit at room temperature for 1-2 hours until it gives slightly when pressed—cold butter won’t cream properly and you’ll end up with dense pizzelle.
- Chill the Dough: After mixing, refrigerate the dough for 30 minutes; it firms up just enough to handle better when pressing, and the flavors meld like they should.
- Skip Overfilling: Use about 1 tablespoon of dough per pizzelle—any more and it’ll ooze out the sides, making a mess and uneven cooking.
- Heat the Iron First: Preheat your pizzelle iron for at least 5 minutes on medium-high; I learned this the hard way after my first batch came out pale and greasy.
Serving Suggestions for pizzelle recipe with butter
🍽️ Plating Styles
Pizzelle can be served in various ways to match your event. For casual gatherings, arrange them in a rustic basket or on a wooden board for a cozy, inviting look. For formal occasions, stack them neatly on a tiered stand or place them beside espresso cups for an elegant touch. At a buffet, create a dedicated dessert station with pizzelle as the star, paired with small dipping bowls of chocolate or fruit compote.
🎨 Garnishing Techniques
Enhance the visual appeal with simple yet effective garnishes. Dust with powdered sugar for a classic finish, or drizzle with melted chocolate for a decadent touch. For a festive flair, sprinkle with edible gold leaf or crushed nuts. Fresh berries or a dollop of whipped cream can add a pop of color and freshness.
📏 Portion Sizes
Pizzelle are naturally portion-controlled, but you can adjust serving sizes based on the occasion. Offer individual cookies for guests to grab and enjoy, or create family-style platters for sharing. For a more substantial treat, sandwich two pizzelle with a layer of Nutella or cannoli cream.
🌡️ Serving Temperature
Pizzelle are best enjoyed at room temperature, allowing their crisp texture to shine. If storing them, let them cool completely on a wire rack to maintain crispness. Serve immediately after cooling for the best experience, or store in an airtight container for up to a week. Re-crisp in a warm oven for a few minutes if needed.
Nutrition Facts

Trained in classic French technique but raised on slow-cooked ribs and spicy rubs, she blends culinary skill with smoke and soul.
- Recipe for Boneless Cross Rib Roast: Slow-Roasted Beef with Herb Crust - October 3, 2026
- Hamburgers in Sauce Recipe Crock Pot: Slow-Cooked Savory Delight - October 3, 2026
- Sanjeev Kapoor Egg Biryani Recipe: Fragrant Spiced Rice With Boiled Eggs - October 3, 2026