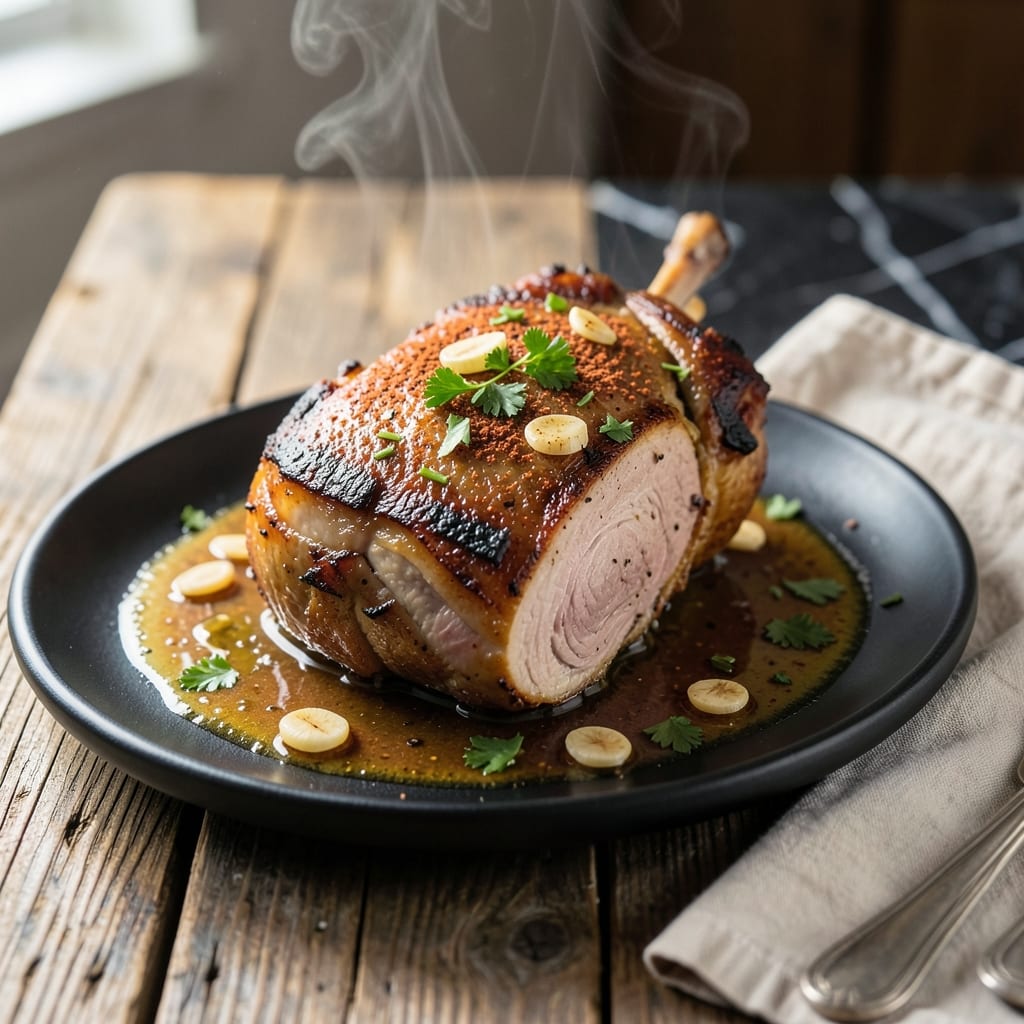
Growing up in Georgia, pork was always the centerpiece of our family gatherings. This pressure cooker method delivers that same rich flavor in a fraction of the time.
What makes this approach special is the way it transforms a tough cut into fall-off-the-bone perfection. The pressure cooker locks in moisture while breaking down connective tissue, creating results that rival slow-roasting.
You’ll end up with tender pork that shreds effortlessly, infused with deep, savory notes. The best part? It’s ready in under 60 minutes, not all day.
Serve it as pulled pork sandwiches, tacos, or alongside classic sides. This technique never fails to impress.
Ingredients for Pork Picnic Roast Pressure Cooker
Transform tough pork into tender perfection with these classic Southern ingredients ready in under an hour.
| Ingredient | Amount | Notes |
|---|---|---|
| Pork Picnic Roast 🥩 | 3 lb | Bone-in, skin-on preferred |
| Kosher Salt 🧂 | 2 tsp | Diamond Crystal preferred |
| Black Pepper 🌶️ | 1 tsp | Freshly ground recommended |
| Garlic Powder 🧄 | 1 tbsp | Not garlic salt |
| Onion Powder 🧅 | 1 tbsp | For depth of flavor |
| Smoked Paprika 🌶️ | 1 tbsp | Sweet or hot variety |
| Dried Oregano 🍃 | 1 tsp | Mediterranean oregano preferred |
| Dried Thyme 🍃 | 1 tsp | Rubbed between fingers |
| Brown Sugar 🍚 | ¼ cup | Light or dark variety |
| Apple Cider Vinegar 🍏 | ¼ cup | Balances richness of pork |
| Chicken Broth 🍲 | 1 cup | Low-sodium preferred |
| Olive Oil 🫒 | 2 tbsp | For searing roast |
| Yellow Onion 🧅 | 1 whole | Medium, roughly chopped |
[recipe_ingredient_scaler]
For the pork, bone-in picnic roast is ideal—it stays juicier during pressure cooking than leaner cuts. Costco often carries these at a good price, or ask your butcher to cut one from a whole shoulder. Look for good marbling throughout; this fat renders down to create that signature richness. The spices should be fresh (within 6 months) for maximum impact. Smoked paprika adds that essential barbecue depth.
No pork picnic roast? Pork shoulder or butt works identically—just adjust cooking time slightly. Out of apple cider vinegar? White vinegar or lemon juice at the same quantity gets you 90% there. Brown sugar can be replaced with maple syrup or honey at a one-to-one ratio. For extra complexity, add a pinch of cayenne or chipotle powder. The chicken broth can be swapped for vegetable broth or even water in a pinch.
The cooked pork keeps beautifully—store in its juices in an airtight container for up to 4 days in the fridge. For longer storage, shred and freeze in portions for up to 3 months. The flavor actually deepens overnight, making this perfect for meal prep. Reheat gently in a skillet with a splash of broth to restore moisture.
Why You’ll Love This Recipe
- I’ll be real: if you can measure spices and press a button, you’ve got this. No searing, no basting, just straightforward flavor.
- Set It and Forget: I toss the pork picnic roast in the pressure cooker with salt, pepper, and those powders, then walk away—dinner practically makes itself.
- Deep, Rich Taste: Honestly, the garlic and onion powders work magic on the fatty picnic cut, giving it that slow-roasted depth in a fraction of the time.
- Feeds My Crew Twice: One roast yields enough for tacos tonight and sandwiches tomorrow. Between us, it’s my sneaky way to stretch a $10 cut into two meals.
Step-by-Step Instructions for Pork Picnic Roast Pressure Cooker
This method delivers tender, flavorful meat with minimal effort and maximum results.
Step 1: Prepare and Season the Pork Picnic Roast
Pat the 3 lb pork picnic roast dry with paper towels to ensure a good sear. This step is crucial for developing flavor and preventing steaming in the pressure cooker. Trim any excess fat if desired, though some marbling enhances the final dish.
In a small bowl, combine the 2 tsp kosher salt, 1 tsp black pepper, 1 tbsp garlic powder, 1 tbsp onion powder, 1 tbsp smoked paprika, 1 tsp dried oregano, and 1 tsp dried thyme. Rub this mixture evenly over the entire surface of the pork, pressing it into the meat to adhere. Let the seasoned roast sit at room temperature for 15-20 minutes while you prepare the remaining ingredients.
Step 2: Sear the Roast for Depth of Flavor
Set your pressure cooker to the “Sauté” function and add the 2 tbsp olive oil. Once the oil shimmers and is hot, carefully place the pork picnic roast in the pot. Sear the meat for 3-4 minutes per side until a deep, golden-brown crust forms on all sides.
This searing process caramelizes the surface sugars and spices, creating a rich fond at the bottom of the pot. This fond will dissolve into the cooking liquid, infusing the dish with complex flavors. Avoid moving the roast too frequently—allow it to develop a proper crust before turning.
Step 3: Deglaze and Add Liquids
Remove the seared pork picnic roast and set it aside temporarily. Add the roughly chopped 1 whole yellow onion to the pressure cooker and sauté for 2-3 minutes until softened and just beginning to caramelize. Pour in the 0.25 cup apple cider vinegar to deglaze the pot, scraping up any browned bits with a wooden spoon.
Stir in the 0.25 cup brown sugar until dissolved, then add the 1 cup chicken broth. The liquid should come about halfway up the sides of the roast when it is returned to the pot. This balance ensures proper pressure cooking while maintaining concentrated flavors.
Step 4: Pressure Cook to Perfection
Return the pork picnic roast to the pressure cooker, securing the lid and setting the valve to “Sealing.” Cook on high pressure for 45 minutes. The natural release method works best for this cut—allow the pressure to release naturally for 15 minutes before carefully turning the valve to “Venting” to release any remaining pressure.
Once it is safe to open, remove the lid and check the pork for doneness. The meat should be fork-tender and easily pull apart with minimal resistance. If it needs more time, reseal the lid and cook for an additional 5-10 minutes on high pressure.
Step 5: Rest and Serve
Transfer the pork picnic roast to a cutting board and let it rest for 10-15 minutes before shredding or slicing. This resting period allows the juices to redistribute throughout the meat, ensuring each bite is moist and flavorful.
Serve the pork with some of the cooking liquid spooned over the top. The liquid will have reduced slightly during cooking, creating a light, flavorful sauce that complements the rich, tender meat. This dish pairs well with simple sides like mashed potatoes or roasted vegetables.
Pro Tips For Making Pork Picnic Roast Pressure Cooker
- Sear the Roast First: I learned this the hard way—skipping the sear gives you bland, gray meat. Two minutes per side in the pressure cooker on sauté mode adds a depth of flavor that dry rub alone can’t match.
- Trim Excess Fat: Pork picnic has a thick fat cap. Leave about 1/4 inch for flavor, but trim the rest or your pressure cooker will fill with grease instead of building pressure.
- Use Natural Release: After cooking, let the pressure release naturally for 10 minutes. Cutting this short makes the meat tough—I ruined two roasts before I figured this out.
- Double the Spices: Sounds like overkill, but pork picnic needs bold seasoning. I use 1 tablespoon each of kosher salt, garlic powder, and onion powder for a 3-pound roast—trust me, it’s not too much.
Pro Cooking Tips for Great pork picnic roast pressure cooker
Perfect Searing Technique
Always sear the pork before pressure cooking to develop that golden-brown crust. I use my Instant Pot on the “Sauté” setting with 2 tbsp olive oil until it shimmers. Press the seasoned roast firmly into the hot oil and resist the urge to move it for at least 3 minutes per side. 🔥
Liquid Balance
Use exactly 1¼ cups total liquid—1 cup chicken broth plus ¼ cup apple cider vinegar. Too much liquid dilutes flavor, too little risks burning. After deglazing, ensure the fond dissolves completely before adding the roast back in.
Pressure Cooking Time
For a 3 lb bone-in picnic roast, cook on high pressure for 45 minutes. Larger roasts may need 5-10 extra minutes. Always use natural release for 15 minutes to prevent muscle tightening. I set a timer to avoid overcooking.
Doneness Check
The pork should reach 195-203°F internal temperature and pull apart easily with a fork. If it resists, reseal and cook for another 5 minutes. This temperature range ensures perfect collagen breakdown without drying out.
Resting is Key
Let the roast rest for 10-15 minutes before shredding. This allows juices to redistribute. I cover mine loosely with foil during this time. Skipping this step means losing precious moisture to your cutting board.
Tools I Swear By
Invest in a good instant-read thermometer—I use ThermoWorks for accuracy. Also, a pair of long silicone tongs makes handling the hot roast much safer. These small upgrades make a noticeable difference in consistency.
Nutrition Facts
Frequently Asked Questions
Can I use a smaller or larger roast?
For a 2 lb roast, reduce pressure time to 35 minutes. For 4 lbs, increase to 55 minutes. Always maintain the 15-minute natural release regardless of size.
Why sear the meat first?
Searing creates a flavorful crust and develops fond in the pot. This fond dissolves into the cooking liquid, adding depth to your final dish. It’s worth the extra 10 minutes!
Can I skip the resting time?
Avoid skipping the 10-15 minute rest. This allows juices to redistribute throughout the meat. Cutting too soon means dry pork and a pool of lost juices on your board.
What if my pork isn’t tender?
If it resists pulling apart, reseal and cook for another 5-10 minutes on high pressure. The collagen needs time to break down completely at 195-203°F.

Trained in classic French technique but raised on slow-cooked ribs and spicy rubs, she blends culinary skill with smoke and soul.
- Recipe for Boneless Pork Chops in Cast Iron Skillet: Sear and Baste to Juicy Perfection - October 3, 2026
- Recipe for Boneless Cross Rib Roast: Slow-Roasted Beef with Herb Crust - October 3, 2026
- Hamburgers in Sauce Recipe Crock Pot: Slow-Cooked Savory Delight - October 3, 2026