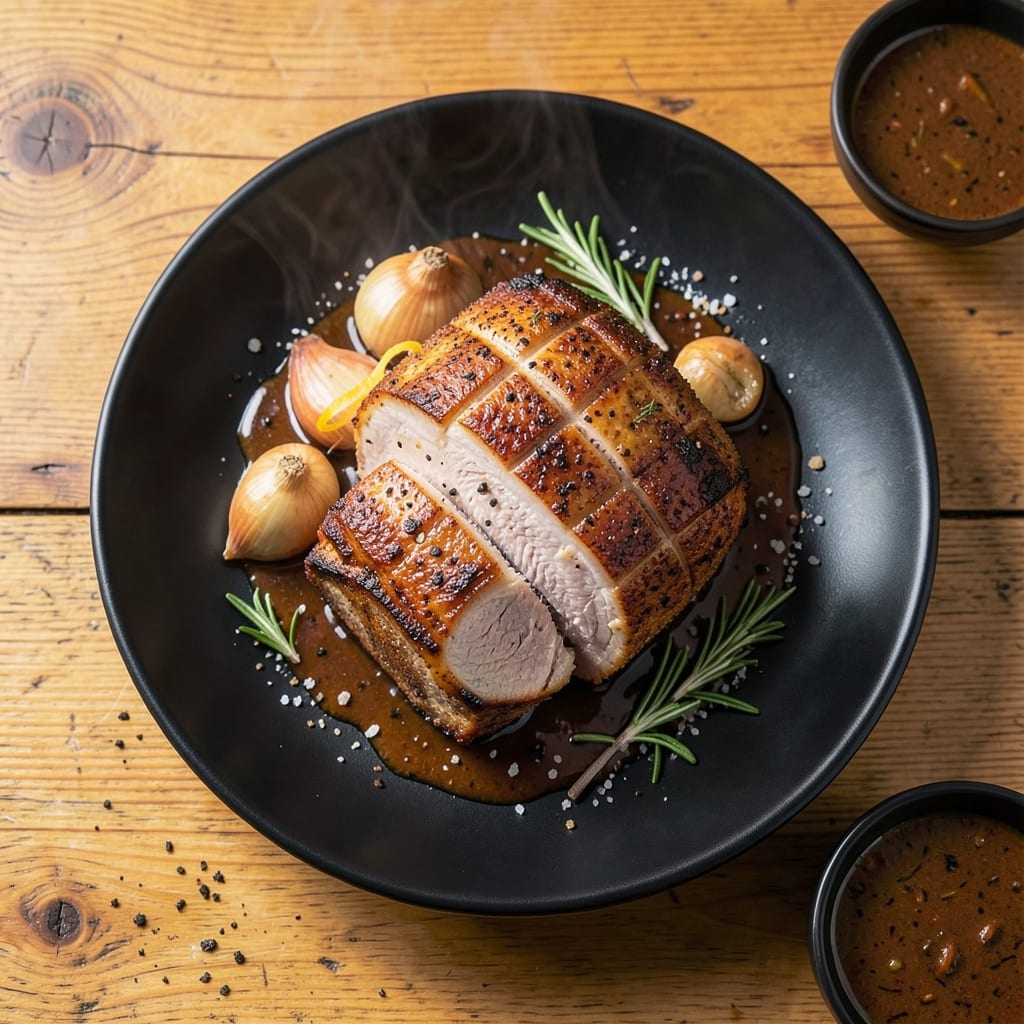
This oven-baked pork roll delivers exactly what the title promises: crispy edges and juicy centers every time. I developed this method after years of testing in my small Boston kitchen, focusing on precise temperature and timing.
The key is starting with a hot oven to render the fat quickly, then finishing lower to ensure the center stays tender. A simple seasoning blend enhances the natural pork flavor without overpowering it. The result is restaurant-quality at home.
You’ll end up with pork that’s golden and crispy outside, with savory juices locked inside. This technique works for both thin and thick cuts, making it versatile for any meal.
Serve with roasted vegetables or mashed potatoes to soak up every flavorful bite. The process is straightforward but delivers impressive results.
Ingredients for Pork Roll Recipe Oven
Simple seasonings and quality pork create this oven-baked masterpiece with crispy edges and juicy centers.
| Ingredient | Amount | Notes |
|---|---|---|
| Pork Shoulder Roll 🥩 | 2 lb | Skin-on for crispiness |
| Kosher Salt 🧂 | 1 ½ tsp | Diamond Crystal preferred |
| Black Pepper 🌶️ | 1 tsp | Freshly ground for best flavor |
| Garlic Powder 🧄 | 1 tsp | Not garlic salt |
| Onion Powder 🧅 | 1 tsp | Adds depth to seasoning |
| Smoked Paprika 🌶️ | ½ tsp | Enhances pork flavor |
| Dried Thyme 🍃 | ½ tsp | Crushed between fingers |
| Olive Oil 🫒 | 1 tbsp | Extra-virgin for richness |
| Dijon Mustard 🟡 | 1 tbsp | For crust adhesion |
| Apple Cider Vinegar 🍏 | 1 tbsp | Balances richness |
| Fresh Rosemary 🌿 | 2 tsp | Chopped, optional garnish |
| Yellow Onion 🧅 | 1 whole | Thinly sliced for base |
[recipe_ingredient_scaler]
The pork shoulder roll is non-negotiable for this recipe. Look for skin-on cuts at your butcher or Whole Foods meat counter—this is what delivers that signature crispiness. The fat cap should be at least 1/4-inch thick for proper rendering. I always ask for a center-cut piece when possible, as it cooks more evenly. Avoid pre-brined pork as it can throw off the seasoning balance you’re carefully creating.
No smoked paprika? Regular paprika plus a pinch of cayenne works in a pinch. Dried rosemary at half the amount can substitute for thyme. The Dijon mustard can be swapped for whole-grain mustard (just strain out the seeds if you prefer a smooth crust). For the vinegar, white wine vinegar offers similar acidity. The onion base is optional but recommended—it elevates the pork as it roasts.
The seasoned pork roll keeps well in the fridge for 2-3 days before cooking. Leftovers (if you have any) reheat beautifully and stay juicy for 4-5 days. For best results, slice only what you need and store the rest whole. The crispy skin softens upon refrigeration but re-crispes nicely in a hot oven.
Why You’ll Love This Recipe
- Set and Forget: I just season the pork shoulder roll, pop it in the oven, and walk away—no babysitting required.
- Crispy, Savory Crust: That combination of kosher salt, black pepper, and garlic powder creates a crust so good I catch myself sneaking bites straight from the pan.
- Feeds My Crew: One pork shoulder roll makes enough for Sunday dinner, plus leftovers for sandwiches the next day.
- Budget Stretch: Pork shoulder is always affordable, and with just a handful of pantry spices, I get a meal that feels way more expensive than it is.
Step-by-Step Instructions for Pork Roll
Master these steps for a dish with an irresistible crisp exterior and tender, flavorful interior.
Step 1: Prepare the Pork Shoulder Roll
Preheat your oven to 400°F. Pat the 2 lb Pork Shoulder Roll dry with paper towels to ensure a good sear and crispy skin. This step is crucial for achieving that golden-brown finish.
In a small bowl, combine the 1.5 tsp Kosher Salt, 1 tsp Black Pepper, 1 tsp Garlic Powder, 1 tsp Onion Powder, 0.5 tsp Smoked Paprika, and 0.5 tsp Dried Thyme. Rub this seasoning blend all over the pork, pressing it into the skin and flesh to maximize flavor penetration.
Step 2: Create the Crust and Aromatic Base
In a separate bowl, whisk together the 1 tbsp Olive Oil, 1 tbsp Dijon Mustard, and 1 tbsp Apple Cider Vinegar until smooth. Brush this mixture evenly over the seasoned pork, ensuring full coverage. The mustard and vinegar will help form a flavorful crust.
Thinly slice the 1 whole Yellow Onion and arrange the slices in a single layer on the bottom of a roasting pan. This will create a natural rack for the pork, adding subtle sweetness as it roasts.
Step 3: Roast to Crispy Perfection
Place the pork shoulder roll skin-side up on the bed of onions in the roasting pan. Roast in the preheated oven for 30 minutes to start developing the crispy exterior.
After the initial 30 minutes, reduce the oven temperature to 325°F and continue roasting for 2 to 2.5 hours, or until the internal temperature reaches 195°F. Baste the pork with its juices every 30 minutes to ensure even browning and moisture retention.
Step 4: Rest and Serve
Once the pork reaches the desired temperature, remove it from the oven and transfer it to a cutting board. Tent loosely with foil and let it rest for 15 minutes. This resting period allows the juices to redistribute, ensuring a moist and tender result.
Optional: Garnish with the 2 tsp Fresh Rosemary before serving. Carve the pork into thick slices, ensuring each piece has a portion of the crispy exterior. Serve immediately with the roasted onions and pan juices for a complete, flavorful dish.
Pro Tips For Making Pork Roll Recipe Oven
- Preheat the Oven: Start your oven at 325°F—low and slow is what turns that pork shoulder roll tender without drying it out.
- Score the Fat: Cut shallow slits into the fat cap before seasoning so the salt, pepper, garlic, and onion powder actually penetrate the meat.
- Skip the Overcrowding: Give the pork roll space on the rack—if it’s touching the pan or walls, it’ll steam instead of roast, and you’ll lose that crisp edge.
- Rest Before Slicing: After pulling it from the oven, tent it with foil and wait 15 minutes—this lets the juices redistribute so the first slice isn’t a puddle on the cutting board.
Common Mistakes When Making Great pork roll recipe oven
Skipping the Dry Pat
I learned the hard way that skipping the paper towel pat means soggy skin. Always pat the 2 lb Pork Shoulder Roll completely dry before seasoning. Even 1 tsp of moisture on the surface steams the skin instead of crisping it. Trust me, this extra 2 minutes makes all the difference. 💡
Overcrowding the Pan
Using a too-small roasting pan causes the pork to steam rather than roast. Choose a pan that gives the pork at least 2 inches of space on all sides. I use my 12×16-inch half sheet pan for perfect air circulation.
Wrong Oven Temp
Starting too low prevents proper fat rendering. Always begin at 400°F for that initial 30 minutes to jumpstart the crisping process. Reducing to 325°F afterward ensures the center cooks through without burning the exterior.
Skipping the Rest
Cutting immediately after removing from the oven sends all those beautiful juices onto your cutting board. Always rest for 15 minutes tented with foil. This gives the muscle fibers time to reabsorb the moisture, keeping each bite tender.
Neglecting to Baste
Basting every 30 minutes with pan juices prevents dry spots and builds layers of flavor. I use a silicon pastry brush for easy application. The onions in the pan also benefit from this liquid, creating a delicious base for serving.
Underestimating Cook Time
Pulling the pork too early results in tough meat. Always cook until the internal temperature hits 195°F. In my Boston kitchen with its finicky oven, this usually takes the full 2.5 hours. A meat thermometer is your best friend here.
Nutrition Facts
Frequently Asked Questions
What temperature should I use for oven-roasting?
Start at 400°F for the first 30 minutes, then reduce to 325°F for the remaining time. This high-to-low method ensures crispy skin while keeping the center juicy.
How do I know when it’s done?
Use a meat thermometer—it’s ready at 195°F internally. The meat should pull apart easily with a fork. Never guess based on color alone.
Can I use a different cut of pork?
Stick with shoulder roll for best results. Other cuts may not have enough fat for crispy skin. If substituting, choose one with a 1/4-inch fat cap minimum.
Why do I need to rest the meat?
Resting for 15 minutes lets juices redistribute. Skipping this step means dry meat and a pool of flavor on your cutting board. Always tent with foil.

Trained in classic French technique but raised on slow-cooked ribs and spicy rubs, she blends culinary skill with smoke and soul.
- Recipe for Boneless Pork Chops in Cast Iron Skillet: Sear and Baste to Juicy Perfection - October 3, 2026
- Recipe for Boneless Cross Rib Roast: Slow-Roasted Beef with Herb Crust - October 3, 2026
- Hamburgers in Sauce Recipe Crock Pot: Slow-Cooked Savory Delight - October 3, 2026