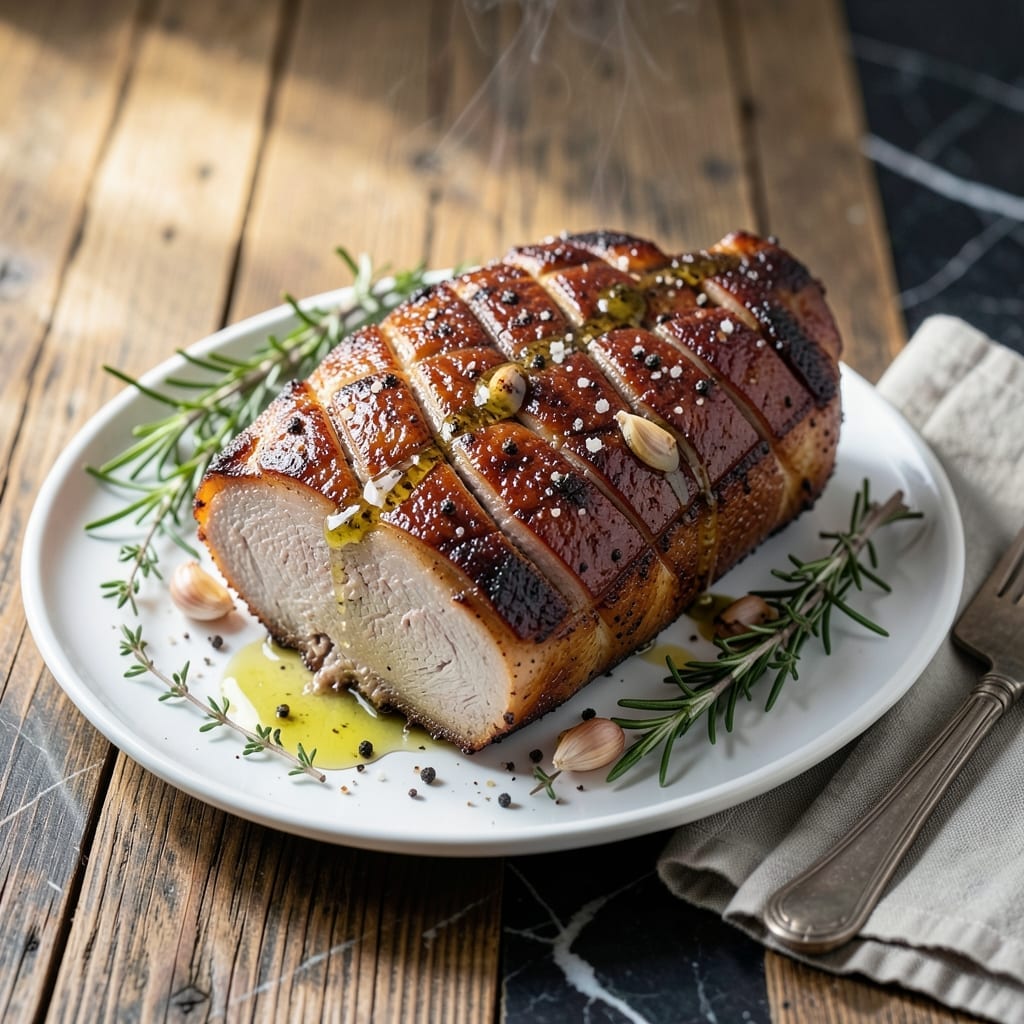
Achieving perfectly crispy pork shoulder skin at home is easier than you think with this proven technique. The secret lies in proper drying, aggressive seasoning, and a precise slow-roasting method that transforms the skin into a shattering, golden crust.
I developed this approach after years of trial and error, testing different temperatures and timing to create that ideal contrast between the crispy exterior and tender meat beneath. The key is patience—low and slow does the work while you focus on other things.
The result is pork shoulder with skin so crisp it cracks at the touch, giving way to juicy, fall-apart meat underneath. This isn’t just good—it’s the kind of dish that makes people pause mid-bite to compliment the cook.
Serve this centerpiece at gatherings or enjoy it as a weekend project. The method delivers consistent results every time, with minimal hands-on effort required.
Ingredients for Pork Shoulder Recipe Crispy Skin
Bone-in pork shoulder with skin takes center stage here. No shortcuts, just perfect crisp.
| Ingredient | Amount | Notes |
|---|---|---|
| Bone-In Pork Shoulder 🐖 | 4 lb | Skin-on, scored in diamond pattern |
| Kosher Salt 🧂 | 2 tbsp | Diamond Crystal preferred for texture |
| Black Peppercorns 🌶️ | 1 tbsp | Freshly cracked for maximum aroma |
| Garlic Cloves 🧄 | 8 cloves | Smashed into paste with salt |
| Fresh Rosemary 🌿 | 2 tbsp | Finely chopped, woody stems discarded |
| Fresh Thyme 🍃 | 2 tbsp | Leaves stripped from stems |
| Dijon Mustard 🟡 | 2 tbsp | Whole grain for texture variation |
| Apple Cider Vinegar 🍏 | 1 tbsp | For skin drying and tang |
| Olive Oil 🫒 | 2 tbsp | For initial skin rubbing |
| Brown Sugar 🟤 | 1 tsp | Light or dark, for caramelization |
| Smoked Paprika 🌶️ | 1 tsp | For depth of flavor in crust |
| Dry White Wine 🍷 | ½ cup | For braising liquid, any dry variety |
| Low-Sodium Chicken Stock 🥣 | 1 cup | For moisture during cooking |
[recipe_ingredient_scaler]
The pork shoulder needs to be bone-in with skin intact—look for picnic shoulder or Boston butt at your butcher or Whole Foods. Ask them to score the skin in a diamond pattern if they haven’t already (saves you a knife workout). I always go for 4 pounds—big enough for a crowd, not so huge it takes forever. The skin should be dry when you start, so pat it thoroughly with paper towels. Skin-on is non-negotiable for that crackling effect.
No fresh herbs? Dried at one-third the amount works, but fresh really shines here. Swap the white wine for apple cider or more stock if you’re avoiding alcohol. If you can’t find smoked paprika, regular plus a pinch of cayenne gets you close. The Dijon mustard is key for that golden crust—don’t skip it. Brown sugar can be subbed with honey (though it’s not traditional).
This keeps beautifully—leftovers taste even better after 2 days in the fridge. Freeze portions for up to 3 months (the skin loses crispness but the meat stays juicy). Reheat gently in the oven with a splash of water to prevent drying out. The fat solidifies when cold, so skim it off before reheating.
Why You’ll Love This Recipe
- Set and Forget: I just rub the pork shoulder with salt, pepper, garlic, and rosemary, then let the oven do the work. Honestly, it’s my kind of hands-off cooking.
- Crispy, Herby Bite: That crackling skin with the aroma of garlic and rosemary? It’s the reason I make this every Sunday.
- Feeds the Whole Crew: One bone-in pork shoulder serves my family of five with leftovers for sandwiches. Between us, it’s a weekend lifesaver.
- Pennywise Protein: I get a rich, flavorful meal without breaking the bank. And that crispy skin? Pure satisfaction.
Step-by-Step Instructions for Pork Shoulder with Crispy Skin
This method guarantees crackling skin and fall-apart tender meat—no shortcuts here.
Step 1: Score and Dry the Skin
Pat the 4 lb bone-in pork shoulder completely dry with paper towels, focusing on the skin surface. Using a sharp knife, score the skin in a diamond pattern, cutting through the skin and fat but not into the meat. This allows fat to render out and creates more surface area for crisping.
Rub the skin with the 1 tbsp apple cider vinegar and 2 tbsp kosher salt. The vinegar helps dry the skin further while the salt begins the seasoning process. Place the pork uncovered in the refrigerator for 12-24 hours to dry the skin thoroughly—this is non-negotiable for achieving that perfect crackle.
Step 2: Create the Aromatic Paste
In a mortar and pestle, combine the 8 cloves garlic cloves, 1 tbsp black peppercorns, 2 tbsp fresh rosemary, and 2 tbsp fresh thyme. Crush into a coarse paste. This releases the essential oils and ensures the flavors penetrate deeply into the meat.
Add the 2 tbsp Dijon mustard, 2 tbsp olive oil, 1 tsp brown sugar, and 1 tsp smoked paprika to the paste and mix well. Rub this mixture all over the pork, including the scored skin and the meaty sides. The mustard helps the paste adhere while the sugar and paprika will contribute to a beautifully caramelized crust.
Step 3: Slow-Roast for Tender Meat
Preheat your oven to 300°F. Place the pork skin-side up on a wire rack set in a roasting pan. Pour the 0.5 cup dry white wine and 1 cup low-sodium chicken stock into the bottom of the pan—this creates a moist environment that prevents the meat from drying out during the long cook.
Roast for 4-5 hours, basting the meat (not the skin) with the pan liquids every hour. You want the internal temperature to reach 195-200°F for that perfect pull-apart tenderness. The skin should start to puff and crisp toward the end of cooking.
Step 4: Finish with High Heat for Crackling Skin
Once the meat is tender, increase the oven temperature to 425°F. Move the pork to the upper third of the oven to expose it to more direct heat. Roast for an additional 20-30 minutes until the skin is deeply browned, blistered, and audibly crackling.
Watch it closely during this phase—the difference between perfectly crispy and burnt can be mere minutes. The skin should be so crisp it shatters when you press it with a spoon. Remove from the oven and let it rest for 20 minutes before carving to allow the juices to redistribute.
Pro Tips For Making Pork Shoulder Recipe Crispy Skin
- Dry the Skin: Pat the pork shoulder skin completely dry with paper towels before seasoning—any moisture will steam the skin instead of crisping it.
- Score Deeply: Use a sharp knife to cut 1/4-inch slits in a crosshatch pattern through the skin and fat cap, which helps the salt penetrate and the skin render crispy.
- Start Hot: Roast at 425°F for the first 45 minutes to jumpstart the Maillard reaction, then lower to 325°F to finish cooking without burning.
- Salt Overnight: Rub the skin with kosher salt at least 12 hours ahead—this draws out moisture and seasons deep into the meat for maximum flavor and crunch.
Storing and Reheating pork shoulder recipe crispy skin
Refrigerator Storage
Let your pork shoulder cool slightly, then wrap it tightly in aluminum foil or place in an airtight container. Store in the fridge at 40°F or below for up to 4 days. The flavors deepen overnight, making leftovers even more delicious. ❄️
Freezer Storage
For longer storage, wrap portions in heavy-duty freezer bags with excess air removed. Freeze for up to 3 months—the meat stays tender, though the skin will soften. Label with the date to track freshness.
Oven Reheating
Preheat oven to 325°F. Place pork in a baking dish, add ¼ cup chicken stock, and cover loosely with foil. Heat for 20-25 minutes until warmed through, then uncover to crisp the skin under the broiler for 2-3 minutes. 🔥
Microwave Method
For quick reheating, place a portion on a microwave-safe plate with a damp paper towel. Heat on 50% power in 1-minute intervals, flipping halfway. This prevents drying out while warming evenly.
Skin Revival Tip
To restore crispiness, transfer reheated portions to a skillet over medium-high heat for 1-2 minutes per side. The direct contact revives the crackle beautifully. I always do this for leftovers.
Nutrition Facts
Frequently Asked Questions
Why do I need to dry the skin overnight?
Drying removes moisture, the enemy of crispiness. 12-24 hours in the fridge lets the skin dehydrate fully for that perfect crackle. Skip this and you’ll get chewy skin instead.
Can I use a boneless cut instead?
Bone-in is best for flavor and moisture, but boneless works if you adjust cooking time. Reduce slow-roasting to 3-4 hours at 300°F since it cooks faster without the bone.
How do I prevent the skin from burning?
Watch closely during the final 20-30 minutes at 425°F. If it darkens too quickly, tent loosely with foil. The skin should blister and bubble, not char.
What if my skin isn’t crispy after cooking?
Return it to the oven at 425°F for 10-15 minutes, or use the broiler for 3-5 minutes. Direct heat is key for that final crisp.

Trained in classic French technique but raised on slow-cooked ribs and spicy rubs, she blends culinary skill with smoke and soul.
- Recipe for Boneless Pork Chops in Cast Iron Skillet: Sear and Baste to Juicy Perfection - October 3, 2026
- Recipe for Boneless Cross Rib Roast: Slow-Roasted Beef with Herb Crust - October 3, 2026
- Hamburgers in Sauce Recipe Crock Pot: Slow-Cooked Savory Delight - October 3, 2026