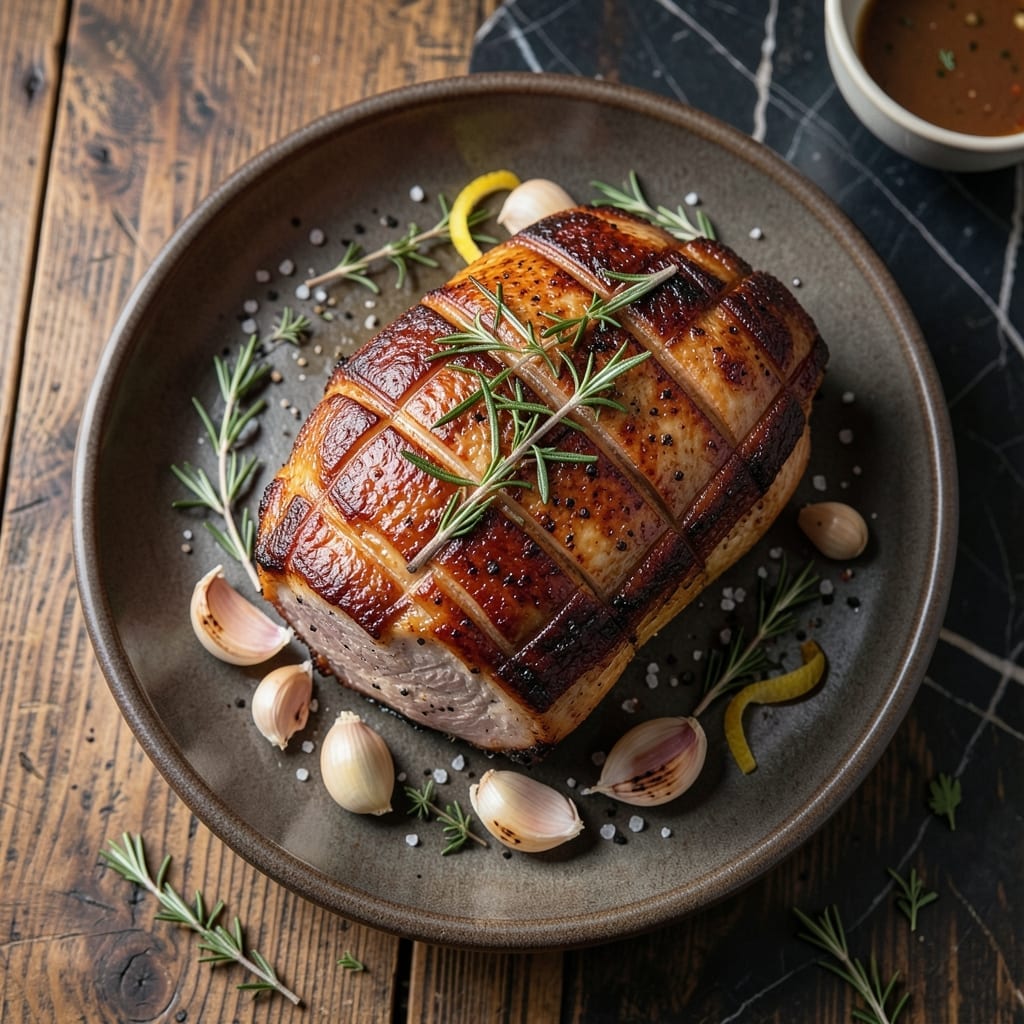
Growing up in Georgia, I learned that a perfect pork shoulder begins with patience and ends with crispy skin that shatters at the touch. This method delivers both every time.
The secret lies in slow-roasting at low heat first, allowing the fat to render gradually. Then a final blast of high heat transforms the skin into a golden, crackling crown.
You’ll achieve fall-apart tenderness inside with a crispy, caramelized exterior that’s the hallmark of great pork. The skin becomes so perfectly textured it’s worth the wait.
This technique works for any occasion, from Sunday suppers to holiday feasts. The results speak for themselves.
Ingredients for Pork Shoulder Roast Recipe Crispy Skin
Slow-roasted pork with crispy skin starts with these quality ingredients for perfect results every time.
| Ingredient | Amount | Notes |
|---|---|---|
| Pork Shoulder 🥩 | 4 lb | Bone-in, skin-on preferred |
| Kosher Salt 🧂 | 2 tbsp | Diamond Crystal preferred for even seasoning |
| Black Pepper 🌶️ | 1 tbsp | Freshly ground coarse |
| Garlic Cloves 🧄 | 6 cloves | Peeled, smashed for maximum flavor |
| Fresh Rosemary Sprigs 🌿 | 4 pieces | Woodsy stems removed |
| Fresh Thyme Sprigs 🍃 | 4 pieces | Stems intact for easy removal |
| Dijon Mustard 🟡 | ¼ cup | For skin crisping enhancement |
| Olive Oil 🫒 | 2 tbsp | Extra-virgin for richness |
| Apple Cider Vinegar 🍏 | 1 tbsp | For acid balance in skin |
| Brown Sugar 🟤 | 2 tbsp | Light or dark variety |
| Onion 🧅 | 1 whole | Yellow or white, quartered |
| Carrots 🥕 | 3 whole | Peeled, cut into chunks |
| Celery Stalks 🥬 | 3 pieces | Cut into large pieces |
[recipe_ingredient_scaler]
The pork shoulder is the foundation—opt for bone-in, skin-on for maximum flavor and texture. Whole Foods or Costco typically carry high-quality cuts with good marbling. For the salt, Diamond Crystal kosher salt is the professional choice; its coarse grains adhere better to the meat. Fresh herbs like rosemary and thyme should have vibrant color and aroma (avoid wilted bunches). The skin must be dry before seasoning—pat it thoroughly for optimal crisping.
No fresh herbs on hand? Dried rosemary and thyme at half the amount will work, though fresh delivers superior brightness. Out of Dijon? Whole-grain mustard adds texture and depth as a substitute. For the vinegar, white wine vinegar can replace apple cider in a pinch. The sugar helps caramelize the skin—honey or maple syrup offers a natural alternative if avoiding refined sugar.
Store pork shoulder in the fridge for up to 2 days before cooking, or freeze for 6 months. Fresh herbs keep wrapped in damp paper towels for about 1 week. Once cooked, the pork reheats beautifully—shred or slice and crisp the skin again under the broiler before serving.
Why You’ll Love This Recipe
- Set It and Forget: I rub the pork with salt, pepper, garlic, and rosemary, pop it in the oven, and let the magic happen—no babysitting required.
- Crispy, Herby Crust: That crackling skin, infused with garlic and fresh rosemary, is the kind of flavor that makes you close your eyes with every bite.
- Feeds a Crowd: This roast is my go-to for Sunday dinners or when the whole family’s coming over—always a hit, always enough.
- Leftovers for Days: Honestly, the pulled pork sandwiches or tacos I make with the leftovers might be even better than the first meal.
Step-by-Step Instructions for Pork Shoulder Roast Crispy Skin
Achieve restaurant-quality results with this method that guarantees tender meat and crackling skin.
Step 1: Score and Dry the Skin Thoroughly
Pat the 4 lb Pork Shoulder completely dry with paper towels, paying special attention to the skin. I use a sharp knife to score the skin in a crosshatch pattern, cutting through the fat but not into the meat—this allows the fat to render out and the skin to crisp evenly.
This step is non-negotiable for crispy skin. Any moisture left on the surface will steam the skin instead of allowing it to crisp. I let the pork sit uncovered in the refrigerator for 1 hour after scoring to ensure the skin is bone-dry before seasoning.
Step 2: Apply the Flavor-Packed Rub
In a small bowl, combine the 2 tbsp Kosher Salt, 1 tbsp Black Pepper, 0.25 cup Dijon Mustard, 2 tbsp Olive Oil, 1 tbsp Apple Cider Vinegar, and 2 tbsp Brown Sugar. The mustard and vinegar work together to break down proteins while creating a sticky surface that promotes browning.
Rub this mixture all over the pork, making sure to work it into the scored skin and every crevice. I press the 6 cloves Garlic Cloves into the slits and tuck the 4 pieces Fresh Rosemary Sprigs and 4 pieces Fresh Thyme Sprigs under the skin where they’ll infuse the meat with aroma as it roasts.
Step 3: Arrange the Aromatic Bed and Start Roasting
Preheat your oven to 325°F. Place the 1 whole Onion, 3 whole Carrots, and 3 pieces Celery Stalks in the bottom of a roasting pan. These vegetables will create a natural rack, elevate the pork, and add moisture to the oven environment during the initial phase.
Set the pork skin-side up on the vegetable bed. The elevated position allows air to circulate around the entire roast, promoting even cooking and preventing the bottom from steaming. Roast uncovered for 2.5 hours, basting with pan juices every 45 minutes.
Step 4: Finish with High Heat for Perfect Crisp
After the initial roasting period, increase the oven temperature to 425°F. This final blast of heat is what transforms the skin from chewy to crackling. Roast for an additional 30-45 minutes, watching closely as the skin can go from golden to burnt quickly.
You’ll know it’s ready when the skin is deep amber and crackles audibly when pressed with tongs. The internal temperature should read 195-200°F in the thickest part of the meat, ensuring it’s fall-apart tender. Remove from the oven and let rest for 20 minutes before carving to allow the juices to redistribute.
Pro Tips For Making Pork Shoulder Roast Recipe Crispy Skin
- Score the Skin: Use a sharp knife to cut 1/4-inch slits across the fat cap in a crosshatch pattern—this lets the salt and heat penetrate for maximum crispiness.
- Dry it Thoroughly: Pat the pork shoulder completely dry with paper towels before seasoning; moisture is the enemy of crispy skin.
- Start Hot, Finish Low: Roast at 450°F for the first 30 minutes to render fat and set the crust, then drop to 325°F until tender.
- Salt Overnight: Rub the skin with kosher salt 12-24 hours ahead and leave it uncovered in the fridge—this draws out moisture and creates that crackling texture.
Storing and Reheating This Dish
Refrigerator Storage
Let your roast cool for no more than 2 hours before refrigerating. I store mine in the cooking juices in a glass dish with a tight lid. This keeps the meat moist for up to 4 days at 40°F or below. ❄️
Freezer Storage
For longer storage, wrap portions in heavy-duty aluminum foil then place in freezer bags. Squeeze out all air to prevent freezer burn. The pork maintains quality for up to 3 months at 0°F.
Reheating Whole
Preheat oven to 325°F. Place the pork in a baking dish, add ¼ cup water, cover with foil. Reheat for 20-30 minutes until internal temp hits 165°F. 🔥
Reheating Shredded
Spread shredded pork in a skillet with 2 tbsp cooking juices. Heat over medium-low for 5-7 minutes, stirring occasionally. Add a splash of water if it looks dry.
Crisping the Skin
To revive crispy skin, place the pork skin-side up on a wire rack. Broil on high for 3-5 minutes until crackling. Watch closely—it can burn quickly. This works for whole or sliced portions.
Meal Prep Tip
I portion the pork into 1 lb containers before freezing. This makes it easy to pull out exactly what I need. Thaw overnight in the fridge before reheating using any method above.
Nutrition Facts
Frequently Asked Questions
Why score the skin before roasting?
Scoring helps render fat and allows heat to penetrate evenly for crispy results. It also lets seasonings penetrate deeper. Without scoring, skin often stays chewy instead of crisp.
Can I use a boneless cut instead?
Boneless works but won’t hold shape as well during roasting. Bone-in adds flavor and helps maintain moisture. For boneless, reduce cooking time by 20-30 minutes.
How do I prevent the skin from burning during the final crisp?
Watch closely during the last 30-45 minutes at 425°F. Tent with foil if it browns too quickly. The skin should be deep amber, not black.
What if my skin isn’t crispy after roasting?
Broil for 3-5 minutes or return to 425°F oven until crackling. Ensure skin was completely dry before seasoning for best results.

Trained in classic French technique but raised on slow-cooked ribs and spicy rubs, she blends culinary skill with smoke and soul.
- Recipe for Boneless Pork Chops in Cast Iron Skillet: Sear and Baste to Juicy Perfection - October 3, 2026
- Recipe for Boneless Cross Rib Roast: Slow-Roasted Beef with Herb Crust - October 3, 2026
- Hamburgers in Sauce Recipe Crock Pot: Slow-Cooked Savory Delight - October 3, 2026