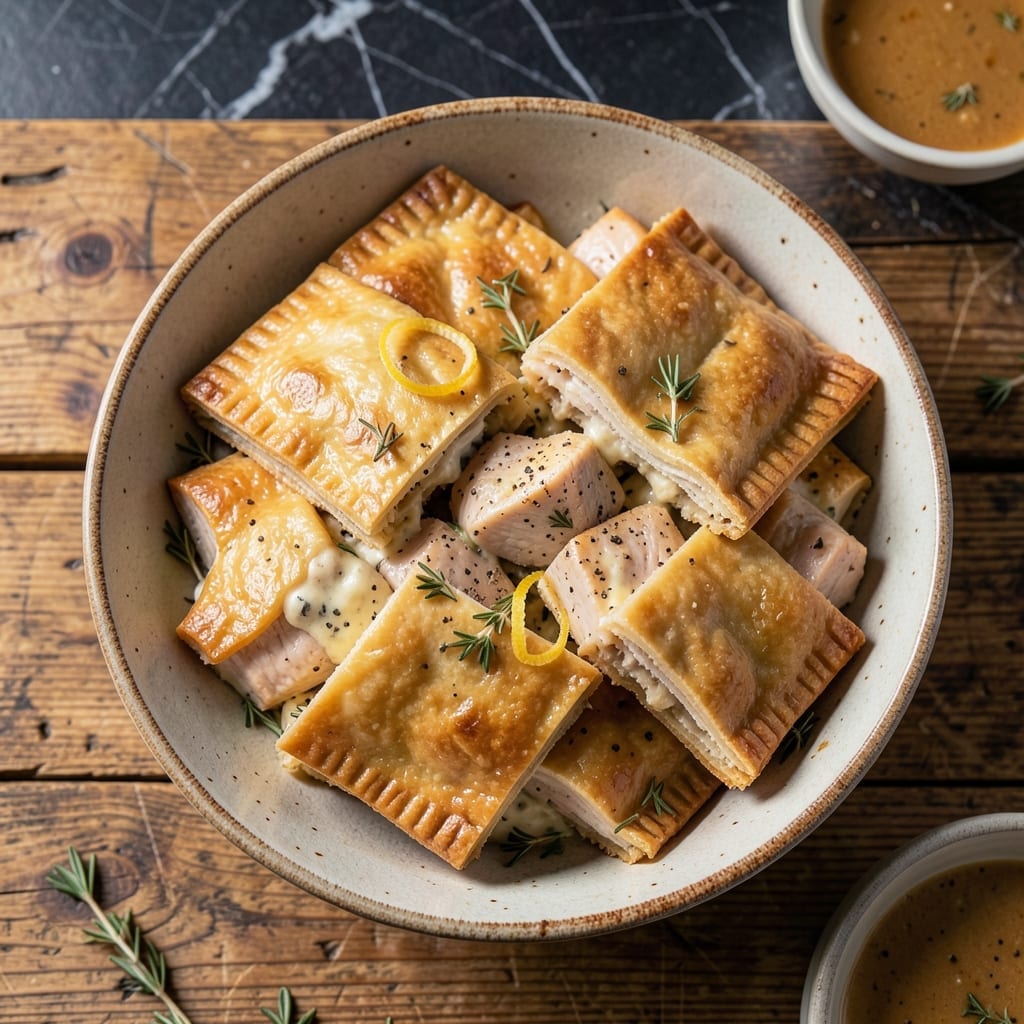
Comfort food reaches new heights with these handheld pot pie squares, where flaky layers meet hearty filling in every bite. I developed this recipe after years of testing pie crusts, finally landing on a method that guarantees perfect layers without the fuss.
The secret lies in cold ingredients and minimal handling. This approach creates flaky dough that holds its shape while baking, encasing the filling in a golden, crisp exterior. Each square delivers the comfort of traditional pot pie in convenient, portable form.
What emerges from the oven is a golden-brown crust with visible layers, giving way to a rich, savory filling. The contrast between the crisp pastry and tender center makes these squares irresistible. Serve warm for the full experience.
Perfect for gatherings or meal prep, these squares hold their structure well and reheat beautifully. The process is straightforward, with results that taste anything but simple.
Ingredients for Pot Pie Dough Squares
Flaky crust and hearty filling come together in these portable, comforting squares with minimal effort.
| Ingredient | Amount | Notes |
|---|---|---|
| All-Purpose Flour 🌾 | 2 ½ cups | Sifted for even texture |
| Unsalted Butter 🧈 | 1 cup | Cold, cubed for flakiness |
| Ice Water 💧 | ½ cup | Plus extra as needed |
| Salt 🧂 | 1 tsp | Fine sea salt preferred |
| Granulated Sugar 🍚 | 1 tsp | Optional, for slight sweetness |
| Chicken Breast 🍗 | 1 lb | Boneless, skinless, diced |
| Carrots 🥕 | 2 whole | Peeled and finely diced |
| Celery Stalks 🌿 | 2 whole | Finely diced for texture |
| Yellow Onion 🧅 | 1 whole | Finely chopped for base |
| Garlic Cloves 🧄 | 2 cloves | Minced for depth |
| Chicken Broth 🍲 | 1 ½ cups | Low-sodium preferred |
| Heavy Cream 🥛 | ½ cup | For rich filling consistency |
| Frozen Peas 🌱 | ¾ cup | No need to thaw |
| Fresh Thyme 🌿 | 1 tbsp | Chopped, or 1 tsp dried |
| Black Pepper 🌶️ | ½ tsp | Freshly ground preferred |
[recipe_ingredient_scaler]
The butter must stay cold—European-style from Whole Foods or a good store brand works. Use all-purpose flour with a moderate protein content (around 10-11%) for the right texture. If you can find King Arthur Flour, it’s my go-to for reliable results. The dough should come together just until it holds, not a second longer. Overworking it means tough, not flaky, layers.
No chicken? Turkey or even mushrooms work well as a swap. Low-sodium broth keeps the filling from getting too salty. Fresh thyme is bright and aromatic, but dried at one-third the amount is fine in a pinch. Heavy cream can be half-and-half if that’s what’s on hand—just expect a slightly less rich finish. Frozen peas can be swapped for corn or green beans.
The dough can rest in the fridge for up to 2 days or freeze for 1 month. Baked squares keep 3-4 days in the fridge and reheat like a dream. Always let the filling cool completely before assembling to avoid a soggy crust.
Why You’ll Love This Recipe
- No-Fuss Dough: I just mix flour, cold butter, and ice water—no fancy techniques, and it comes together in minutes.
- Buttery Bliss: The unsalted butter makes every bite rich and flaky, with just a hint of sugar for warmth.
- Freezer Friendly: I roll out a double batch, bake half, and freeze the rest for last-minute dinners.
- Pocket-Sized Comfort: These squares are perfect for lunchboxes, picnics, or a quick snack—no forks required.
Step-by-Step Instructions for Pot Pie Dough Squares
This method ensures flaky layers and handheld comfort with every bite.
Step 1: Prepare the Flaky Dough
In a large bowl, whisk together the 2.5 cups All-Purpose Flour, 1 tsp Salt, and 1 tsp Granulated Sugar. The sugar adds a subtle sweetness that balances the savory filling. Cut in the 1 cup Unsalted Butter (cold and cubed) using a pastry cutter or your fingers until the mixture resembles coarse crumbs with pea-sized butter pieces visible.
Gradually add the 0.5 cup Ice Water, one tablespoon at a time, mixing gently with a fork until the dough just comes together. Don’t overwork it—visible butter streaks are what create those coveted flaky layers. If the dough feels too dry, add ice water by the teaspoon until it holds when pressed.
Step 2: Chill and Roll the Dough
Divide the dough into two equal portions, flatten into discs, and wrap in plastic. Chill for 1 hour or until firm. This resting period allows the gluten to relax and the butter to solidify, preventing tough dough and ensuring maximum flakiness.
On a lightly floured surface, roll one disc into a 12-inch square about ⅛-inch thick. Use a ruler for precision—this ensures even baking. Trim the edges for a clean look, then cut into 3-inch squares. Repeat with the second disc. Place the squares on a parchment-lined baking sheet and chill while preparing the filling.
Step 3: Sauté the Aromatic Base
In a large skillet over medium heat, melt 2 tablespoons of the reserved butter from the dough. Add the diced 1 lb Chicken Breast, 2 whole Carrots, 2 whole Celery Stalks, and 1 whole Yellow Onion. Cook for 5-6 minutes until the chicken is no longer pink and the vegetables soften.
Stir in the 2 cloves Garlic Cloves, 1 tbsp Fresh Thyme, and 0.5 tsp Black Pepper, cooking for 1 minute until fragrant. Sprinkle 2 tablespoons of the 2.5 cups All-Purpose Flour over the mixture and stir to coat, creating a roux that will thicken the filling beautifully.
Step 4: Build and Bake the Hand Pies
Pour in the 1.5 cups Chicken Broth and 0.5 cup Heavy Cream, stirring constantly until the mixture thickens to a gravy-like consistency, about 3-4 minutes. Remove from heat and stir in the 0.75 cup Frozen Peas. Let the filling cool slightly—it should be thick enough to hold its shape when spooned.
Place a heaping tablespoon of filling in the center of half the dough squares. Top each with another square, pressing the edges with a fork to seal. Brush the tops with a bit of milk or beaten egg for a golden finish. Bake at 375°F for 25-30 minutes until the crust is golden brown and the filling is bubbling.
Pro Tips For Making Pot Pie Dough Squares
- Chill the Butter: Freeze your unsalted butter for 15 minutes before cutting it into the flour—cold butter is non-negotiable for flaky layers. I learned this the hard way after ending up with dense, sad squares.
- Measure Water Precisely: Use exactly 3-4 tablespoons of ice water per cup of flour, adding a little at a time. Too much water makes the dough tough, and nobody wants chewy pot pie crust.
- Skip Overworking: Stop mixing as soon as the dough comes together, even if it looks shaggy. Overworking develops gluten, and your squares will turn out as hard as hockey pucks.
- Rest the Dough: Give the dough a solid 30 minutes in the fridge before rolling—it relaxes the gluten and makes it easier to handle. I skip this when I’m in a rush, but the texture suffers every time.
Troubleshooting Perfect Results
Dough Too Tough
If your dough feels elastic or hard to roll, you’ve likely overworked it. Stop mixing as soon as the dough holds together—visible butter streaks are perfect. I often remind my test cooks that 30 seconds of gentle mixing is usually enough. Let it rest 1 hour in the fridge to relax the gluten. 💡
Soggy Bottoms
This usually happens when the filling isn’t cooled completely before assembly. Always let your filling sit for 15-20 minutes at room temperature. Another trick: brush the bottom dough squares with a thin layer of beaten egg white before adding filling—it creates a moisture barrier.
Filling Leaking
Overfilling is the main culprit. Use exactly 1 heaping tablespoon per square. Press the edges firmly with a fork to create a tight seal. I also chill the assembled squares for 15 minutes before baking to help them hold their shape. 🔥
Crust Not Browning
Your oven might be running cool. Always preheat for 20 minutes and use an oven thermometer to verify 375°F. For extra color, brush the tops with milk or beaten egg before baking. If needed, broil for 1-2 minutes at the end, watching closely.
Dry Dough
Add ice water 1 teaspoon at a time until the dough just holds together when pressed. In dry climates, you might need up to 2 extra tablespoons. Remember, the dough should look shaggy, not smooth. The butter will melt during baking, creating steam for flaky layers.
Uneven Layers
Roll the dough to an even ⅛-inch thickness using a ruler for precision. Rotate the dough 90 degrees between rolls to prevent sticking. If layers still seem flat, your butter might have been too warm—ensure it stays ice cold until baking. ✨
Nutrition Facts
Frequently Asked Questions
Can I use store-bought pie crust?
Yes, but the texture will differ. Store-bought crusts work in a pinch, but they lack the flaky layers of homemade. Roll them to ⅛-inch thickness for even baking.
How do I prevent the filling from drying out?
Don’t overcook the chicken in the filling step. Keep it to 5-6 minutes on medium heat. The cream and broth will keep it moist during baking.
Can I make these ahead of time?
Assemble the squares and refrigerate for up to 12 hours before baking. For longer storage, freeze unbaked squares for up to 1 month. Bake from frozen, adding 5-10 minutes to the time.
Why did my dough shrink while baking?
This happens if the dough wasn’t chilled long enough. Rest it for 1 hour before rolling and again after cutting into squares. This relaxes the gluten and prevents shrinking.

Trained in classic French technique but raised on slow-cooked ribs and spicy rubs, she blends culinary skill with smoke and soul.
- Recipe for Boneless Pork Chops in Cast Iron Skillet: Sear and Baste to Juicy Perfection - October 3, 2026
- Recipe for Boneless Cross Rib Roast: Slow-Roasted Beef with Herb Crust - October 3, 2026
- Hamburgers in Sauce Recipe Crock Pot: Slow-Cooked Savory Delight - October 3, 2026