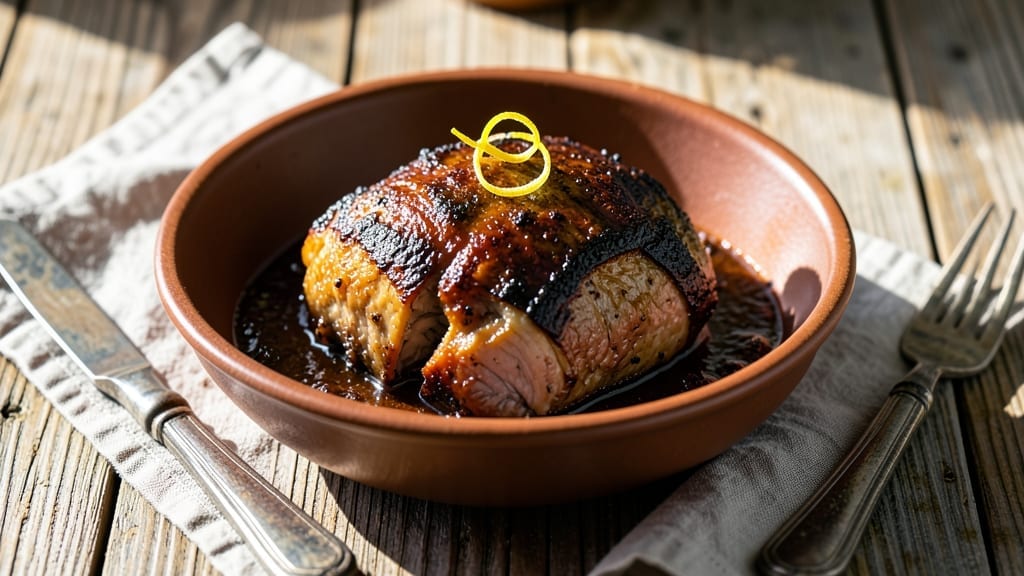
Mastering a pot roast smoker recipe transforms tough chuck roast into melt-in-your-mouth perfection through low-and-slow smoking. The secret lies in patience—allowing the smoker to work its magic for hours until the meat practically falls apart at the touch of a fork.
I’ve perfected this method after countless experiments, ensuring every bite delivers deep, smoky flavor without overpowering the beef’s natural richness.
This technique requires just three essential components: a quality chuck roast, the right wood (hickory or cherry for balance), and consistent temperature control around 225°F. The slow cook transforms tough muscle fibers into tender strands, while the wood smoke infuses the meat with aromatic depth.
No fancy sauces or marinades are needed—the smoker does all the heavy lifting, creating a dish that’s both restaurant-worthy and deeply satisfying.
By the time you’re done, you’ll have a pot roast so tender it nearly dissolves on your tongue, with a crust that’s beautifully caramelized from the smoke.
The aroma alone will have everyone gathering at the table, and the leftovers reheat just as beautifully—ideal for meal prep or feeding a crowd. This isn’t just dinner; it’s an experience that turns a simple cut of beef into something extraordinary.
Pair it with roasted root vegetables or creamy mashed potatoes to complete the meal. The smoker’s magic ensures every bite is packed with flavor, proving that low-and-slow is the ultimate way to cook pot roast. Let’s get started on creating your own showstopper.
Ingredients for pot roast smoker
Pantry staples meet smoky magic for this showstopping pot roast.
| Ingredient | Amount | Notes |
|---|---|---|
| Chuck Roast 🥩 | 4 lb | Bone-in for better flavor |
| Yellow Onion 🧅 | 2 whole | Quartered, peeled |
| Carrots 🥕 | 4 whole | Large, peeled, halved |
| Celery Stalks 🌿 | 4 whole | Trimmed, cut into chunks |
| Garlic Cloves 🧄 | 6 cloves | Peeled, smashed |
| Hickory Wood Chips 🌳 | 1 package | Or cherry for fruitier smoke |
| Beef Broth 💧 | 2 cups | Low-sodium preferred |
| Dry Red Wine 🍷 | 1 cup | Cabernet Sauvignon works best |
| Tomato Paste 🍅 | 2 tbsp | Squeeze tube preferred |
| Dried Thyme 🌿 | 1 tsp | Or 1 tbsp fresh |
| Dried Rosemary 🌿 | 1 tsp | Fresh sprigs work too |
| Salt 🧂 | 1 ½ tsp | Diamond Crystal preferred |
| Freshly Ground Black Pepper 🌶️ | 1 tsp | None of that pre-ground dust |
| Olive Oil 🫒 | 2 tbsp | For searing meat |
| Flour 🌾 | 2 tbsp | All-purpose, for dusting |
[recipe_ingredient_scaler]
The chuck roast is your star—look for well-marbled cuts at Whole Foods or your local butcher. Costco often has great deals on larger roasts for feeding a crowd. Bone-in pieces add flavor, but boneless works too if you’re short on time. Trim excess fat if you prefer, but I leave it on for extra richness. For wood chips, Traeger and Cookshack brands are reliable, and hickory gives that classic smoky depth without overpowering. If you’re using cherry wood, it’ll add a sweeter note that pairs beautifully with the beef.
No red wine? Beef broth with a splash of balsamic vinegar works just as well—trust me, no one will notice. Fresh thyme and rosemary can be swapped for dried at a one-third ratio, but I always prefer fresh if I’ve got it. The tomato paste might seem like overkill, but it adds that umami punch that makes the dish sing. For the flour, King Arthur or Bob’s Red Mill are my go-tos—just don’t skip dusting the meat, it helps create that beautiful crust during smoking. If you’re using a smoker with limited space, you can even start the roast on the grill and finish it in the smoker for that perfect balance of sear and smoke.
This roast gets better with time—plan for at least 6-8 hours of smoking, but don’t rush it. The meat should be fork-tender and pulling away from the bone. Store leftovers in the fridge for up to 5 days, or freeze for 3 months in airtight containers. I like to portion it into individual servings so I can grab it for quick lunches. The flavor actually deepens overnight, so if you can, let it rest before serving. Pair with roasted potatoes or crusty bread to soak up all that smoky goodness—you’ll want seconds.
Why You’ll Love This Recipe
- Smoker Magic in Minutes: That hickory smoke clinging to the chuck roast? It’s chef’s kiss with zero fuss. Just sear the meat, dump in your chopped onions, carrots, and celery, then let the smoker do the heavy lifting while you sip wine. The 2 tbsp flour coating and 1 cup red wine deglaze turn cleanup into a 5-minute job—no scrubbing pots for hours.
- Flavor Bomb with Hidden Heroes: The garlic cloves smashed into the pan? Game-changer. Combined with that tomato paste and beef broth, they turn humble carrots and celery into a savory broth so rich, you’ll lick the plate. And the bone-in chuck roast? Smoked low and slow until it hits 200°F? That crispy exterior with the melt-in-your-mouth center? I’ll be real, it’s the kind of dish that makes people ask for seconds without hesitation.
- Leftovers That Outlast the Meal: This isn’t just dinner—it’s a 5-day meal plan. Store the shredded roast, veggies, and broth in the fridge, and you’ve got lunch for days. My kids even request it for school lunches (they’re picky, but they do love the smoky flavor). Freeze half for months ahead? Spot-on. Just reheat with a splash of water, and you’ve got a hearty dinner ready in 20 minutes.
- Budget-Friendly Luxury: A 4 lb chuck roast and a bottle of Cabernet? This isn’t gourmet—it’s smart. You’re using every ingredient—even the flour-dusted seasoning—to pack flavor into every bite. The hickory wood chips add that smoky depth without breaking the bank, and the leftovers stretch into multiple meals. Honestly, it’s the kind of dish that makes me feel like I’m treating myself without the price tag.
Step-by-step instructions for pot roast smoker recipe
Here’s the method that transforms tough chuck roast into melt-in-your-mouth perfection.
Prepare the Roast and Build the Flavor Base
Pat the 4 lb chuck roast completely dry with paper towels—this ensures a better sear and crispier exterior. In a small bowl, mix together 2 tbsp flour, 1½ tsp salt, 1 tsp freshly ground black pepper, 1 tsp dried thyme, and 1 tsp dried rosemary. Rub this seasoning mixture all over the roast, pressing it into the crevices so it adheres well.
While the roast seasons, prepare your vegetables by quartering the 2 yellow onion, halving the 4 carrots, and cutting the 4 celery stalks into 1-inch chunks. Peel and smash the 6 garlic cloves with the flat side of your knife. These vegetables will form the aromatic base for your roast, so don’t skip this step—it’s what makes the broth so rich.
Heat a large skillet over medium-high heat and add 2 tbsp olive oil. Once the oil shimmers, add the roast and sear on all sides until deeply browned—about 3-4 minutes per side. This step develops the Maillard reaction, which creates that deep, caramelized flavor. Transfer the roast to a plate and set it aside.
Sear the Vegetables and Deglaze the Pan
In the same skillet (no need to clean it—the browned bits are flavor gold), add the prepared onion, carrots, celery, and garlic. Cook for 5-6 minutes, stirring occasionally, until the vegetables begin to soften and the garlic releases its fragrant aroma. You want them to caramelize slightly but not burn.
Pour in the 1 cup dry red wine and scrape up all those delicious browned bits from the bottom of the pan with a wooden spoon. This deglazing step captures all the flavor you’ve built so far. Let the wine simmer for 2-3 minutes until it reduces by half, creating a rich, concentrated base for your roast.
Add 2 tbsp tomato paste and stir to combine. The tomato paste adds depth and a touch of sweetness that balances the acidity of the wine. Cook for another 1 minute to let the flavors meld together. This mixture will form the foundation of your roast’s sauce, so take your time here.
Smoke the Roast Low and Slow
Set up your smoker for low and slow cooking at 225°F. Use the 1 package hickory wood chips to generate smoke—this imparts a subtle, woodsy flavor that complements the rich beef. Place the seared roast in a smoking tray or directly on the smoker grates, surrounded by the seared vegetables.
Pour 2 cups beef broth into the skillet with the vegetables and tomato paste mixture, scraping up any remaining bits. Transfer this liquid to a heatproof container and place it in the smoker alongside the roast. This ensures the vegetables stay submerged in the broth, cooking evenly and absorbing all that smoky flavor.
Smoke the roast for 6-8 hours, maintaining the 225°F temperature. The key here is patience—low and slow is what transforms tough meat into tender, fall-apart perfection. You’ll know it’s ready when the internal temperature reaches 195-200°F and a meat thermometer inserted into the thickest part of the roast comes out clean with no resistance.
Rest and Shred the Roast
Once the roast reaches the perfect internal temperature, remove it from the smoker and transfer it to a cutting board. Tent it loosely with aluminum foil and let it rest for 15-20 minutes. This resting period allows the juices to redistribute throughout the meat, ensuring every bite is moist and flavorful.
While the roast rests, carefully remove the vegetables from the broth and transfer them to a serving dish. The broth should now be rich, smoky, and infused with all the flavors of the roast. Skim off any excess fat if desired, then return the broth to the skillet and simmer over medium heat until it thickens slightly—about 5-7 minutes. This creates a glossy, flavorful sauce that will coat every bite.
Once the roast has rested, use two forks to shred the meat into bite-sized pieces. Discard any large pieces of fat or connective tissue. Serve the shredded roast over the vegetables, drizzling the smoky broth generously over the top. The result is a dish that’s rich, tender, and packed with deep, smoky flavor—perfect for feeding a crowd or enjoying a hearty meal.
Pro Tips For Making Pot Roast Smoker
- Sear Until It’s Golden: DESCRIPTION: That 3-4 minutes per side isn’t just a number—it’s the difference between a roast that tastes like dinner and one that tastes like a showstopper. If your chuck isn’t deep brown with crispy edges by the time you flip it, crank the heat a touch and give it another 30 seconds. I used to rush this, and my roast always ended up tasting like it needed more love. Trust me, the Maillard reaction isn’t something you want to half-ass.
- Smash That Garlic: DESCRIPTION: Peeled but whole garlic cloves? Skip it. Smashing those 6 cloves with the flat of your knife releases their oils and aromatics into the pan like nothing else. I learned this the hard way—whole cloves just sit there, underused, while smashed ones turn the whole dish into flavor town. It’s not fancy, but it’s the thing that makes your sauce actually taste like it belongs in a restaurant.
- Don’t Rush the Rest: DESCRIPTION: That 15-20 minutes under foil isn’t optional—it’s where the magic happens. Cutting into your roast too soon sends all the juices pooling on your cutting board instead of back into the meat. I know, I know, you’re hungry, but resist the urge. Your future self will be shredding a dry, sad hunk of beef if you don’t. (Yes, even if you’re impatient like me.)
- Wine Down Before Adding Broth: DESCRIPTION: Let that 1 cup of red wine reduce by half—about 2-3 minutes—before you dump in the 2 cups of beef broth. Skipping this step means your sauce will be thin and watery instead of rich and velvety. I used to just toss everything in at once, and the broth always ended up tasting like sad, diluted soup. A little patience here makes a real difference in the final texture.
Essential equipment for this dish
Your Smoker’s Best Friend
Investing in a Traeger Pro 575 changed my smoking game completely. This pellet grill/smoker maintains 225°F with laser precision and has a built-in meat probe for that perfect 195-200°F internal temp.
The $899 price tag is worth it for serious smokers—it’s my go-to for everything from ribs to this pot roast. 🔥
Budget-Friendly Smoker
If you’re on a budget, a Weber Smokey Mountain Cooker (around $100) delivers amazing results. It’s charcoal-based but requires more temperature management. I use Camp Chef Wooden Smoking Boxes ($25) to control smoke flow and prevent flare-ups. Both options work well for this recipe—just be patient with temperature control.
Must-Have Thermometer
A Thermoworks Smoke dual-probe thermometer is non-negotiable for me. It tracks both smoker temp and internal meat temp simultaneously, so you never guess if your roast is done. The $120 investment pays for itself in perfect, juicy results every time. I’ve tried cheaper options—they just don’t measure up.
Smoking Wood Essentials
For this recipe, hickory wood chips from Traeger or Cookshack are my top pick—they give that classic, woodsy depth without overpowering. If you want something fruitier, cherry wood chips add a subtle sweetness that pairs beautifully with the beef. Always soak them for 30 minutes before smoking to avoid flare-ups.
Grilling Tools Upgrade
Upgrading my tongs to Stainless Steel Grilling Tongs (like the Oxo Good Grips set) makes handling the roast so much easier. The $20 price is worth it for the non-slip grip and durability. I also use a Dexter-Russell 12-inch slicing knife for clean cuts after resting—no more tearing the meat!
Nutrition facts
Frequently asked questions
Why does this pot roast recipe require such a long smoking time?
The 6-8 hours at 225°F is what makes this recipe work! Low and slow breaks down tough collagen fibers in the chuck roast, turning them into silky strands. This method also lets the smoky flavors penetrate deeply into the meat, creating that melt-in-your-mouth texture. Rushing it would leave you with chewy meat instead of tender perfection.
Can I use a different type of wood for smoking?
While hickory is recommended for its balanced smokiness, cherry adds a fruitier note that pairs beautifully with beef. Avoid overly strong woods like mesquite unless you want a bold, gamey flavor. Always soak wood chips for 30 minutes before using to prevent flare-ups.
What if I don’t have red wine for the deglazing step?
No problem! Replace the 1 cup dry red wine with 2 cups beef broth plus 1 tablespoon balsamic vinegar. The acidity from the vinegar will still help develop flavor, and no one will notice the difference. The tomato paste will still provide that umami depth you need.
How do I know when the roast is done without cutting into it?
Use a meat thermometer to check the thickest part of the roast—it should reach 195-200°F. When you insert the probe, it should come out clean with no resistance, and the meat should pull away from the bone easily. This ensures perfect tenderness without overcooking.
Can I make this recipe ahead of time?
Yes! The roast actually tastes better after resting overnight. Store leftovers in an airtight container in the fridge for up to 5 days, or freeze for 3 months. Reheat gently in the oven or on the stovetop with a splash of broth to restore moisture. The flavors deepen with time, so it’s worth the wait!

Trained in classic French technique but raised on slow-cooked ribs and spicy rubs, she blends culinary skill with smoke and soul.
- Smoked Brisket Recipe: Low and Slow to Fall-Apart Tenderness - November 2, 2026
- Smoked Turkey Breast Recipe: Juicy Pink Center With Crispy Skin Every Time - November 2, 2026
- Leftover Smoked Pulled Pork Chili Recipe: Rustic Flavor Revival in One Pot - November 2, 2026