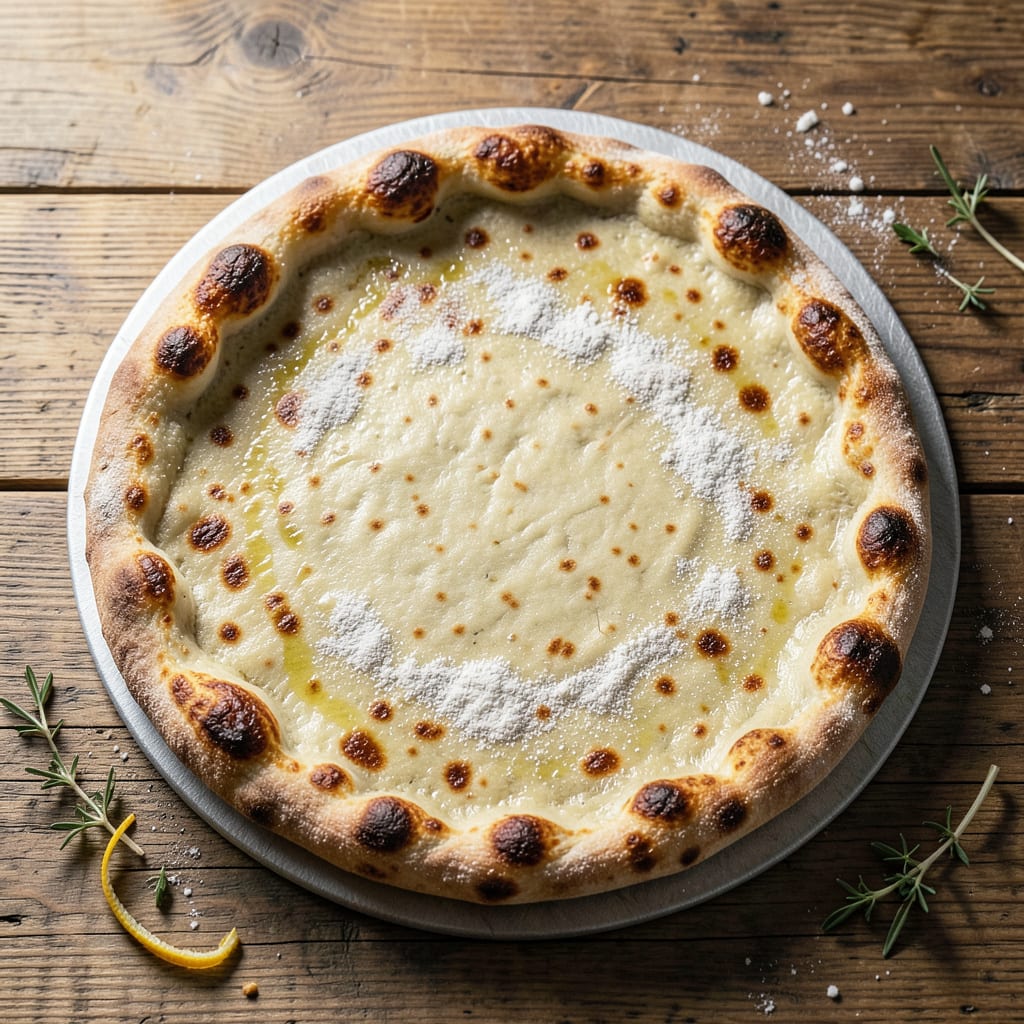
I’ll be real with you—nothing ruins a perfect pizza faster than a soggy bottom. After years of experimenting (and more than a few disappointing pies), I discovered the game-changer: pre-baking your crust before adding toppings. This simple step transforms homemade pizza from “meh” to “restaurant-quality” every single time.
The secret is in the timing and temperature. A quick 5-7 minutes at 475°F creates a sturdy base that can handle sauce and cheese without turning into a mushy mess. You’re not fully baking the crust—just setting it so it develops that perfect crisp texture while still being able to finish cooking with the toppings. Watch for the edges to turn just golden before pulling it out.
What you get is a pizza with a crispy, sturdy crust that holds up to all your favorite toppings. No more sad, floppy slices where the cheese slides off when you take a bite. Whether you’re loading it with veggies, classic marinara and mozzarella, or going vegan with plant-based cheese, this method ensures every slice stays perfect from first bite to last.
Here’s where it gets interesting—this technique works for any pizza style. Thin crust? Pre-bake. Thick and chewy? Pre-bake. Even gluten-free crusts benefit from this extra step. Once you try it, you’ll never go back to soggy-bottom pies again.
📚 In This Guide
- What You’ll Need
- Instructions
- Tips and Common Mistakes
What Youll Need
- ● Pizza dough: 1 lb (16 oz) of room-temperature dough (homemade or store-bought). For crispier crusts, opt for high-protein bread flour dough (12-14% protein).
- ● Baking sheet or pizza stone/steel: 12–16″ round preheated surface (stone/steel = extra crispiness!). A perforated pizza pan works too for air circulation.
- ● Parchment paper or cornmeal: 1 sheet of parchment (for easy transfer) or 2 tbsp cornmeal/semolina to dust the peel or pan.
- ● Olive oil: 1–2 tbsp extra-virgin for brushing the crust (prevents drying + adds flavor).
- ● Fork or docker tool: To poke holes (dock) in the dough and prevent air bubbles.
- ● Pastry brush: For even olive oil application (a clean silicone brush works too!).
- ○ Oven thermometer (optional but helpful): Ensures your oven hits 475–500°F (many home ovens run 25–50°F off!).
- ○ Pizza peel (optional): For transferring dough to a hot stone/steel—wooden or metal both work.
- ● Timer: A phone or kitchen timer to track the 5–8 minute pre-bake time.
- ● Toppings (prepped in advance!): Sauce, cheese, and toppings ready to go immediately after pre-baking. Cold toppings = sad, soggy crusts!
Instructions for Pre-Baking Pizza Crust Before Adding Toppings
This simple technique transforms your homemade pizza from soggy to spectacular—let’s get that crust perfectly crisp!
Prepare Your Dough and Oven
Start by shaping your pizza dough into a round on a lightly floured surface. I always stretch it by hand for the best texture, working from the center outward while leaving a slightly thicker rim for that classic crust. Don’t worry about perfection—rustic shapes add character!
Place your pizza stone or inverted baking sheet in the cold oven, then preheat to 475°F for at least 30 minutes. This high heat mimics professional pizza ovens and ensures your crust gets that crucial initial crisp before toppings go on. The longer preheat guarantees the stone is screaming hot when you slide your dough in.
Pre-Bake the Crust for Structure
Carefully transfer your shaped dough to a piece of parchment paper (this makes sliding it onto the hot stone easier). Dock the dough all over with a fork—this prevents large air bubbles from forming during baking. I like to make about 20-25 holes across the surface for even baking.
Slide the dough (with parchment) onto your preheated stone and bake for 5-7 minutes until the crust is set but not browned. You’re looking for a matte finish rather than golden color at this stage. The edges should feel dry to the touch but still pale. This partial bake creates a sturdy foundation that won’t turn soggy when you add saucy toppings later.
Add Toppings Strategically
Remove the pre-baked crust from the oven and let it cool for 2 minutes before adding toppings. This brief rest prevents the sauce from soaking into the hot crust immediately. Start with a thin layer of sauce—about ¼ cup—spread evenly to the edges. Less is more here; too much sauce creates steam that softens your crispy base.
Layer your cheese next (I prefer low-moisture mozzarella for best melting), then add other toppings. Distribute everything evenly but don’t overload—each topping should have its own space rather than piling up. For vegetables, I pat them dry first to remove excess moisture that could make the crust soggy during the final bake.
Finish Baking to Perfection
Return your topped pizza to the 475°F oven and bake for 8-12 minutes until the crust is deep golden brown and the cheese is bubbly with some light browning. Rotate the pizza halfway through baking for even cooking—this prevents one side from getting too dark while the other stays pale.
The pre-baked crust will develop beautiful color and crispness while the toppings heat through perfectly. You’ll know it’s done when the edges are crisp and the bottom sounds hollow when tapped. Let it rest for 2 minutes before slicing to allow the cheese to set slightly—this makes for cleaner cuts and prevents toppings from sliding off.
Tips and Common Mistakes for Perfect Pre-Baked Pizza Crust
This method changed my pizza game forever—here’s how to make it work flawlessly every time.
Heat Control is Everything: That 30-minute preheat at 475°F isn’t just a suggestion—it’s the secret to restaurant-quality crust! I learned the hard way that rushing this step results in a limp base. The stone needs to be screaming hot to create that initial crisp structure. Trust me, set a timer and don’t peek until it’s fully preheated.
Docking Technique: When you make those 20-25 fork holes in Step 2, press all the way through the dough. Half-hearted docking leads to giant air bubbles that’ll ruin your even bake. I use the tines to create a grid pattern—it ensures complete coverage and prevents any surprise puffs during those crucial 5-7 minutes of pre-baking.
Sauce Strategy: The 2-minute cooling rest before topping is non-negotiable! I used to skip this and wondered why my crust still got soggy. That brief pause lets the crust firm up just enough to resist sauce absorption. And when you add that ¼ cup sauce, use the back of a spoon to spread it thin—you should see the crust peeking through in spots.
Final Bake Watch: During that 8-12 minute finish, rotate your pizza at the 5-minute mark, not halfway. I found this prevents the side nearest the oven door from getting too dark while the back catches up. Look for cheese that’s bubbling vigorously with just a few golden-brown spots—that’s your signal it’s done, not the clock alone.
Pro Tips for Pre Bake Pizza Crust Before Adding Toppings
- This method changed my pizza game forever—here’s how to make it work flawlessly every time.
- Heat Control is Everything: That 30-minute preheat at 475°F isn’t just a suggestion—it’s the secret to restaurant-qua…
- Docking Technique: When you make those 20-25 fork holes in Step 2, press all the way through the dough. Half-hearted …
Frequently Asked Questions
Do I have to pre-bake my pizza crust, or can I skip it?
While you can skip pre-baking, it risks a soggy crust—especially with wet toppings like fresh veggies or saucy meats. Pre-baking (or “par-baking”) for 5–7 minutes creates a barrier against moisture, ensuring a crispier base. For thin crusts, it’s almost non-negotiable!
How long should I pre-bake the crust before adding toppings?
For most homemade or store-bought crusts, 5–8 minutes at 425°F (220°C) works perfectly. Aim for a light golden color—it should be firm but not fully cooked. Thicker crusts (like deep-dish) may need 10–12 minutes. Use a timer to avoid over-browning!
Can I pre-bake the crust days ahead of time?
Pre-bake the crust, let it cool completely, then store it in an airtight container at room temp for 1–2 days or freeze for up to a month. Reheat briefly (2–3 mins at 375°F) before adding toppings to restore crispness.
What if my crust puffs up or bubbles while pre-baking?
No stress—just dock (poke) the crust with a fork before baking to release steam. If bubbles form anyway, gently press them down with a spatula immediately after removing from the oven. A rolling pin can also flatten stubborn puffs post-bake.
Are there alternatives to pre-baking for a crispy crust?
Yes! Try these tricks:
- Use a pizza stone/steel (preheated for 30+ mins) for even heat.
- Brush the crust with olive oil before toppings to create a moisture barrier.
- Opt for low-moisture toppings (e.g., roasted veggies instead of fresh).
- Bake at a higher temp (475°F+) for a shorter time.
Pre-baking your pizza crust is the game-changer you didn’t know you needed! No more soggy bottoms—just crispy, golden perfection every time. 🍕✨ By giving your crust a head start in the oven, you lock in texture and flavor, ensuring your toppings shine without turning your pie into a sad, limp mess.
Ready to put this trick to the test? Grab your dough, preheat that oven, and experiment with bake times to find your ideal crunch. Your next pizza night just got a serious upgrade—happy baking!

Trained in classic French technique but raised on slow-cooked ribs and spicy rubs, she blends culinary skill with smoke and soul.
- Recipe For Fried Salmon Patties With Flour: Crispy Golden Crust With Flaky Centers - October 3, 2026
- Meat and Potato Recipe Ideas: Savory Pairings for Hearty Meals - October 3, 2026
- Recipe for Fried Prawns Batter: Ultra-Crispy Golden Shell - October 3, 2026