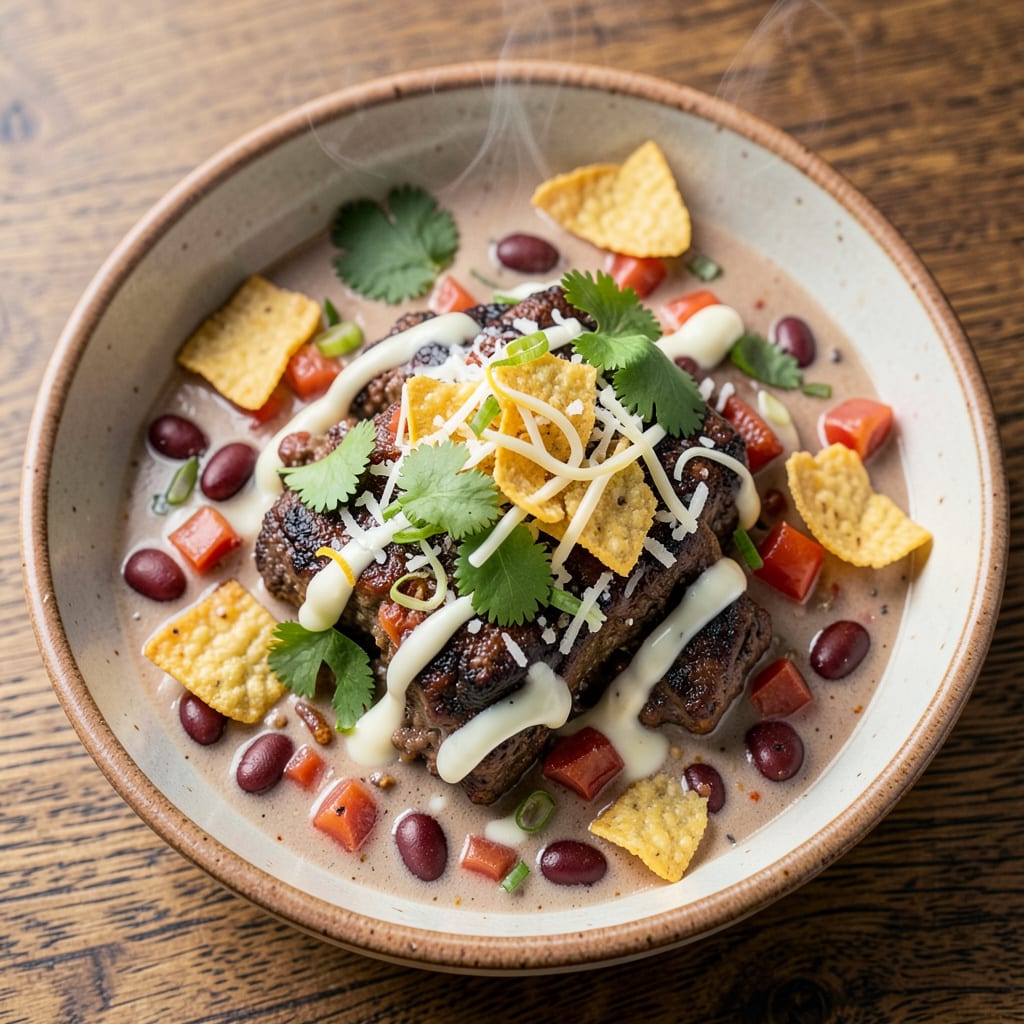
Adding milk to chili transforms a classic dish into something unexpectedly rich and velvety. This professional technique creates a balanced, creamy texture that mellows the heat while enhancing the depth of flavors. The milk doesn’t make it taste “milky”—instead, it rounds out the spices and adds a subtle richness that keeps people guessing your secret.
The key is proper integration: milk is added during the final simmering stage after the chili’s base flavors have developed. This prevents curdling while allowing the dairy to blend seamlessly with the tomatoes and spices. The result is a chili that maintains its robust character but gains an elegant, velvety finish that elevates every spoonful.
This method works particularly well with beef chili, where the milk’s proteins help tenderize the meat during the long cooking process. The dairy also helps balance the acidity from tomatoes and the heat from chiles, creating a more complex flavor profile that lingers pleasantly on the palate.
Perfect for cold-weather meals or game day gatherings, this creamy chili offers a sophisticated twist on a comfort food classic. The milk addition makes it feel indulgent while keeping the hearty, satisfying qualities that make chili a beloved dish.
📚 In This Guide
- What You’ll Need
- Instructions
- Tips and Common Mistakes
What Youll Need
- ● Ground beef or turkey: 1.5 lbs (80% lean for best flavor 🥩)
- ● Kidney beans: 2 cans (15 oz each), drained & rinsed (or 3 cups cooked)
- ● Diced tomatoes: 1 can (28 oz), fire-roasted for extra smokiness 🔥
- ● Tomato sauce: 1 can (15 oz)
- ● Whole milk: 1 cup (or 2% for lighter richness)
- ● Yellow onion: 1 large, finely diced (~2 cups)
- ● Garlic: 4 cloves, minced
- ● Chili powder: 3 tbsp (adjust for heat preference)
- ● Ground cumin: 1 tbsp
- ● Paprika: 1 tsp (smoked paprika for depth)
- ● Salt & black pepper: To taste
- ● Olive oil: 2 tbsp (for browning meat)
- ● Large pot or Dutch oven (5-6 qt)
- ● Wooden spoon
- ● Cutting board & sharp knife
- ● Measuring cups/spoons
- ● Bell peppers (1, diced)
- ● Jalapeños (1-2, seeded & minced)
- ● Shredded cheese (cheddar or Monterey Jack)
- ● Sour cream (for topping)
Instructions
This method transforms traditional chili into a velvety, rich dish with unexpected depth.
Build the Chili Base
Begin by browning your ground beef in a heavy pot over medium-high heat. I recommend using a Dutch oven for even heat distribution. Cook the meat until it develops a deep brown color and begins to release its fat—this typically takes 8-10 minutes of occasional stirring.
Once the beef is browned, add your diced onions and cook for 4-5 minutes until they become translucent and start to soften. This creates the aromatic foundation for your chili. Stir in the garlic and cook for an additional 30 seconds until fragrant, being careful not to let it burn.
Add your chili powder, cumin, and other dry spices at this stage, toasting them briefly with the meat and onions for 1 minute. This blooms the spices and intensifies their flavors before adding any liquid ingredients.
Incorporate the Milk for Creamy Depth
Here’s where the transformation begins. After adding your tomatoes and beans, pour in the whole milk—this is the secret ingredient that creates the signature creaminess. I use 1 cup of whole milk for this recipe, which is enough to add richness without making the chili taste milky.
Stir the milk into the chili thoroughly, allowing it to combine with the other ingredients. You’ll notice the broth immediately takes on a slightly lighter color and a velvety texture. The milk’s proteins will help thicken the chili naturally as it simmers.
Bring the mixture to a gentle simmer over medium heat. The milk will initially separate slightly, but as it heats, it will fully incorporate into the chili base, creating a smooth, cohesive texture.
Simmer for Flavor Development
Reduce the heat to low and let the chili simmer uncovered for 45-60 minutes. This extended cooking time allows the milk to fully integrate with the other flavors while mellowing any acidity from the tomatoes.
Stir the chili occasionally during simmering, scraping the bottom of the pot to prevent sticking. You’ll notice the color deepening and the texture becoming richer as the milk reduces slightly. The chili should maintain a gentle bubble throughout this process.
Taste and adjust seasoning as needed during the last 15 minutes of cooking. The milk adds a subtle sweetness that may require a slight increase in salt or chili powder to balance the flavors perfectly.
Finish and Serve
Once the chili has reached your desired thickness, remove it from the heat. The milk will have created a luscious, creamy base that coats each ingredient beautifully. Let it rest for 5-10 minutes before serving to allow the flavors to meld completely.
Serve the chili hot, garnished with your preferred toppings. The milk-enriched base pairs particularly well with sharp cheddar cheese, fresh cilantro, and a dollop of sour cream. Each bite should deliver the familiar chili flavors with an unexpected velvety richness.
This chili keeps well in the refrigerator for up to 5 days, and the flavors continue to develop over time. The creaminess from the milk remains stable even when reheated, making this an excellent make-ahead dish.
Tips and Common Mistakes
The secret to this chili’s velvety texture lies in mastering a few key techniques that transform simple ingredients into something extraordinary.
The Browning Foundation: In Step 1, don’t rush the 8-10 minutes of browning the ground beef. This isn’t just about cooking the meat—it’s about developing deep, caramelized flavors through the Maillard reaction. Use a Dutch oven as recommended for even heat distribution, and resist the urge to stir constantly. Let the meat form a crust before breaking it up; this creates flavor compounds that will carry through the entire dish.
Milk Integration Technique: When incorporating the 1 cup of whole milk in Step 2, temperature control is crucial. Bring the mixture to a gentle simmer over medium heat, but watch closely as the milk first separates. Stir constantly during this phase until you see the mixture become cohesive. The proteins in the milk will begin to thicken the chili naturally—this is where the signature velvety texture develops. If the milk appears to curdle slightly at first, don’t panic; continued stirring over consistent heat will resolve this.
Simmering Strategy: During the 45-60 minutes of simmering in Step 3, maintain the lowest heat that keeps a gentle bubble. This slow reduction allows the milk to fully integrate without scorching. Stir every 10-15 minutes, scraping the bottom to prevent sticking. The chili should reduce by about 20% in volume, with the color deepening to a rich, brick-red hue. This gradual reduction concentrates flavors while maintaining the creamy texture.
Seasoning Timing: The instruction to adjust seasoning during the last 15 minutes isn’t arbitrary. The milk’s natural sweetness becomes more pronounced as it reduces, so taste testing at this stage ensures perfect balance. I recommend having additional chili powder and salt ready—you’ll likely need about 1/4 teaspoon more of each than you initially added to compensate for the milk’s mellowing effect on spices.
Pro Tips for Milk In Chili
- The secret to this chili’s velvety texture lies in mastering a few key techniques that transform simple ingredients i…
- The Browning Foundation: In Step 1, don’t rush the 8-10 minutes of browning the ground beef. This isn’t just about co…
- Milk Integration Technique: When incorporating the 1 cup of whole milk in Step 2, temperature control is crucial. Bri…
Frequently Asked Questions
Got questions about adding milk to your chili? You’re not alone! Here are the most common curiosities—and quick answers—to help you nail that creamy, dreamy bowl.
Can I use any type of milk in chili?
Yes! Whole milk adds the richest creaminess, but 2%, skim, or even plant-based milks (like oat or coconut) work. For best results, avoid ultra-thin options (like almond milk) unless you balance with a thickener like cornstarch. Whole milk or half-and-half are crowd favorites!
When’s the best time to add milk to chili?
Wait until the last 10–15 minutes of cooking. Adding it too early can cause curdling or a watery texture. Lower the heat to a gentle simmer, stir in the milk slowly, and let it warm through—never boil!
What if my chili curdles after adding milk?
Don’t panic! Remove it from heat immediately and stir in a splash of cold water or broth to stabilize. To prevent curdling, temper the milk first: warm it separately, then slowly mix in a ladle of hot chili before combining.
Are there dairy-free alternatives for creamy chili?
Absolutely! Try full-fat coconut milk (adds sweetness), cashew cream (neutral flavor), or blended silken tofu (protein boost). For a tangy twist, stir in dairy-free yogurt at the end.
Does milk make chili less spicy?
Yes—dairy’s fat helps neutralize capsaicin (the compound that brings the heat). If your chili’s too fiery, milk or sour cream can tame it. For non-dairy options, try a spoonful of peanut butter or avocado!
Whether you’re a chili purist or a flavor adventurer, adding milk can transform your bowl into something richer and more complex. 🥣 This simple tweak balances heat, adds creaminess, and deepens the flavors—without overpowering the dish. Next time you simmer a pot, don’t hesitate to experiment with a splash of dairy or a non-dairy alternative!
Ready to take your chili to the next level? Try the recipe with milk today, then tweak the ratios to match your taste. Your perfect bowl is just a ladle away!

Trained in classic French technique but raised on slow-cooked ribs and spicy rubs, she blends culinary skill with smoke and soul.
- Recipe for Fried Pork Chops With Flour: Crispy Crust and Juicy Centers - October 3, 2026
- Octopus Recipe Pan Fried: Crispy Edges With Tender Bites - October 3, 2026
- Recipe For Fried Pork Chops In An Iron Skillet: Crispy Crust With Juicy Centers - October 3, 2026