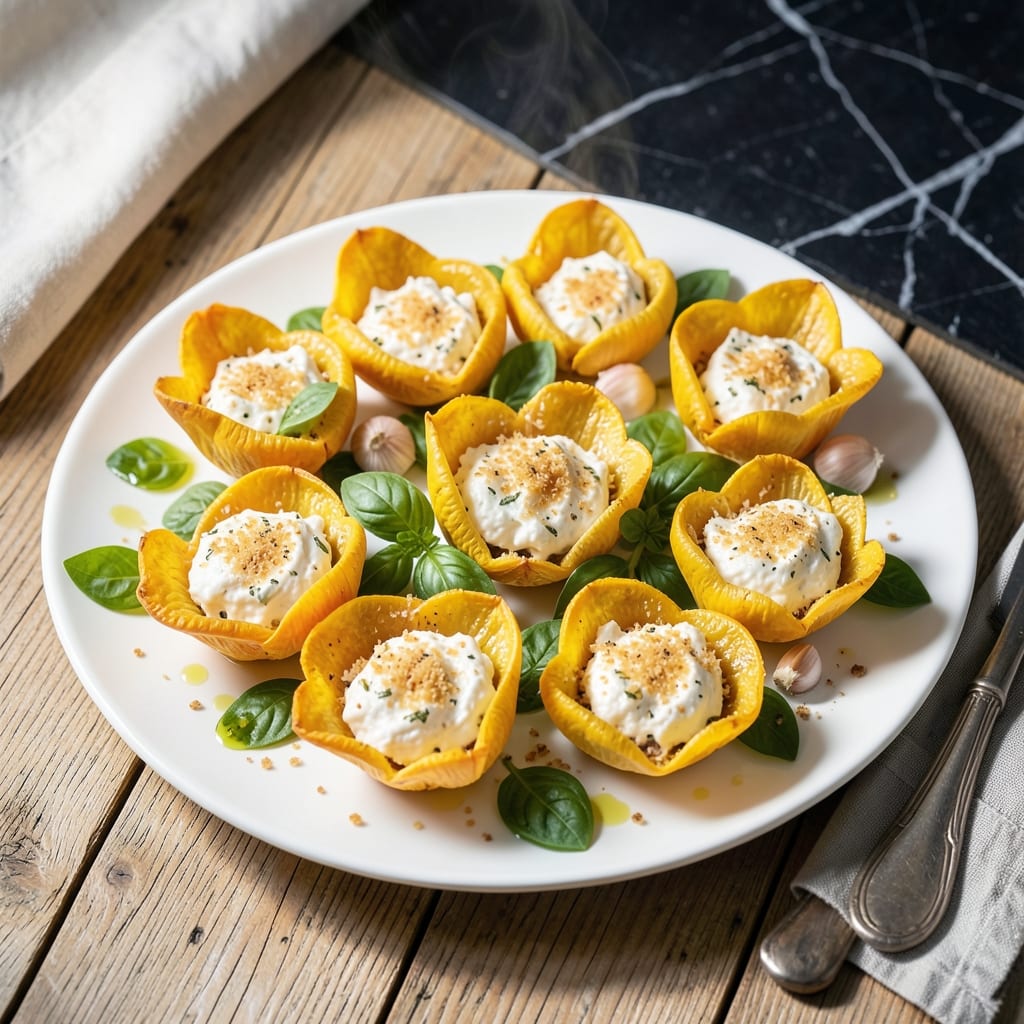
There’s a simple elegance to stuffed pumpkin blossoms that captures the essence of garden-to-table cooking. This dish transforms delicate flowers into a crispy, flavorful appetizer or light main course.
I learned this technique from my grandmother in Sicily, where we’d gather blossoms fresh from the vine. The key is handling them gently and stuffing with a light, flavorful filling before a quick fry.
The result is a delicate balance of textures—crispy exterior giving way to a soft, savory center. It’s a dish that celebrates seasonal ingredients with minimal effort.
Serve warm for the best experience, with a sprinkle of salt to highlight the natural flavors.
Ingredients for Pumpkin Blossom
Delicate blossoms meet crispy perfection with these fresh, garden-inspired ingredients.
| Ingredient | Amount | Notes |
|---|---|---|
| Pumpkin Blossoms 🌼 | 12 whole | Fresh, unopened, stems removed |
| Ricotta Cheese 🧀 | 1 cup | Whole milk for creaminess |
| Parmesan Cheese 🧀 | ½ cup | Freshly grated for best texture |
| Fresh Basil Leaves 🌿 | ¼ cup | Chopped, stems removed |
| Garlic Cloves 🧄 | 2 cloves | Minced for filling flavor |
| Large Eggs 🥚 | 2 whole | Beaten for batter consistency |
| All-Purpose Flour 🌾 | 1 cup | For light, crispy batter |
| Sparkling Water 💧 | 1 cup | Chilled for airy batter |
| Olive Oil 🫒 | 2 cups | For frying, high smoke point |
| Sea Salt 🧂 | 1 tsp | Fine grain for seasoning |
| Freshly Ground Black Pepper 🌶️ | ½ tsp | For finishing the dish |
| Lemon Zest 🍋 | 1 tsp | For bright, citrusy accent |
[recipe_ingredient_scaler]
The blossoms are everything here. Find them at farmers markets in late spring or early summer—look for bright orange flowers with firm stems. If you’re growing your own, pick them in the morning when they’re fully open. The ricotta should be whole milk for that creamy texture my grandmother insisted on. BelGioioso or Calabria brands are solid if you’re not making it fresh.
No ricotta? Cottage cheese blended smooth works in a pinch. Skip the Parmesan? Pecorino Romano adds a sharper bite. For a lighter filling, swap half the cheese for mashed white beans (cannellini work well). The batter must be ice-cold—chill the sparkling water first. If you’re gluten-free, sub the flour for rice flour or cornstarch.
Blossoms wilt fast—use them within 24 hours of picking or purchasing. The filling can be made a day ahead and stored in the fridge. Fried blossoms are best eaten fresh but will keep in the fridge for 1-2 days (reheat in the oven to restore crispiness).
Why You’ll Love This Recipe
- Minimal Chopping: I just rinse the blossoms, chop the garlic, and tear the basil—no fancy knife skills needed.
- Cheesy Heaven: The ricotta and parmesan mix with garlic and basil is ridiculously good, like a creamy, herby hug in every bite.
- Weeknight Wonder: Honestly, I’ve served this as an appetizer for guests and as a quick lunch for myself on busy days.
- Budget-Friendly Elegance: Pumpkin blossoms are seasonal and often free if you grow your own, and a little cheese goes a long way.
Step-by-Step Instructions for Pumpkin Blossom Stuffed and Lightly Fried
Here’s the method I’ve perfected for crispy, flavorful blossoms every time.
Step 1: Prepare the Pumpkin Blossoms and Filling
Gently rinse the 12 whole Pumpkin Blossoms and pat them completely dry with paper towels. Remove the pistils and stamens from inside each blossom, then carefully separate the petals to create a small opening for stuffing.
In a bowl, combine the 1 cup Ricotta Cheese, 0.5 cup Parmesan Cheese, 0.25 cup Fresh Basil Leaves, 2 cloves Garlic Cloves, 1 tsp Sea Salt, 0.5 tsp Freshly Ground Black Pepper, and 1 tsp Lemon Zest. Mix until just combined—this filling should be thick but spreadable.
Step 2: Stuff the Blossoms
Using a small spoon or piping bag, carefully fill each blossom with about 1 tablespoon of the ricotta mixture. Don’t overfill or the blossoms won’t close properly. Gently twist the tops of the blossoms to seal the filling inside.
Place the stuffed blossoms on a plate and refrigerate for 15 minutes. This chilling step helps the filling firm up slightly, making them easier to handle when dipping in batter.
Step 3: Prepare the Batter
In a mixing bowl, whisk together the 1 cup All-Purpose Flour and 2 whole Large Eggs until smooth. Slowly pour in the 1 cup Sparkling Water while whisking continuously. The batter should be thin and slightly bubbly—this gives the finished blossoms their light, airy coating.
Let the batter rest for 5 minutes at room temperature. This allows the gluten to relax, resulting in a more tender crust. The batter should resemble thin pancake batter.
Step 4: Fry to Golden Perfection
Heat the 2 cups Olive Oil in a deep, heavy-bottomed skillet over medium-high heat until it reaches 350-375°F. To test the temperature, drop a pinch of flour into the oil—it should sizzle immediately and rise to the surface.
Dip each stuffed blossom into the batter, coating completely. Allow any excess to drip off before carefully placing it in the hot oil. Fry in batches for 2-3 minutes per side until golden brown and crispy. Don’t overcrowd the pan, as this will lower the oil temperature and result in greasy blossoms.
Step 5: Drain and Serve Immediately
Transfer the fried blossoms to a paper towel-lined plate to drain excess oil. Sprinkle with a pinch of Sea Salt while still hot. The blossoms are best served immediately while the crust is still crisp and the filling is warm and creamy.
Arrange on a serving platter and garnish with any remaining Fresh Basil Leaves for a pop of color. The contrast of the crispy exterior with the creamy, herby filling is what makes this dish truly special.
Pro Tips For Making Pumpkin Blossom
- Pat blossoms dry: I learned this the hard way—wet blossoms turn to mush in the pan. Gently press them between paper towels for 5 minutes before stuffing.
- Chill the filling: Mix the ricotta, parmesan, and basil, then refrigerate for 15 minutes. It’s firmer to stuff and doesn’t ooze out when frying.
- Skip the overcrowding: After burning three batches, I finally figured out that frying just 3-4 stuffed blossoms at a time prevents soggy, greasy results.
- Use day-old cheese: Sounds weird, but it works: slightly dried ricotta holds its shape better than fresh out of the tub.
Wine and Beer Pairings for This Recipe
Italian White Wines
I love pairing these blossoms with a crisp Vermentino from Sardinia—its citrus notes complement the lemon zest in the filling. Pinot Grigio from Alto Adige also works beautifully, cutting through the richness of the fried coating. 🍷
Sparkling Options
A chilled Prosecco adds a celebratory touch and its effervescence cleanses your palate. The bubbles contrast nicely with the creamy ricotta filling. For a non-alcoholic option, try a sparkling lemonade with fresh mint.
Light Beers
A crisp Italian pilsner like Peroni or Moretti won’t overpower the delicate flavors. The light malt profile and mild hop bitterness balance the dish perfectly. I always keep a few in my fridge for summer gatherings. 🍺
Rosé Pairings
A dry Provençal rosé with its subtle berry notes and crisp acidity is an excellent match. The pale pink color even mirrors the blossoms themselves. Serve well-chilled for the best experience.
Cocktail Alternative
For a festive twist, serve with a Spritz Veneziano (Aperol, Prosecco, soda water). The bittersweet orange flavor enhances the dish’s garden-fresh qualities. This is my go-to for Sunday family dinners.
Nutrition Facts
Frequently Asked Questions
Can I use zucchini blossoms instead?
Zucchini blossoms work perfectly as a substitute. They have a similar delicate flavor and texture, though they may be slightly smaller. Adjust filling portions accordingly.
Why do I need to chill the batter?
Chilling keeps the batter cold, which helps create a crispier coating when fried. 5 minutes at room temperature is ideal. Cold batter also helps the coating adhere better to the blossoms.
How do I know when the oil is ready?
Test with a pinch of flour—it should sizzle immediately and rise to the surface. For precise results, use a thermometer and aim for 350-375°F. Too cool and the blossoms will absorb oil.
Can I bake these instead of frying?
Yes, but they won’t be as crispy. Use a light spray of oil and bake at 400°F for 12-15 minutes, flipping halfway. The texture will be different but still delicious.

Trained in classic French technique but raised on slow-cooked ribs and spicy rubs, she blends culinary skill with smoke and soul.
- Recipe for Boneless Pork Chops in Cast Iron Skillet: Sear and Baste to Juicy Perfection - October 3, 2026
- Recipe for Boneless Cross Rib Roast: Slow-Roasted Beef with Herb Crust - October 3, 2026
- Hamburgers in Sauce Recipe Crock Pot: Slow-Cooked Savory Delight - October 3, 2026