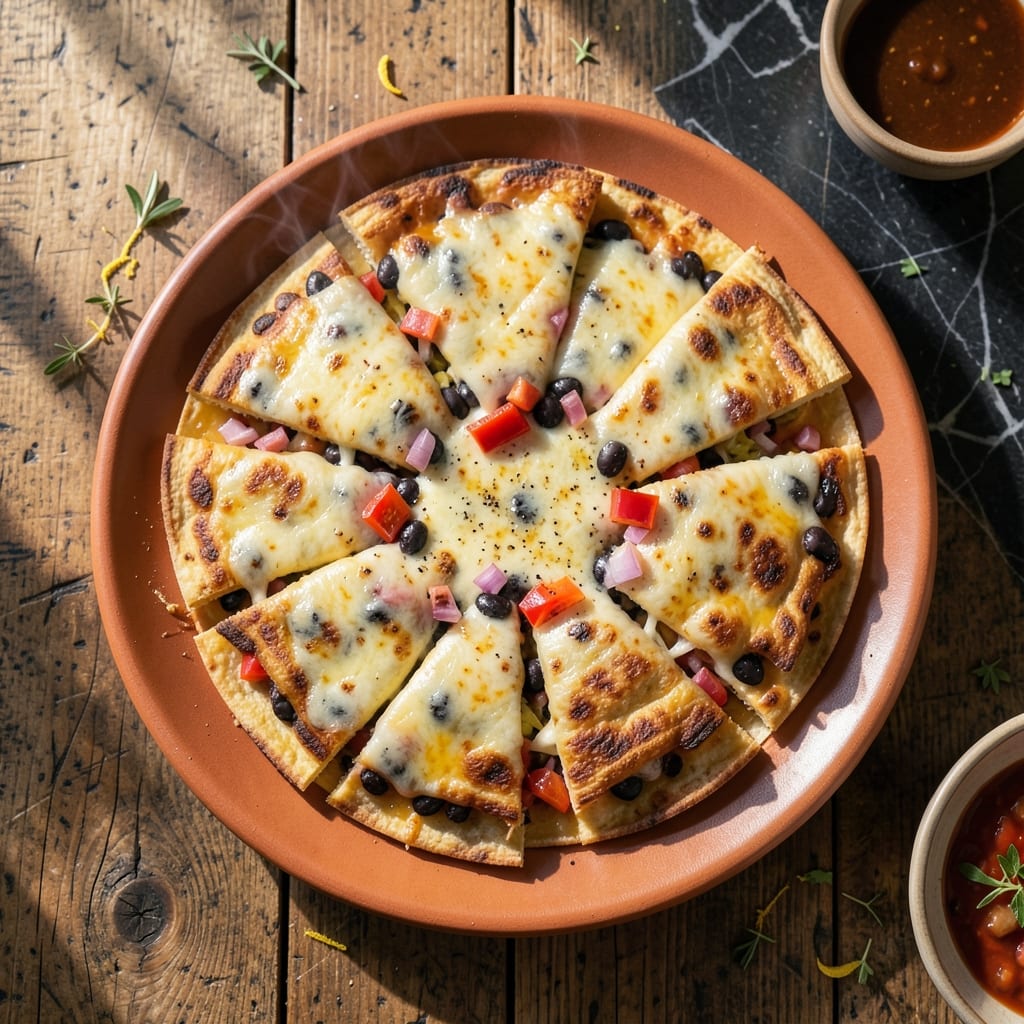
My quesadilla maker has become a game-changer for crispy, evenly cooked cheese pockets every time. This appliance delivers restaurant-quality results without the guesswork of stovetop methods.
The beauty of this method is its precision. Even heat distribution ensures the tortillas turn golden while the cheese melts perfectly inside. It’s a foolproof technique that works with any filling you choose.
What you’ll get are perfectly sealed pockets with a shatteringly crispy exterior and gooey, melted cheese throughout. The process takes minutes, making it ideal for quick meals or snacking.
Try classic cheese or experiment with proteins and veggies. Let’s create these together.
Ingredients for Quesadilla Maker
Pantry staples plus fresh produce make these pockets sing. Nothing complicated here.
| Ingredient | Amount | Notes |
|---|---|---|
| Flour Tortillas 🌮 | 8 pieces | Medium size, 8-inch diameter |
| Sharp Cheddar Cheese 🧀 | 2 cups | Shredded from block preferred |
| Monterey Jack Cheese 🧀 | 1 ½ cups | Shredded for melty texture |
| Unsalted Butter 🧈 | 2 tbsp | Melted for brushing tortillas |
| Vegetable Oil 🫒 | 1 tbsp | Neutral flavor for cooking |
| Black Beans 🫘 | 1 can | Drained and rinsed for filling |
| Red Bell Pepper 🌶️ | 1 whole | Diced for crunch and color |
| Red Onion 🧅 | ½ whole | Finely diced for flavor |
| Fresh Cilantro 🌿 | ¼ cup | Chopped for garnish |
| Jalapeño Pepper 🌶️ | 1 whole | Seeded, minced for heat |
| Lime Juice 🍈 | 1 tbsp | Freshly squeezed for brightness |
| Ground Cumin 🌿 | ½ tsp | Toasted for depth |
| Salt 🧂 | ½ tsp | Kosher or sea salt preferred |
| Black Pepper 🌶️ | ¼ tsp | Freshly ground for best flavor |
[recipe_ingredient_scaler]
The tortillas are key—Mission brand or similar hold up best in the quesadilla maker without tearing. For cheese, block cheddar and Monterey Jack shredded fresh melt smoother than pre-shredded (which has anti-caking agents). I grab mine at Whole Foods or Trader Joe’s—their cheese selection is always top-notch. Butter should be unsalted so you control the seasoning yourself (trust me on the full-fat version).
No Monterey Jack? Pepper Jack adds a nice kick. Out of fresh peppers? Jarred roasted red peppers work in a pinch (just drain well). Skip the cilantro if it’s not your thing—green onions or parsley are fine swaps. The black beans can be pinto beans or refried if that’s what’s in the cupboard. For extra crispiness, brush both sides of the tortillas with melted butter.
Assemble these right before cooking—no prep ahead. Leftovers keep 2-3 days in the fridge (reheat in a dry skillet). Tortillas last 1 week in the pantry, cheese 1 month unopened. The veggies? Use within 5 days for best texture.
Why You’ll Love This Recipe
- One Hand Wonder: I can assemble these in the quesadilla maker with one hand while stirring dinner with the other.
- Cheesy Perfection: Sharp cheddar and creamy Monterey Jack melt into this ridiculously good, gooey center.
- Lunchbox Hero: My kids request these cold in their lunchboxes the next day—still delicious.
- Pantry MVP: Flour tortillas and cheese are staples I always have, so this saves me on busy nights.
Step-by-Step Instructions for Cheesy Quesadilla Pockets
Here’s the method. Straightforward, tested, works every time.
Step 1: Prepare the Filling with Bold Flavors
Heat the 1 tbsp Vegetable Oil in a skillet over medium heat. Add the 1 can Black Beans (drained and rinsed), 1 whole Red Bell Pepper (diced), and 0.5 whole Red Onion (finely diced). Sauté for 5-6 minutes until the vegetables soften slightly but retain a satisfying crunch.
Stir in the 1 whole Jalapeño Pepper (seeded and minced), 0.5 tsp Ground Cumin, 0.5 tsp Salt, and 0.25 tsp Black Pepper. Cook for an additional 2 minutes until the aroma of toasted cumin fills the air. Remove from heat and let the filling cool slightly—this prevents soggy tortillas.
Step 2: Assemble with a Cheese Blend for Maximum Melt
Lay out the 8 pieces Flour Tortillas and brush one side of each lightly with the 2 tbsp Unsalted Butter (melted). On half of the tortillas, sprinkle a generous layer of the 2 cups Sharp Cheddar Cheese and 1.5 cups Monterey Jack Cheese, ensuring even coverage up to the edges.
Divide the black bean and vegetable mixture evenly over the cheese on each tortilla. The cheese acts as a glue, holding the filling in place. Top with the remaining tortillas, butter-side out, and press down gently to seal the edges. This layering guarantees a gooey, stretchy center in every bite.
Step 3: Cook to Crispy Perfection in the Quesadilla Maker
Preheat your quesadilla maker according to the manufacturer’s instructions. Once hot, place the assembled quesadillas inside and close the lid. Cook for 3-4 minutes until the exterior turns golden brown and the cheese begins to ooze slightly at the edges.
Resist the urge to open the lid early—this traps the heat, ensuring the cheese melts completely and the tortillas crisp uniformly. The maker’s design presses the pockets just enough to create that coveted crunch without squashing the filling out. You’ll hear a satisfying sizzle when it’s ready.
Step 4: Finish and Serve with Fresh Garnishes
Carefully remove the quesadillas from the maker and let them rest for 1-2 minutes on a cutting board. This brief pause allows the cheese to set slightly, making them easier to slice without the filling spilling out.
Cut each quesadilla into wedges and arrange on a serving platter. Drizzle with the 1 tbsp Lime Juice and sprinkle with the 0.25 cup Fresh Cilantro (chopped) for a bright, fresh finish. The lime cuts through the richness, balancing the bold, melty flavors perfectly.
Pro Tips For Making Quesadilla Maker
- Preheat the Maker: Always let your quesadilla maker heat up for at least 5 minutes—skipping this leads to uneven melting and a pale, soggy tortilla.
- Shred Your Own Cheese: I learned this the hard way—pre-shredded cheese has anti-caking agents that make it melt less smoothly, so buy blocks and shred fresh for that perfect gooey texture.
- Don’t Overstuff: Resist the urge to pile in too much cheese; about 1/2 cup total per quesadilla is the sweet spot for even cooking without spillage.
- Butter the Outside: Brush the outer tortillas with melted unsalted butter right before closing the maker—it gives a golden, crispy finish that oil alone can’t match.
Creative Variations of This Recipe
Breakfast Quesadilla
Swap the black beans for scrambled eggs and crumbled bacon. Use 1 cup shredded cheddar and add ¼ cup diced ham for extra protein. Cook as usual—this is my go-to for Sunday brunches. The eggs stay fluffy even after pressing. 💛
Buffalo Chicken Style
Mix 1 cup shredded rotisserie chicken with ¼ cup Frank’s RedHot sauce and 2 tbsp ranch dressing. Use Monterey Jack for meltiness. The spicy-savory combo reminds me of game day in Boston sports bars.
Vegetarian Mediterranean
Replace the filling with ½ cup crumbled feta, ¼ cup chopped spinach, and 2 tbsp sun-dried tomatoes. Add 1 tsp dried oregano for that Greek diner flavor I grew up loving in the North End.
Dessert S’mores
Use graham cracker crumbs inside with chopped milk chocolate and mini marshmallows. Brush tortillas with melted butter and sprinkle with cinnamon sugar before cooking. My nieces beg me to make these for sleepovers. ✨
Spicy Southwestern
Add ½ cup corn kernels and 1 tsp chipotle powder to the black bean mix. Use Pepper Jack cheese for heat. This version tastes like the street food I miss from our Arizona vacations.
BBQ Pulled Pork
Fill with 1 cup leftover pulled pork and 2 tbsp BBQ sauce. Top with pickled red onions after cooking. The tangy crunch cuts through the richness beautifully.
Nutrition Facts
Frequently Asked Questions
What’s the best cheese for crispy edges?
Sharp cheddar and Monterey Jack melt smoothly and crisp up nicely. Avoid pre-shredded cheese as it contains anti-caking agents that prevent proper melting.
Can I use corn tortillas instead?
Corn tortillas work but may crack more easily. For best results, warm them first and handle gently when pressing in the maker.
How do I prevent sticking?
Brush tortillas lightly with melted butter or oil before cooking. Preheating the maker for 2-3 minutes also helps create a non-stick surface.
Can I make these ahead of time?
Assemble right before cooking for best texture. Leftovers keep 2-3 days in the fridge—reheat in a dry skillet to restore crispiness.

Trained in classic French technique but raised on slow-cooked ribs and spicy rubs, she blends culinary skill with smoke and soul.
- Recipe for Boneless Pork Chops in Cast Iron Skillet: Sear and Baste to Juicy Perfection - October 3, 2026
- Recipe for Boneless Cross Rib Roast: Slow-Roasted Beef with Herb Crust - October 3, 2026
- Hamburgers in Sauce Recipe Crock Pot: Slow-Cooked Savory Delight - October 3, 2026