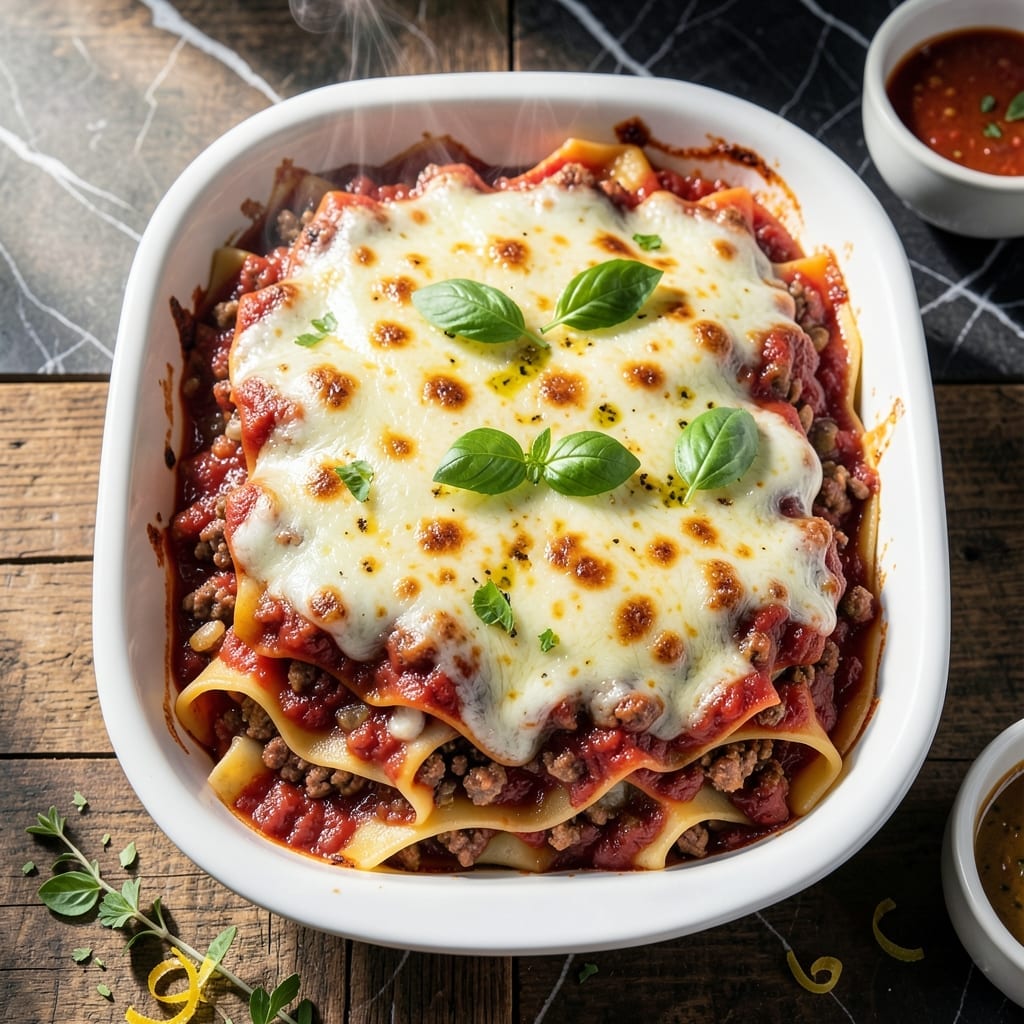
This lasagna delivers homemade richness with layers of tender pasta, rich meat sauce, and creamy cheese. I developed this method to ensure every bite is perfectly balanced.
With a few quality ingredients and careful layering, you’ll achieve restaurant-worthy results. The key is patience—letting the flavors meld during baking makes all the difference.
Ingredients for Rao Lasagna
Quality ingredients build this lasagna’s signature layers of richness and depth.
| Ingredient | Amount | Notes |
|---|---|---|
| Lasagna Noodles 🍝 | 12 pieces | Oven-ready or no-boil preferred |
| Ground Beef 🥩 | 1 ½ lb | 80/20 lean-to-fat ratio |
| Italian Sausage 🌭 | ½ lb | Sweet or spicy, casings removed |
| Onion 🧅 | 1 whole | Yellow or white, finely diced |
| Garlic Cloves 🧄 | 4 cloves | Minced for sauce |
| Crushed Tomatoes 🍅 | 2 cans | 28 oz each, San Marzano preferred |
| Tomato Paste 🍅 | ¼ cup | For depth of flavor |
| Dried Basil 🌿 | 1 tbsp | Or fresh at triple quantity |
| Dried Oregano 🍃 | 1 tbsp | Mediterranean variety preferred |
| Ricotta Cheese 🧀 | 2 cups | Whole-milk for creaminess |
| Mozzarella Cheese 🧀 | 2 cups | Shredded, low-moisture |
| Parmesan Cheese 🧀 | 1 cup | Freshly grated from block |
| Extra-Virgin Olive Oil 🫒 | 2 tbsp | For sautéing aromatics |
| Salt 🧂 | 1 tsp | Diamond Crystal kosher preferred |
| Black Pepper 🌶️ | ½ tsp | Freshly ground preferred |
[recipe_ingredient_scaler]
The tomatoes define this dish. San Marzano canned tomatoes offer the ideal balance of sweetness and acidity—Whole Foods or Italian specialty stores reliably stock them. For the meats, 80/20 ground beef provides necessary fat for flavor, while sweet Italian sausage adds complexity. Opt for freshly grated Parmigiano-Reggiano rather than pre-shredded to avoid anti-caking agents that affect melt.
No Italian sausage? Double the ground beef with an extra teaspoon of fennel seeds. Substitute fresh mozzarella for low-moisture if preferred (pat dry first). For a shortcut, Rao’s jarred marinara can replace the crushed tomatoes and paste—use 3 cups. Dried herbs work in a pinch, but fresh basil or oregano at triple the amount delivers superior aroma.
Assemble up to 24 hours ahead—cover tightly and refrigerate. Bake as directed, adding 10-15 minutes if cold. Leftovers keep 5 days refrigerated or 3 months frozen. Reheat covered to prevent drying.
Why You’ll Love This Recipe
- One Pot Magic: I brown the beef, sausage, onion, and garlic together—no extra pans, no extra fuss.
- Meaty Depth: The combo of ground beef and Italian sausage gives it that rich, hearty flavor I crave.
- Feeds a Crowd: Honestly, this makes enough for dinner tonight and leftovers for tomorrow’s lunch.
- Budget Friendly: Between us, ground beef and sausage stretch further than you’d think in this dish.
Step-by-Step Instructions for Rao Lasagna
Master this layered dish with rich, homemade sauce and perfectly balanced textures.
Step 1: Prepare the Rich Meat Sauce
Heat the 2 tbsp extra-virgin olive oil in a large pot over medium heat. Add the 1 whole onion, finely diced, and cook for 5 minutes until translucent and fragrant. Stir in the 4 cloves garlic cloves and cook for 30 seconds until aromatic—don’t let it brown.
Add the 1.5 lb ground beef and 0.5 lb Italian sausage (casings removed). Cook, breaking it up with a wooden spoon, for 8-10 minutes until browned and crumbly. Drain excess fat if needed, then stir in the 2 cans crushed tomatoes, 0.25 cup tomato paste, 1 tbsp dried basil, 1 tbsp dried oregano, 1 tsp salt, and 0.5 tsp black pepper.
Simmer uncovered for 20-25 minutes, stirring occasionally, until the sauce thickens and deepens in color. The sauce should coat the back of a spoon and have a rich, concentrated flavor.
Step 2: Combine the Cheese Filling
In a medium bowl, combine the 2 cups ricotta cheese, 1 cup parmesan cheese, and a pinch of the black pepper. Stir until smooth and fully integrated. The mixture should be thick but spreadable—this creates the creamy layer that balances the hearty meat sauce.
Set aside while you prepare the remaining components. This filling can be made ahead and stored in the refrigerator for up to 24 hours if needed.
Step 3: Layer the Lasagna
Preheat the oven to 375°F. Spread 1 cup of the meat sauce on the bottom of a 9×13-inch baking dish. Arrange 4 pieces lasagna noodles in a single layer, slightly overlapping if necessary. Spread half of the ricotta mixture evenly over the noodles, then sprinkle with ⅔ cup mozzarella cheese.
Repeat the layers: another 1 cup of meat sauce, 4 pieces lasagna noodles, the remaining ricotta mixture, and another ⅔ cup mozzarella cheese. Top with the final 4 pieces lasagna noodles, the remaining meat sauce, and the last ⅔ cup mozzarella cheese.
Step 4: Bake to Perfection
Cover the dish tightly with foil and bake for 25 minutes. Then, remove the foil and bake for another 20-25 minutes until the top is bubbly and golden brown and the edges are crisp. The lasagna is done when a knife inserted in the center meets no resistance.
Let it rest for 10-15 minutes before slicing. This resting period allows the layers to set, making it easier to serve neat, intact portions. The cheese should be fully melted and slightly browned, with the sauce bubbling at the edges.
Pro Tips For Making Rao Lasagna
- Brown the Meat Well: Cook the ground beef and Italian sausage until deeply browned, not just gray—this builds the rich flavor foundation Rao’s lasagna deserves.
- Drain the Fat: After browning the meat, drain all but about 1 tablespoon of fat before adding onions and garlic to avoid a greasy sauce.
- Skip Dry Noodles: I learned this the hard way—use regular lasagna noodles and par-boil them for 2 minutes less than the package says so they finish perfectly in the oven.
- Layer Sauce Last: Always end with a thin layer of Rao’s sauce on top (no cheese) to prevent the lasagna from drying out during baking.
Essential Equipment for rao lasagna
Baking Dish Essentials
For lasagna, I always reach for my 9×13-inch glass baking dish—it distributes heat evenly and lets me see the layers browning. David swears by his stoneware dish for extra crispy edges, but glass is my go-to for consistent results. 💛
Quality Saucepan
A heavy-bottomed 5-6 quart Dutch oven is perfect for the meat sauce. I use my Le Creuset from Central Market—it browns meat beautifully and prevents scorching during the long simmer. The weight keeps it steady on the stove.
Cheese Grater Matters
Freshly grated Parmesan makes all the difference. I use a Microplane for fine, fluffy shreds that melt perfectly. Pre-shredded cheese has anti-caking agents that affect texture—always grate your own for this dish.
Lasagna Noodle Tools
If using regular noodles, a large pot with 6 quarts water prevents sticking. For no-boil, just ensure your dish is deep enough. I also keep a lasagna layering tool (a small offset spatula) handy for smooth spreading.
Oven Thermometer
Oven temperatures vary wildly. I always check mine with a ThermoWorks oven thermometer—it’s revealed my oven runs 15°F hot. This $10 tool prevents burnt edges and undercooked centers. 🌡️
Resting Rack
After baking, transfer the dish to a wire rack for the 10-15 minute rest. This prevents the bottom from steaming and getting soggy. I learned this trick working at that Asheville farm-to-table spot—simple but game-changing.
Nutrition Facts
Frequently Asked Questions
Can I use no-boil noodles?
Yes, no-boil noodles work perfectly here. Just ensure you use enough sauce to soften them during baking.
Why do I need to let it rest?
Resting for 10-15 minutes allows the layers to set, making it easier to slice clean portions. It also lets flavors meld together.
Can I make this vegetarian?
Swap the meat for sautéed mushrooms, spinach, or lentils. Use the same sauce and layering method for great results.
How do I prevent soggy layers?
Don’t over-sauce the layers, and always bake until bubbly. Resting on a wire rack helps too.

Trained in classic French technique but raised on slow-cooked ribs and spicy rubs, she blends culinary skill with smoke and soul.
- Recipe for Boneless Cross Rib Roast: Slow-Roasted Beef with Herb Crust - October 3, 2026
- Hamburgers in Sauce Recipe Crock Pot: Slow-Cooked Savory Delight - October 3, 2026
- Sanjeev Kapoor Egg Biryani Recipe: Fragrant Spiced Rice With Boiled Eggs - October 3, 2026