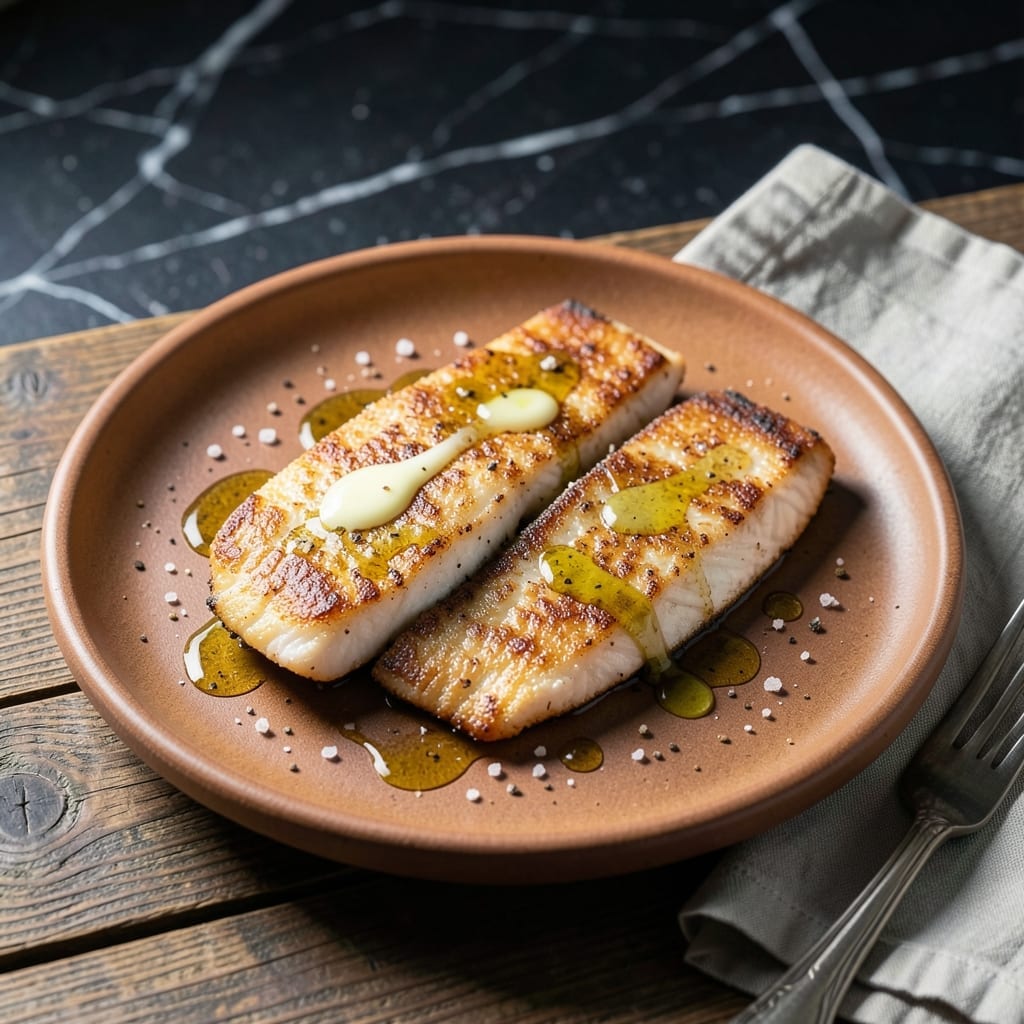
There’s a simple elegance to perfectly pan-fried flounder that makes it a standout main course. This method ensures a golden crust with tender, flaky fish inside.
With just a few ingredients and precise timing, you’ll achieve restaurant-quality results at home. The buttery flavor shines through every bite, making it a dish worth mastering.
Ingredients for Recipe Flounder Pan Fried
Fresh flounder, a few pantry staples, and butter create this elegant pan-fried dish with ease.
| Ingredient | Amount | Notes |
|---|---|---|
| Flounder Fillets 🐟 | 1 ½ lb | Skin-on, about 1/2-inch thick |
| All-Purpose Flour 🌾 | ½ cup | For dredging fillets |
| Kosher Salt 🧂 | 1 ½ tsp | Divided for seasoning |
| Freshly Ground Black Pepper 🌶️ | ½ tsp | Divided for seasoning |
| Unsalted Butter 🧈 | 6 tbsp | Divided for cooking and basting |
| Olive Oil 🫒 | 2 tbsp | Neutral flavor, for frying |
| Lemon 🍋 | 1 whole | Zested and juiced |
| Garlic Cloves 🧄 | 2 cloves | Minced for aroma |
| Fresh Parsley 🌿 | ¼ cup | Chopped, for garnish |
| Capers 🌿 | 2 tbsp | Rinsed, for briny finish |
[recipe_ingredient_scaler]
The flounder is paramount here. Wild-caught from a trusted fishmonger ensures superior texture and flavor over farmed varieties. Look for fillets with glistening, translucent flesh and a mild ocean scent—avoid anything with a fishy odor. Whole Foods or local seafood markets typically carry high-quality options. Request skin-on fillets if possible, as this aids in achieving that coveted golden crust.
No flounder? Sole or tilapia can be substituted, though cooking times may vary slightly. For a gluten-free version, replace the all-purpose flour with rice flour or cornstarch. If capers are unavailable, chopped green olives provide a similar briny note. The butter can be swapped for ghee if you prefer a higher smoke point, but avoid margarine as it lacks the depth of flavor.
Serve immediately for the best texture, as the crust softens over time. Leftovers, if any, keep in the fridge for 1-2 days but are best avoided—this dish truly shines fresh. If you must store, gently reheat in a skillet to revive some crispness.
Why You’ll Love This Recipe
- One Pan Wonder: I love that I can go from fillets to plate with just a skillet and a spatula. No fancy tools, no extra dishes.
- Buttery Crisp: That first bite of flounder with its golden, buttery crust and tender center is pure satisfaction. The salt and pepper bring out the flounder’s natural sweetness.
- Weeknight Hero: Honestly, this is my go-to for busy evenings. It’s ready faster than takeout and feels like a restaurant meal.
- Budget Friendly: Flounder fillets stretch further than you’d think, and the rest is pantry staples. I’ll be real: it’s a solid, affordable way to get seafood on the table.
Step-by-Step Instructions for Flounder Pan Fried
Master the technique for achieving a golden crust and buttery flavor with this straightforward method.
Step 1: Season and Dredge the Flounder Fillets
Pat the 1.5 lb Flounder Fillets completely dry with paper towels—this ensures a crispy coating. Season both sides evenly with 1 tsp Kosher Salt and 0.5 tsp Freshly Ground Black Pepper, reserving the remaining 0.5 tsp Kosher Salt for later.
Spread the 0.5 cup All-Purpose Flour on a shallow plate. Lightly dredge each fillet in the flour, shaking off any excess. The flour should create a thin, even layer that will crisp beautifully in the pan. Set the dredged fillets aside on a clean plate.
Step 2: Sear the Fillets in Hot Oil and Butter
Heat a large skillet over medium-high heat and add the 2 tbsp Olive Oil and 2 tbsp Unsalted Butter. Allow the butter to melt and foam, but avoid letting it brown—this indicates it’s too hot.
Carefully place the flounder fillets in the skillet, skin-side down. Cook for 3-4 minutes until the edges turn golden brown and the skin is crisp. Avoid moving the fillets during this time to ensure even browning. Gently flip and cook for an additional 2-3 minutes until the fish is opaque and flakes easily with a fork.
Step 3: Baste with Garlic-Infused Butter and Finish
Reduce the heat to medium and add the remaining 4 tbsp Unsalted Butter, the minced 2 cloves Garlic Cloves, and the zest of the 1 whole Lemon to the skillet. Tilt the pan slightly and spoon the melted butter, garlic, and lemon zest over the fillets repeatedly for 1-2 minutes.
This basting technique infuses the flounder with rich, aromatic flavor while adding a glossy finish. The garlic should sizzle but not burn. Remove the skillet from heat once the butter is fully incorporated and the fillets are cooked through.
Step 4: Garnish and Serve Immediately
Transfer the flounder fillets to a serving platter. Squeeze the juice from the 1 whole Lemon over the fillets, then sprinkle with the 2 tbsp Capers and 0.25 cup Fresh Parsley. The capers add a briny contrast, while the parsley introduces freshness.
The remaining 0.5 tsp Kosher Salt can be sprinkled over the top to enhance the flavors. Serve immediately while the crust is still crisp and the butter sauce is warm. Each bite should deliver tender, flaky fish with a golden, buttery exterior.
Pro Tips For Making Recipe Flounder Pan Fried
- Pat Fillets Dry: I learned this the hard way—moisture on the flounder prevents a good crust. Press between paper towels before dredging in flour.
- Heat the Pan First: Get that skillet screaming hot before adding butter, then lay fillets down gently. Sounds obvious, but cold starts make soggy fish.
- Skip the Overcrowding: After burning three batches, I finally figured out one fillet at a time (or two in a large pan) keeps the temperature stable.
- Use Clarified Butter: My grandmother swore by this, and she was right: regular butter burns too fast, but clarified gives that rich flavor without black bits.
Essential Equipment for Perfect Results
Skillet Selection
I always reach for my 12-inch cast iron skillet for this dish—its even heat distribution ensures perfect browning without hot spots. A Lodge or Le Creuset works brilliantly. Avoid nonstick pans; they can’t handle the high heat needed for that golden crust. 🔥
Tongs for Precision
Long-handled stainless steel tongs give you the control to flip delicate fillets without breaking them. I prefer OXO Good Grips for their comfortable handle and precise grip. Never use a spatula—it can crush the fish.
Temperature Control
An instant-read thermometer is invaluable for confirming doneness. I use a ThermoWorks ThermoPop to check internal temp hits 145°F. This prevents overcooking while ensuring food safety.
Butter Basting Tool
A heat-resistant silicone basting spoon lets you drizzle that garlic butter over the fillets without burning your fingers. Look for one with a long handle and deep bowl, like the RSVP Endurance.
Paper Towel Trick
Keep a stack of high-quality paper towels handy for patting fillets dry before dredging. I use Bounty for its absorbency. Dry fish means a crispier crust—this step is non-negotiable.
Splatter Screen
Frying butter can get messy. A stainless steel splatter screen protects your stovetop and your arms from hot oil. I place mine over the skillet during the initial sear for peace of mind.
Nutrition Facts
Frequently Asked Questions
What’s the best oil for pan-frying?
Use a neutral oil with a high smoke point like olive oil. It won’t overpower the delicate flounder flavor and handles the medium-high heat needed for crisping.
How do I know when it’s done?
Look for opaque flesh that flakes easily with a fork. The internal temperature should reach 145°F. Overcooking makes it dry, so check early.
Can I substitute another fish?
Yes! Try sole or tilapia for similar results. Adjust cooking time slightly based on thickness—thinner fillets need 1-2 minutes less per side.
Why is my crust not crispy?
Pat fillets completely dry before dredging. Use medium-high heat and avoid moving them in the pan. These steps ensure a golden, crispy crust.

Trained in classic French technique but raised on slow-cooked ribs and spicy rubs, she blends culinary skill with smoke and soul.
- Recipe for Cut Up Chicken: One-Pan Crispy Bites - October 3, 2026
- Recipe For Oven Baked Haddock: Buttery Crumbs With Zesty Lemon Topping - October 3, 2026
- Recipe For Fried Salmon Patties With Flour: Crispy Golden Crust With Flaky Centers - October 3, 2026