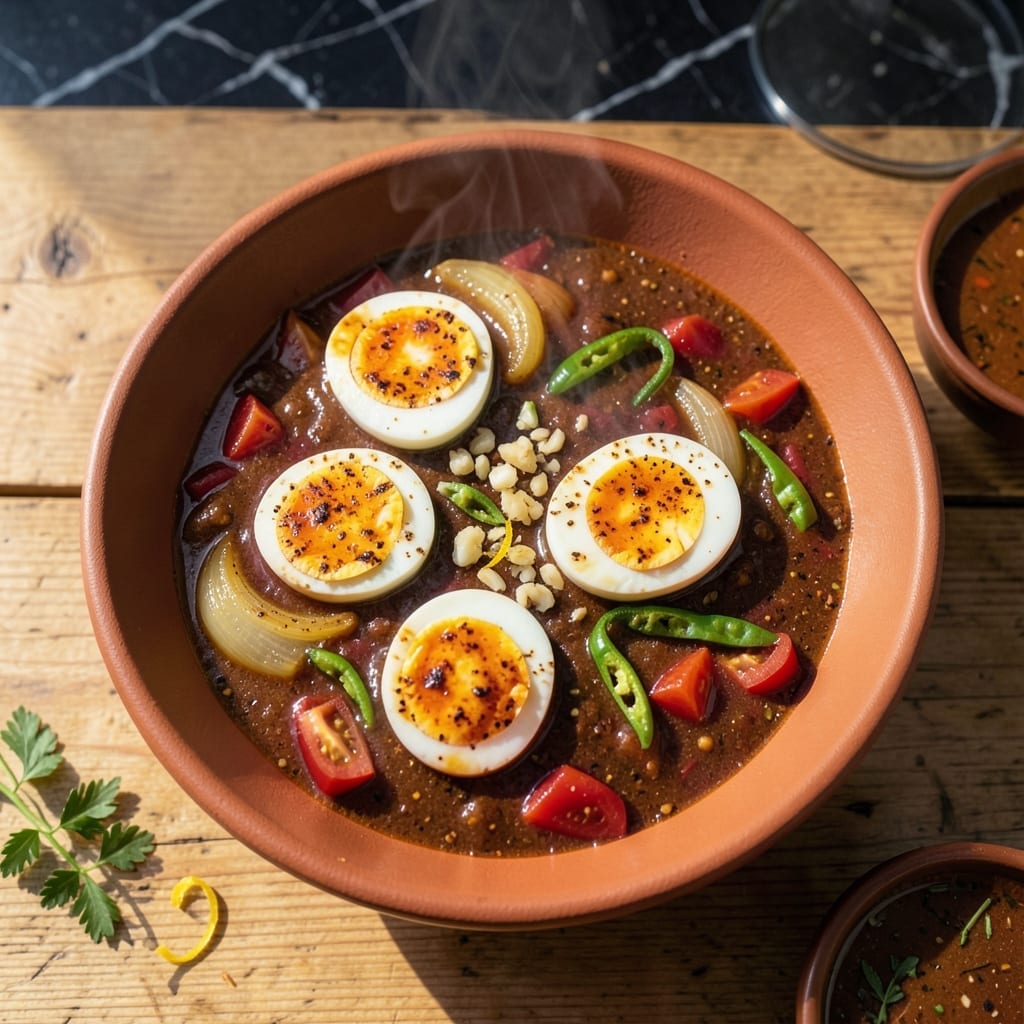
This North Indian classic transforms humble eggs into a rich, aromatic curry that’s both comforting and deeply flavorful.
A simple blend of onions, tomatoes, and warm spices creates a velvety sauce that perfectly coats each egg, delivering traditional taste with every bite.
Ingredients for Recipe for Anda Curry
Transform humble eggs with aromatic spices and velvety tomato sauce for authentic North Indian flavor.
| Ingredient | Amount | Notes |
|---|---|---|
| Hard-Boiled Eggs 🥚 | 8 whole | Peeled, halved lengthwise |
| Yellow Onions 🧅 | 2 whole | Finely diced for base |
| Garlic Cloves 🧄 | 6 cloves | Minced for aromatic depth |
| Fresh Ginger 🌿 | 1 tbsp | Grated for freshness |
| Roma Tomatoes 🍅 | 4 whole | Pureed for smooth sauce |
| Green Chilies 🌶️ | 2 whole | Slit lengthwise, seeds removed |
| Ground Cumin 🌿 | 1 tsp | Toasted for earthy aroma |
| Ground Coriander 🌿 | 1 tsp | Freshly ground preferred |
| Turmeric Powder 🌶️ | ½ tsp | For golden color |
| Garam Masala 🌿 | 1 tsp | Freshly ground for potency |
| Kashmiri Red Chili Powder 🌶️ | 1 tsp | For vibrant color, mild heat |
| Cilantro Leaves 🌿 | ¼ cup | Chopped, for garnish |
| Vegetable Oil 🫒 | 3 tbsp | Neutral flavor for cooking |
| Heavy Cream 🥛 | ½ cup | Optional, for richness |
| Salt 🧂 | 1 tsp | Adjust to taste |
[recipe_ingredient_scaler]
The eggs are the foundation, so use the freshest you can find—organic or farm-fresh if possible. Kashmiri red chili powder is non-negotiable for that signature vibrant hue without overwhelming heat. For authentic flavor, source your garam masala and cumin from an Indian specialty store or Patel Brothers. The ginger and garlic should be fresh; pre-minced lacks the necessary punch.
No Kashmiri chili? Sweet paprika plus a pinch of cayenne mimics the color and mild heat. Fresh cilantro can be swapped with parsley (less authentic but works). Coconut milk at half the quantity replaces heavy cream for a dairy-free version. Roma tomatoes are ideal for their low water content, but any ripe tomato will do—just drain excess liquid after pureeing.
The curry develops flavor overnight. Store in an airtight container in the fridge for up to 3 days. Reheat gently to avoid breaking the eggs. The sauce can be made ahead and frozen for up to 3 months—add eggs fresh when serving.
Why You’ll Love This Recipe
- One-Pot Wonder: I toss everything in a single pan—onions, tomatoes, and eggs soak up the ginger-garlic magic with almost no cleanup.
- Flavor Bomb: The blend of fresh ginger and caramelized onions with the tomatoes creates a rich, tangy sauce that clings perfectly to the eggs.
- Weeknight Hero: It’s my go-to when I need something hearty for dinner but don’t want to spend hours in the kitchen (Yes, even on a Tuesday night).
- Budget Winner: Hard-boiled eggs stretch further than meat, and the spices transform simple ingredients into a meal that feels indulgent.
Step-by-Step Instructions for Anda Curry
Master the technique for this aromatic dish with precise timing and layering of spices.
Step 1: Prepare the Aromatic Base
Heat the 3 tbsp vegetable oil in a heavy-bottomed pan over medium heat. Add the 2 whole yellow onions and sauté for 8-10 minutes until they turn golden brown and translucent. This slow cooking caramelizes the natural sugars, building a deep flavor foundation.
Add the 6 cloves garlic cloves, 1 tbsp fresh ginger, and 2 whole green chilies. Sauté for 2-3 minutes until the raw aroma dissipates and the mixture becomes fragrant. Stir frequently to prevent burning—the ginger and garlic can catch quickly at this stage.
Step 2: Develop the Spiced Tomato Sauce
Pour in the pureed 4 whole Roma tomatoes and cook for 5-7 minutes until the mixture thickens and the oil begins to separate at the edges. This visual cue indicates the tomatoes have broken down and the water content has evaporated.
Add the 1 tsp ground cumin, 1 tsp ground coriander, 0.5 tsp turmeric powder, 1 tsp Kashmiri red chili powder, and 1 tsp salt. Stir well and cook for 2-3 minutes to toast the spices. The turmeric will deepen in color, and the mixture will become increasingly aromatic.
Step 3: Simmer and Finish the Curry
Reduce the heat to low and add ½ cup water to create a smooth, pourable consistency. Simmer for 5 minutes to allow the flavors to meld together. The sauce should coat the back of a spoon with a glossy sheen.
Gently add the 8 whole hard-boiled eggs, halved lengthwise, ensuring they are fully submerged in the sauce. Simmer for 3-4 minutes to allow the eggs to absorb the flavors. Avoid boiling vigorously, as this can cause the egg yolks to break apart.
Step 4: Add Cream and Final Touches
Stir in the ½ cup heavy cream and 1 tsp garam masala. The cream will lighten the sauce and add a velvety texture, while the garam masala introduces a warm, complex depth. Simmer for an additional 2 minutes to heat through.
Taste and adjust the salt if needed. The final sauce should be rich, aromatic, and balanced, with the eggs tender and infused with the spices. Garnish with the ¼ cup cilantro leaves just before serving to add freshness and a pop of color.
Pro Tips For Making Recipe For Anda Curry
- Boil Eggs Firm: Hard-boil the eggs for exactly 9-10 minutes in salted water—any less and the yolks won’t hold up in the curry, any more and they turn that unappetizing greenish-gray.
- Sauté Onions Slow: Cook the yellow onions on medium-low heat until deep golden brown, about 15 minutes; I learned this the hard way—rushing them leaves the curry tasting raw and thin.
- Grind Ginger Fine: Grate the fresh ginger into a paste rather than mincing it—this way it melts into the sauce instead of leaving chewy bits between your teeth.
- Skin Tomatoes First: Drop the Roma tomatoes in boiling water for 30 seconds, then ice water, to peel them easily; skipping this makes the curry texture uneven.
Storing and Reheating recipe for anda curry
Refrigerator Storage
Let the curry cool completely before transferring to airtight containers. It keeps beautifully in the fridge for up to 3 days. The flavors actually deepen overnight as the spices continue to meld. ❄️
Freezer Storage
For longer storage, freeze the sauce separately in quart-sized freezer bags for up to 3 months. I recommend leaving the eggs out and adding fresh ones when reheating to maintain texture. Squeeze out excess air to prevent freezer burn.
Stovetop Reheating
This is my preferred method. Reheat the sauce over medium-low heat for 5-7 minutes, stirring occasionally. Add the eggs in the last 2-3 minutes to warm through without overcooking. Add a splash of water if the sauce thickens too much. 🔥
Microwave Reheating
For quick meals, microwave individual portions covered with a damp paper towel. Heat on 70% power for 1-2 minutes, stir, then continue in 30-second intervals until reaching 165°F. The eggs stay intact with this gentle approach.
Make-Ahead Tip
Prepare the sauce a day ahead and refrigerate. The flavors will be even more complex. When ready to serve, reheat the sauce and add freshly boiled eggs. I often do this for dinner parties—it saves so much time.
Nutrition Facts
Frequently Asked Questions
Can I make this with soft-boiled eggs instead?
Soft-boiled eggs work but may break apart in the sauce. For best results, use firm hard-boiled eggs to maintain shape during simmering. If using soft-boiled, add them last and cook for only 1-2 minutes.
What if I don’t have Kashmiri chili powder?
Substitute with ½ tsp sweet paprika and ¼ tsp cayenne for color and mild heat. This combo mimics the vibrant hue and gentle spice profile of Kashmiri powder.
How do I prevent the sauce from curdling when adding cream?
Always add cream to warm sauce over low heat and stir constantly. Avoid boiling after adding cream to maintain a smooth, velvety texture.

Trained in classic French technique but raised on slow-cooked ribs and spicy rubs, she blends culinary skill with smoke and soul.
- Recipe for Boneless Pork Chops in Cast Iron Skillet: Sear and Baste to Juicy Perfection - October 3, 2026
- Recipe for Boneless Cross Rib Roast: Slow-Roasted Beef with Herb Crust - October 3, 2026
- Hamburgers in Sauce Recipe Crock Pot: Slow-Cooked Savory Delight - October 3, 2026