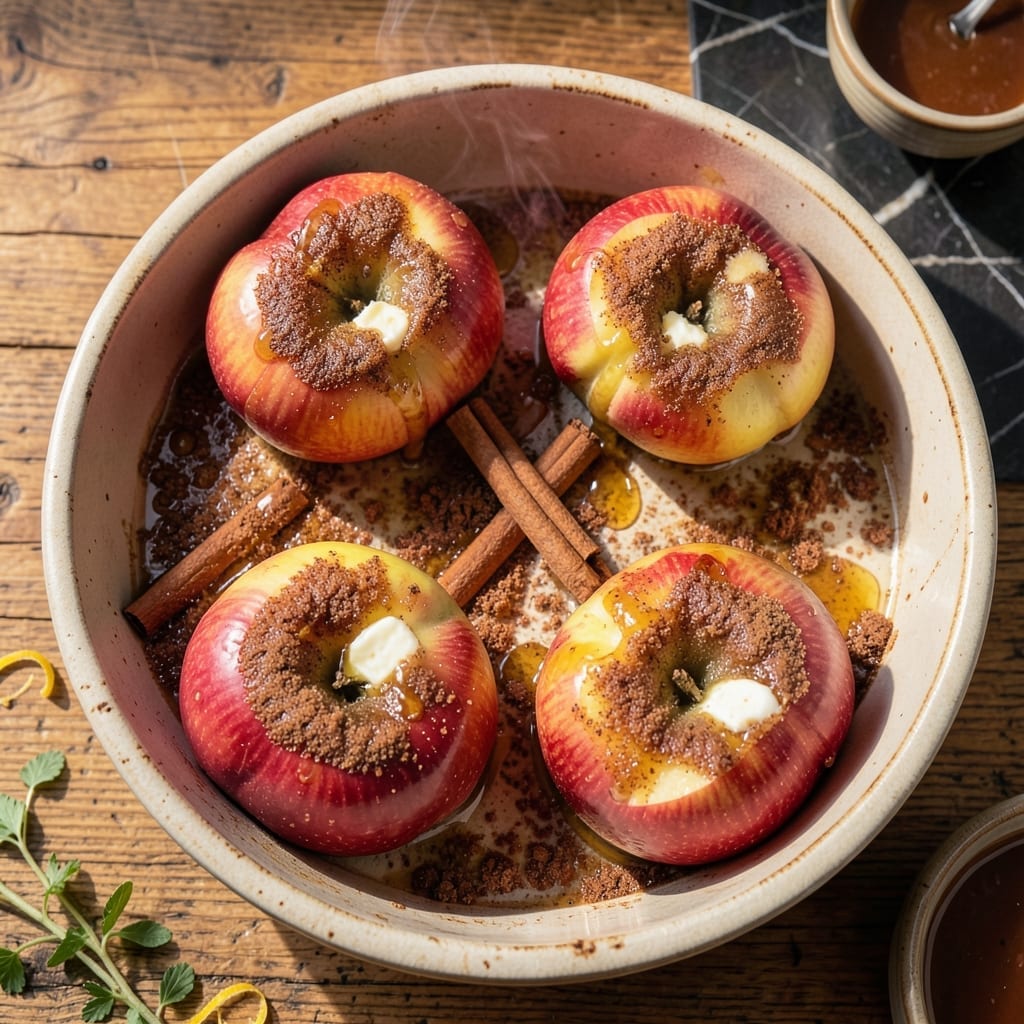
There’s something deeply comforting about warm baked apples filling your kitchen with their spiced aroma. This simple dessert transforms ordinary fruit into something extraordinary with minimal effort.
The key is coring the apples properly and choosing varieties that hold their shape during baking. A touch of cinnamon and a drizzle of honey enhance their natural sweetness without overpowering it.
What emerges from the oven is tender apples with caramelized centers, their juices bubbling with warm spices. The contrast between the soft fruit and any added crunchy toppings makes every bite satisfying.
Serve with vanilla ice cream or whipped cream for an easy yet impressive finish to any meal.
Ingredients for Recipe for Baked Apples in Oven
Pantry staples and fresh apples create this warm, spiced dessert with minimal effort.
| Ingredient | Amount | Notes |
|---|---|---|
| Honeycrisp Apples 🍎 | 4 whole | Cored, stems intact for presentation |
| Granulated Sugar 🍚 | ¼ cup | Or substitute brown sugar |
| Ground Cinnamon 🌿 | 1 ½ tsp | Ceylon for delicate flavor |
| Honey 🍯 | 2 tbsp | Local raw preferred |
| Unsalted Butter 🧈 | 2 tbsp | Melted, for filling |
| Vanilla Extract 🌿 | 1 tsp | Pure, not imitation |
| Chopped Walnuts 🥜 | ¼ cup | Lightly toasted for crunch |
| Raisins 🍇 | ¼ cup | Optional for texture contrast |
| Old-Fashioned Rolled Oats 🌾 | ¼ cup | For topping texture |
| Salt 🧂 | 0.125 tsp | Fine sea salt preferred |
| Lemon Juice 🍋 | 1 tsp | Freshly squeezed to prevent browning |
[recipe_ingredient_scaler]
The apples are everything. Honeycrisp or Granny Smith hold their shape best during baking—avoid Red Delicious, which turn to mush. Look for firm fruit with smooth skin at your local farmers market or grocery store. For the cinnamon, Ceylon variety has a more delicate, citrusy note than Cassia. The honey should be raw and local if possible (that thick, cloudy kind in glass jars).
No Honeycrisp? Granny Smith or Braeburn work beautifully too. Swap honey for maple syrup at equal volume—just know the flavor profile changes slightly. Skip the raisins if you dislike them, or use dried cranberries for tartness. The walnuts can be pecans or almonds (toast them first). For a gluten-free version, certified GF oats do the trick.
Prepared apples can sit 1 hour at room temperature before baking (cover with plastic to prevent browning). Baked apples keep 2-3 days refrigerated, though they’re best served warm. Reheat in a 350°F oven for 10-15 minutes to revive that just-baked goodness.
Why You’ll Love This Recipe
- Set and Forget: I toss the Honeycrisp apples in the pan, drizzle with honey, and let the oven do the work.
- Warm Spice Hug: That cinnamon-sugar butter melts into the apples and fills the kitchen with the best smell.
- Crowd Pleaser: From Sunday brunch to a weeknight dessert, these disappear fast—no complaints, ever.
Step-by-Step Instructions for Baked Apples in Oven
This method ensures perfectly tender apples with a caramelized, spiced filling every time.
Step 1: Prepare and Core the Apples
Preheat your oven to 375°F. Wash and dry all 4 whole Honeycrisp Apples thoroughly, then remove the cores using an apple corer or a small knife, being careful to leave the bottoms intact so the filling stays contained.
Rub each apple with 1 tsp Lemon Juice to prevent browning and enhance the natural color. This small step makes a noticeable difference in the final presentation. Place the prepared apples in a baking dish that fits them snugly without crowding.
Step 2: Make the Spiced Filling
In a bowl, combine the 0.25 cup Granulated Sugar, 1.5 tsp Ground Cinnamon, 2 tbsp Honey, 2 tbsp Unsalted Butter, 1 tsp Vanilla Extract, and 0.125 tsp Salt. Mix until the ingredients form a thick, cohesive paste.
Stir in the 0.25 cup Chopped Walnuts and 0.25 cup Raisins until evenly distributed. The texture should be chunky but well incorporated. This filling will caramelize beautifully as the apples bake, creating a rich, fragrant center.
Step 3: Fill and Top the Apples
Divide the filling evenly among the 4 whole Honeycrisp Apples, pressing it gently into the cores. Mound the filling slightly above the top of each apple—it will settle as it bakes.
Sprinkle the 0.25 cup Old-Fashioned Rolled Oats over the tops of the filled apples, pressing lightly so they adhere to the filling. The oats will toast during baking, adding a delightful crunch to contrast the tender apples.
Step 4: Bake Until Tender
Cover the baking dish loosely with aluminum foil to prevent over-browning. Bake at 375°F for 25 minutes, then remove the foil and bake for an additional 15-20 minutes.
You’ll know they’re done when the apples are tender when pierced with a knife and the filling is bubbly and golden brown. The aroma of cinnamon and caramelized sugar will fill your kitchen—this is your sensory cue that they’re ready.
Let the apples cool for 5-10 minutes before serving. This allows the filling to set slightly, making it easier to serve without spilling. The residual heat will continue to soften the apples just enough to reach perfect doneness.
Pro Tips For Making Recipe For Baked Apples In Oven
- Core the Apples: Use an apple corer or small knife to remove the core completely, but leave the bottom intact so the filling stays put—this keeps the apples from collapsing in the oven.
- Preheat the Oven: Set it to 375°F and give it a full 15 minutes to reach temperature. I learned this the hard way after my first batch came out unevenly cooked.
- Score the Skin: Lightly slice the skin in a few places around each apple to prevent bursting as they bake—sounds weird, but it works.
- Melt Butter First: Mix the butter with honey and cinnamon while it’s still warm so it blends smoothly into the sugar filling—no clumps, no fuss.
Serving Suggestions for This Recipe
Ice Cream Pairing
Vanilla ice cream is my go-to companion for these warm apples. The contrast between hot and cold is irresistible. I prefer Ben & Jerry’s Vanilla for its creamy texture, but any quality brand works beautifully. 💛
Whipped Cream Option
For a lighter touch, top each apple with a dollop of freshly whipped cream. Add ½ tsp vanilla extract and 1 tsp granulated sugar per ½ cup heavy cream for best results. The cream’s coolness balances the warm spices perfectly.
Yogurt Alternative
Greek yogurt offers a tangy contrast that cuts through the sweetness. Use full-fat plain yogurt and stir in 1 tbsp honey per cup before serving. I love how it adds protein while keeping the dessert light.
Crunchy Toppings
Enhance texture with ¼ cup toasted pecans or granola sprinkled over the top. The crunch complements the soft apples wonderfully. I keep a bag of Nature’s Path granola on hand for this exact purpose.
Sauce Drizzle
A caramel or butterscotch sauce takes this to restaurant-level elegance. Warm ¼ cup store-bought caramel sauce with 1 tbsp bourbon for an adult twist. Drizzle just before serving for maximum visual impact.
Plating Tips
Serve each apple in a shallow bowl to catch all the delicious juices. Garnish with a cinnamon stick or mint sprig for a simple but stunning presentation. I always save the baking dish juices to spoon over the top.
Nutrition Facts
Frequently Asked Questions
How do I know when they’re done?
Pierce the thickest part with a knife—it should slide in easily. The filling will be bubbly and golden brown at about 40-45 minutes total.
Can I prep them ahead?
Yes! Core and fill apples up to 1 hour before baking, then cover. Refrigerate filled apples up to 24 hours, but add 5-10 minutes baking time.
What if my apples collapse?
This happens with overripe fruit. Choose firm varieties like Granny Smith or Honeycrisp and avoid overbaking. Check at 35 minutes if unsure.
Can I make these gluten-free?
Use certified gluten-free oats and check that all other ingredients are GF. The recipe works exactly the same.

Trained in classic French technique but raised on slow-cooked ribs and spicy rubs, she blends culinary skill with smoke and soul.
- Recipe for Boneless Pork Chops in Cast Iron Skillet: Sear and Baste to Juicy Perfection - October 3, 2026
- Recipe for Boneless Cross Rib Roast: Slow-Roasted Beef with Herb Crust - October 3, 2026
- Hamburgers in Sauce Recipe Crock Pot: Slow-Cooked Savory Delight - October 3, 2026