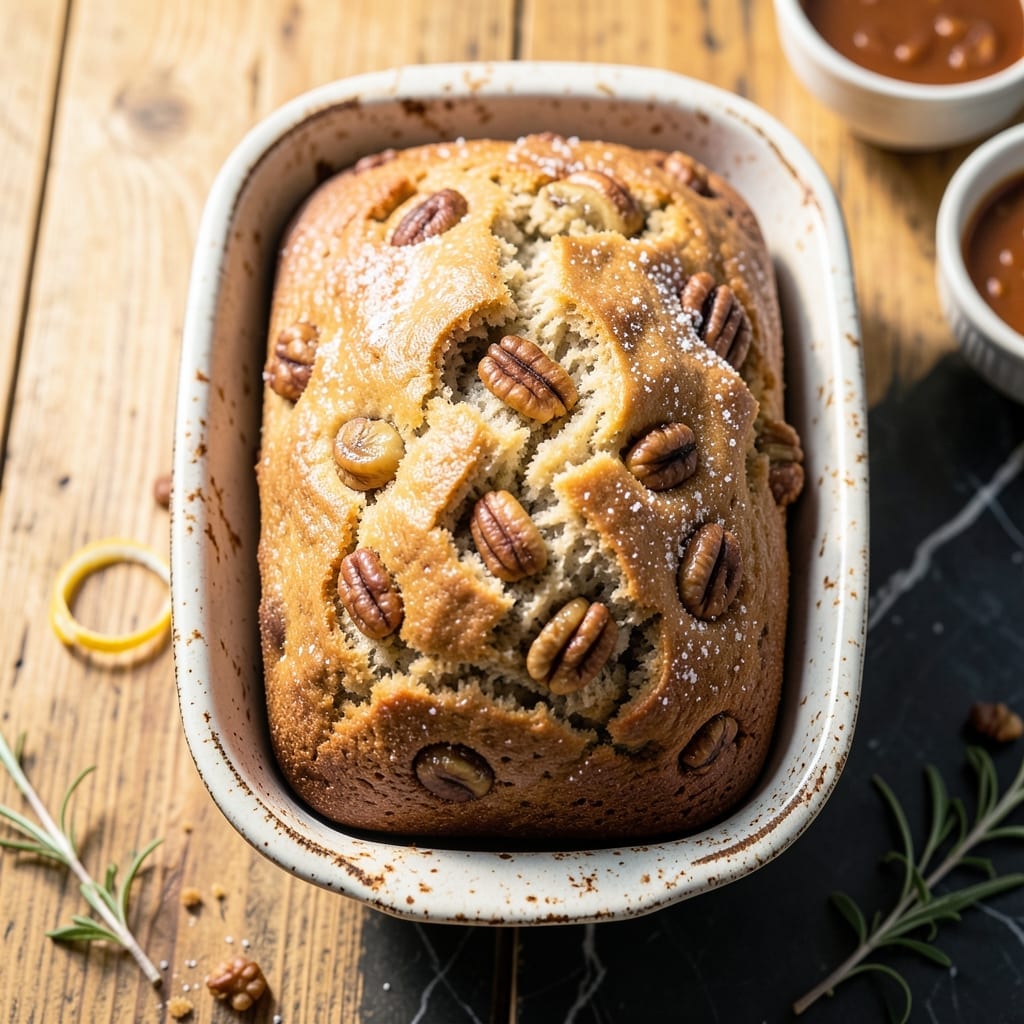
This banana nut bread delivers perfect results every time, thanks to the magic of self-rising flour. No yeast required—just simple mixing and baking.
The flour does all the work, creating a tender crumb studded with crunchy nuts. Warm, fragrant, and ready to enjoy straight from the oven.
Ingredients for Recipe for Banana Nut Bread Made with Self Rising Flour
Self-rising flour does the heavy lifting here. Just mix, bake, and enjoy warm bread.
| Ingredient | Amount | Notes |
|---|---|---|
| Ripe Bananas 🍌 | 3 whole | Very ripe, mashed (about 1.5 cups) |
| Self-Rising Flour 🌾 | 2 cups | Sifted for best texture |
| Granulated Sugar 🍚 | ¾ cup | White or light brown works |
| Large Eggs 🥚 | 2 whole | Room temperature preferred |
| Vegetable Oil 🫒 | ½ cup | Or melted butter for richness |
| Vanilla Extract 🌿 | 1 tsp | Pure vanilla for best flavor |
| Chopped Walnuts 🥜 | 1 cup | Toasted for extra crunch |
| Ground Cinnamon 🌶️ | 1 tsp | Optional but recommended |
| Salt 🧂 | ¼ tsp | Balances sweetness |
| Baking Soda 🧪 | ¼ tsp | Helps with rise |
[recipe_ingredient_scaler]
The bananas are key—look for heavily speckled peels. They should feel soft to the touch and smell sweet. Self-rising flour is non-negotiable here (it’s the secret to the rise), and I’ve had the best luck with White Lily at the grocery store. The walnuts? Toast them first—it’s worth the extra five minutes for that deep, nutty flavor.
No self-rising flour? All-purpose plus baking powder and salt works (1 cup AP + 1.5 tsp baking powder + 0.25 tsp salt). Out of walnuts? Pecans or almonds are great swaps. Brown sugar instead of white gives a deeper molasses note. If you want to make it extra fancy, add a handful of chocolate chips (trust me on this one).
This loaf stays moist for 3-4 days wrapped tightly at room temp. Freeze slices for up to 3 months—just pop them straight in the toaster. Bananas freeze beautifully too (peel first), so stock up when they’re on sale.
Why You’ll Love This Recipe
- One Bowl Magic: No mixer, no fuss—just mash the bananas, stir in the self-rising flour, and you’re halfway done before the oven preheats.
- Ridiculously Moist: The vegetable oil keeps it tender for days, while the ripe bananas add that deep, caramelized sweetness I crave.
- Breakfast or Dessert: I slice it thick for morning toast or warm a piece with ice cream for an after-dinner treat. Honestly, it works any hour.
- Budget Stretch: Three overripe bananas and pantry staples make two loaves. I’ll be real: it’s my go-to for using up fruit before it’s compost.
Step-by-Step Instructions for Banana Nut Bread with Self-Rising Flour
Here’s the method I use for perfect banana bread every time.
Step 1: Mash Bananas and Toast Walnuts
Peel the 3 whole ripe bananas and place them in a large mixing bowl. Mash them with a fork until mostly smooth with some small lumps remaining—this gives the bread a nice texture. I like to use bananas that are heavily speckled or even slightly brown; the riper they are, the sweeter your bread will be.
While the bananas are mashing, spread the 1 cup chopped walnuts on a baking sheet and toast them in a 350°F oven for 8-10 minutes until fragrant and lightly golden. Watch them closely—they burn easily. Set them aside to cool completely before adding to the batter.
Step 2: Mix Wet and Dry Ingredients Separately
In the bowl with the mashed bananas, whisk in the 0.75 cup granulated sugar, 2 whole large eggs, 0.5 cup vegetable oil, and 1 tsp vanilla extract until smooth. I always use room temperature eggs—they incorporate better into the batter. The mixture should look slightly pale and well combined.
In a separate bowl, whisk together the 2 cups self-rising flour, 1 tsp ground cinnamon, 0.25 tsp salt, and 0.25 tsp baking soda. This ensures the leavening agents are evenly distributed, which is key for a consistent rise. The cinnamon adds warmth, but you can omit it if you prefer a classic flavor.
Step 3: Combine and Fold in Walnuts
Pour the dry ingredients into the wet mixture and fold gently with a spatula just until combined. Be careful not to overmix—this can make the bread dense. A few flour streaks are fine; they’ll disappear as the batter rests.
Fold in the toasted 1 cup chopped walnuts until evenly distributed. The toasted walnuts add a nutty depth and extra crunch that pairs perfectly with the sweetness of the bananas. If the batter seems thick, don’t worry—that’s normal with self-rising flour.
Step 4: Bake Until Golden and Fragrant
Pour the batter into a greased 9×5-inch loaf pan and smooth the top with a spatula. Bake in a preheated 350°F oven for 50-60 minutes, or until a toothpick inserted in the center comes out clean or with a few moist crumbs.
Start checking at 50 minutes—ovens vary, and you don’t want to overbake. The bread is done when the top is deep golden brown and the edges pull slightly away from the pan. If the top browns too quickly, tent it loosely with foil for the remaining time.
Step 5: Cool Completely Before Slicing
Remove the bread from the oven and let it cool in the pan for 10 minutes. Then, transfer it to a wire rack and let it cool completely for at least 1 hour. I know it’s tempting to slice into it right away, but cooling allows the crumb to set properly.
Once cooled, slice with a serrated knife for clean cuts. The bread should be moist, tender, and packed with banana flavor, with a perfect rise thanks to the self-rising flour. Serve it warm or at room temperature, and store any leftovers tightly wrapped for up to 3 days.
Pro Tips For Making Recipe For Banana Nut Bread Made With Self Rising Flour
- Test Banana Ripeness: Use bananas with plenty of brown spots—they’re sweeter and mash easier. I learned this the hard way after using underripe ones and ending up with bland bread.
- Skip Overmixing: Stir the batter just until the flour disappears; overmixing makes the bread dense. After a few tough loaves, I finally got the hang of it.
- Check at 50 Minutes: Ovens vary, so start testing doneness with a toothpick at 50 minutes—better to pull it early than end up with a dry loaf.
- Add Nuts Last: Fold in the nuts after the batter is combined to keep them from sinking. Sounds weird, but it works and saves you from a soggy bottom.
Flavor Customization for This Dish
Sweet Heat Twist
Add ½ tsp cayenne pepper to the dry ingredients for a surprising kick that plays beautifully against the bananas’ natural sweetness. I discovered this combo at a Southern bakery and haven’t looked back. The heat builds subtly with each bite. 🌶️
Chocolate Lovers’ Version
Fold in ½ cup semi-sweet chocolate chips along with the walnuts. Use Guittard brand for chips that hold their shape. The melted chocolate creates pockets of richness that make this taste like a cross between bread and brownie.
Tropical Infusion
Swap ½ cup walnuts for ½ cup toasted coconut flakes and add 1 tsp lime zest to the wet ingredients. This variation transports you to a beachside café with its bright, island-inspired flavors.
Spiced Chai Bread
Enhance the cinnamon by adding ¼ tsp each cardamom, ginger, and cloves to the dry mix. This chai-inspired blend works especially well when served with a cup of Earl Grey tea. The warm spices deepen the banana’s natural caramel notes.
I recommend grinding whole spices fresh for maximum aroma. ✨
Nut-Free Option
Omit the walnuts entirely or replace with ½ cup sunflower seeds for a school-friendly version. The seeds provide similar crunch and healthy fats without the allergen concerns. Toast them just like the walnuts.
Nutrition Facts
Frequently Asked Questions
Can I substitute all-purpose flour?
Yes, but you’ll need to add 1.5 tsp baking powder and 0.25 tsp salt per 1 cup of all-purpose flour to mimic self-rising. The texture will be slightly different but still delicious.
How do I know when the bread is done?
A toothpick inserted in the center should come out clean or with a few moist crumbs. The top will be deep golden brown, and the edges will pull slightly from the pan.
Can I use a different type of nut?
Pecans or almonds work beautifully. Toast them first for the best flavor. Sunflower seeds are a great nut-free alternative.
How long does it stay fresh?
Wrapped tightly at room temperature, it stays moist for 3-4 days. For longer storage, freeze slices for up to 3 months and toast as needed.

Trained in classic French technique but raised on slow-cooked ribs and spicy rubs, she blends culinary skill with smoke and soul.
- Recipe for Boneless Pork Chops in Cast Iron Skillet: Sear and Baste to Juicy Perfection - October 3, 2026
- Recipe for Boneless Cross Rib Roast: Slow-Roasted Beef with Herb Crust - October 3, 2026
- Hamburgers in Sauce Recipe Crock Pot: Slow-Cooked Savory Delight - October 3, 2026