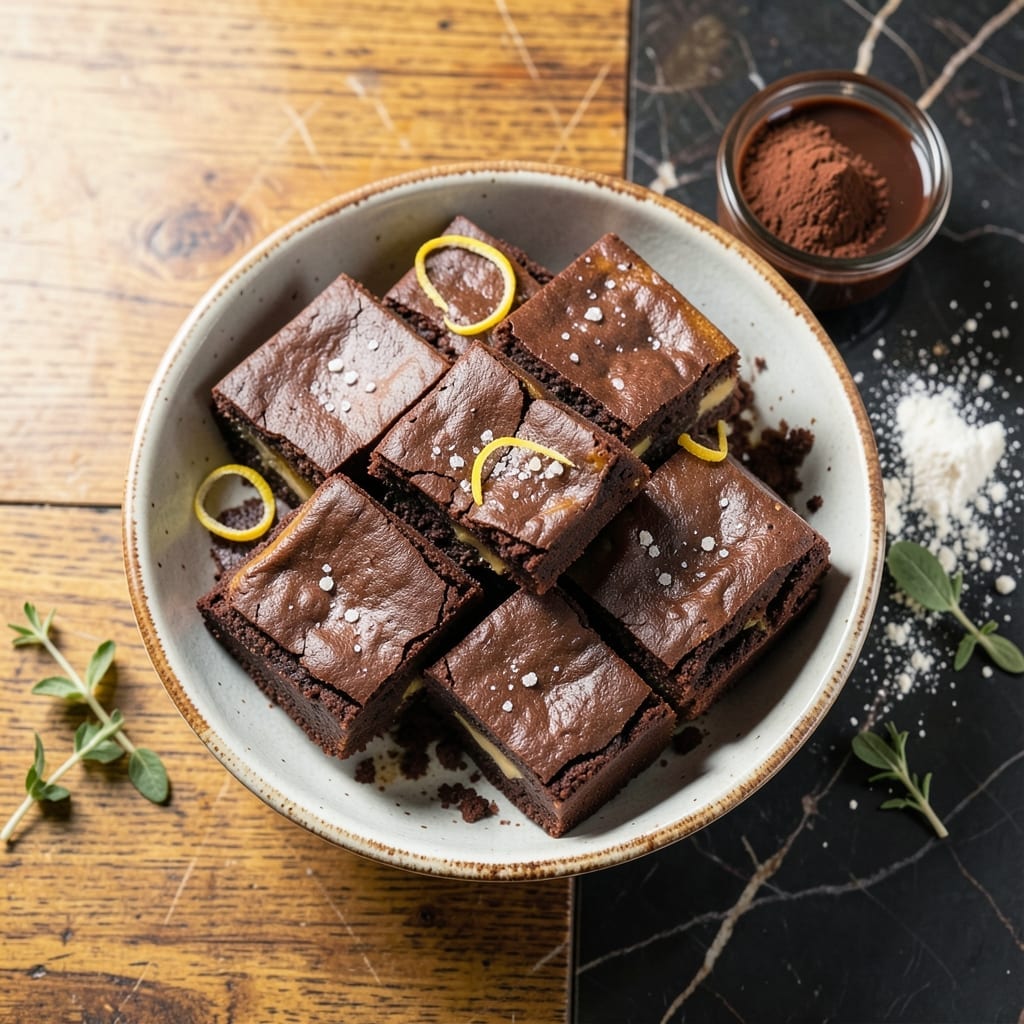
This cocoa-based brownie recipe delivers fudgy centers and crackly tops with minimal effort. The secret lies in using quality cocoa powder as the primary chocolate source.
A simple batter comes together quickly, then bakes to perfection. The result is rich, dense, and deeply chocolatey—exactly what you want in a classic brownie.
Ingredients for Recipe for Chocolate Brownies with Cocoa
Quality cocoa powder and simple pantry staples create rich, fudgy brownies with crackly tops.
| Ingredient | Amount | Notes |
|---|---|---|
| Unsalted Butter 🧈 | 1 cup | Melted and slightly cooled |
| Granulated Sugar 🥄 | 1 ½ cups | Fine white sugar preferred |
| Large Eggs 🥚 | 3 whole | Room temperature for best texture |
| Vanilla Extract 🌿 | 2 tsp | Pure vanilla for depth |
| All-Purpose Flour 🌾 | ¾ cup | Sifted for even distribution |
| Unsweetened Cocoa Powder 🍫 | ¾ cup | High-quality Dutch-process preferred |
| Salt 🧂 | ½ tsp | Fine sea salt for balance |
| Baking Powder 🧂 | ¼ tsp | Ensures slight lift |
| Semi-Sweet Chocolate Chips 🍫 | ½ cup | Optional for extra richness |
| Chopped Walnuts 🌰 | ½ cup | Toasted for crunch (optional) |
[recipe_ingredient_scaler]
The cocoa powder is critical—Dutch-process from Ghirardelli or Hershey’s Special Dark delivers the deepest flavor. Unsalted butter allows you to control the salt content precisely. Whole Foods or Trader Joe’s carry excellent organic options. For the best texture, ensure all ingredients are at room temperature before mixing. A fine sea salt enhances the chocolate notes without overpowering the dish.
No Dutch-process cocoa? Natural cocoa works at the same amount, though the flavor will be slightly more acidic. Swap chocolate chips for chopped chocolate bars if preferred. For a gluten-free version, 1:1 gluten-free flour blend substitutes seamlessly. The walnuts can be omitted or replaced with pecans (or whatever nut you have on hand).
Store brownies in an airtight container at room temperature for up to 5 days. They also freeze beautifully for 3 months. For serving, a brief warming in the microwave restores that fresh-baked texture.
Why You’ll Love This Recipe
- One Bowl Wonder: I just melt the butter, mix in the sugar and eggs, and fold in the flour—no fancy equipment, no fuss.
- Deep Chocolate Fix: Honestly, that rich cocoa flavor with a hint of vanilla hits the spot every time.
- Crowd Pleaser: I’ve served these at potlucks and weeknight desserts—always disappear first.
- Budget Friendly: A batch costs pennies, uses pantry staples, and tastes like a bakery treat.
Step-by-Step Instructions for Chocolate Brownies With Cocoa
Master the technique for dense, fudgy brownies with that signature crackly top layer.
Step 1: Melt and Combine Wet Ingredients
Begin by melting the 1 cup Unsalted Butter in a heatproof bowl over simmering water or in the microwave in 20-second bursts, stirring between each. Allow it to cool slightly—it should be warm but not hot to the touch.
In a large mixing bowl, whisk the melted butter with the 1.5 cups Granulated Sugar until the mixture is smooth and the sugar begins to dissolve. The texture should resemble wet sand. Add the 3 whole Large Eggs one at a time, whisking vigorously after each addition until fully emulsified. Stir in the 2 tsp Vanilla Extract. This foundation creates the fudgy texture and crackly crust.
Step 2: Incorporate Dry Ingredients
In a separate bowl, sift together the 0.75 cup All-Purpose Flour, 0.75 cup Unsweetened Cocoa Powder, 0.5 tsp Salt, and 0.25 tsp Baking Powder. Sifting ensures even distribution and prevents clumps in the batter.
Gradually add the dry mixture to the wet ingredients, folding gently with a silicone spatula just until no streaks of flour remain visible. Overmixing at this stage develops gluten, which can make the brownies cakey instead of dense. The batter will be thick and glossy, with a consistency similar to pudding.
Step 3: Fold in Add-Ins and Prepare the Pan
Gently fold in the 0.5 cup Semi-Sweet Chocolate Chips and 0.5 cup Chopped Walnuts (if using) with a spatula, distributing them evenly throughout the batter. The chocolate chips will melt slightly during baking, creating pockets of gooey richness, while the walnuts add a subtle crunch.
Line a 9×9-inch baking pan with parchment paper, leaving an overhang on two sides for easy removal. Lightly grease the parchment with butter or nonstick spray. Pour the batter into the prepared pan, spreading it evenly with the spatula. The top should be smooth and level.
Step 4: Bake to Crackly Perfection
Preheat the oven to 350°F. Bake the brownies on the center rack for 25-30 minutes, or until a toothpick inserted into the center comes out with a few moist crumbs clinging to it. The edges should be set, and the top should have a thin, papery crust with characteristic cracks.
Avoid overbaking—this is the most common mistake. The brownies will continue to set as they cool, so remove them from the oven when they’re just shy of fully done. The center should still have a slight jiggle when you gently shake the pan.
Step 5: Cool and Slice for Clean Edges
Allow the brownies to cool completely in the pan on a wire rack for at least 1 hour. This resting period is crucial—it lets the structure set so they don’t fall apart when sliced. Resist the temptation to cut into them too soon; the texture improves dramatically with patience.
Once cooled, use the parchment overhang to lift the brownies from the pan. Transfer to a cutting board and slice into 16 squares using a sharp knife. Wipe the knife clean between cuts for neat edges. Serve at room temperature for the best balance of fudgy interior and crackly top.
Pro Tips For Making Recipe For Chocolate Brownies With Cocoa
- Check the Middle: Use a toothpick to test doneness—it should come out with a few moist crumbs, not wet batter. I learned this the hard way after pulling out underbaked brownies that collapsed like sad pancakes.
- Melt Butter Slowly: Brown the butter gently over medium-low heat until it turns golden and nutty, about 5-7 minutes. Sounds weird, but it works: it adds a deep, caramelized flavor that plain melted butter just can’t match.
- Room Temp Eggs: Take your eggs out of the fridge 30 minutes before baking—cold eggs don’t emulsify as well with the sugar and butter. My grandmother swore by this, and she was right: it makes the texture noticeably smoother.
- Line the Pan: Always use parchment paper with overhanging edges, even if it’s a pain. Does it look messy? Yes. Does it guarantee you can lift the whole batch out cleanly without breaking a single corner? Every single time.
Common Mistakes When Making This Dish
Overmixing the Batter
Once you add the dry ingredients, mix just until the flour disappears. Overworking the batter develops gluten, turning your fudgy brownies into cakey ones. I use a silicone spatula and stop as soon as I see no streaks.
Skipping the Parchment
Always line your 9×9-inch pan with parchment paper. Without it, you risk stuck brownies and messy removal. Leave an overhang on two sides for easy lifting—this also makes slicing cleaner.
Overbaking the Batch
Pull the pan at 25-30 minutes when the center still jiggles slightly. The toothpick test should show moist crumbs, not clean. They’ll finish setting as they cool—overbaking dries them out. 🔥
Using Cold Ingredients
Room temperature eggs and butter emulsify better, creating that signature crackly top. I take my eggs out 30 minutes before starting. Cold ingredients can cause the batter to separate.
Ignoring Cocoa Quality
Invest in Dutch-process cocoa like Ghirardelli or Hershey’s Special Dark. Natural cocoa works but lacks depth. The cocoa is your primary flavor source—cheap brands give weak chocolate notes.
Cutting Too Soon
Let them cool completely in the pan—at least 1 hour. Slicing while warm collapses the structure. I know it’s hard to wait, but patience rewards you with clean, professional-looking squares.
Nutrition Facts
Frequently Asked Questions
Can I use natural cocoa instead of Dutch-process?
Yes, natural cocoa works, but it may create a slightly tangier flavor. Use the same 0.75 cup measurement. Dutch-process gives a smoother, richer chocolate taste.
How do I get the perfect crackly top?
Vigorously whisk the eggs and sugar for 2-3 minutes. This incorporates air, which forms the signature crust. Also, let the batter rest for 5 minutes before baking.
Can I add mix-ins to the batter?
Fold in up to 1 cup of extras like chocolate chips, nuts, or dried fruit. Just avoid overloading or the texture may become dense.
Why did my brownies turn out cakey?
Overmixing the batter or using too much flour develops gluten. Mix just until combined and measure flour accurately for fudgy results.

Trained in classic French technique but raised on slow-cooked ribs and spicy rubs, she blends culinary skill with smoke and soul.
- Recipe for Boneless Pork Chops in Cast Iron Skillet: Sear and Baste to Juicy Perfection - October 3, 2026
- Recipe for Boneless Cross Rib Roast: Slow-Roasted Beef with Herb Crust - October 3, 2026
- Hamburgers in Sauce Recipe Crock Pot: Slow-Cooked Savory Delight - October 3, 2026