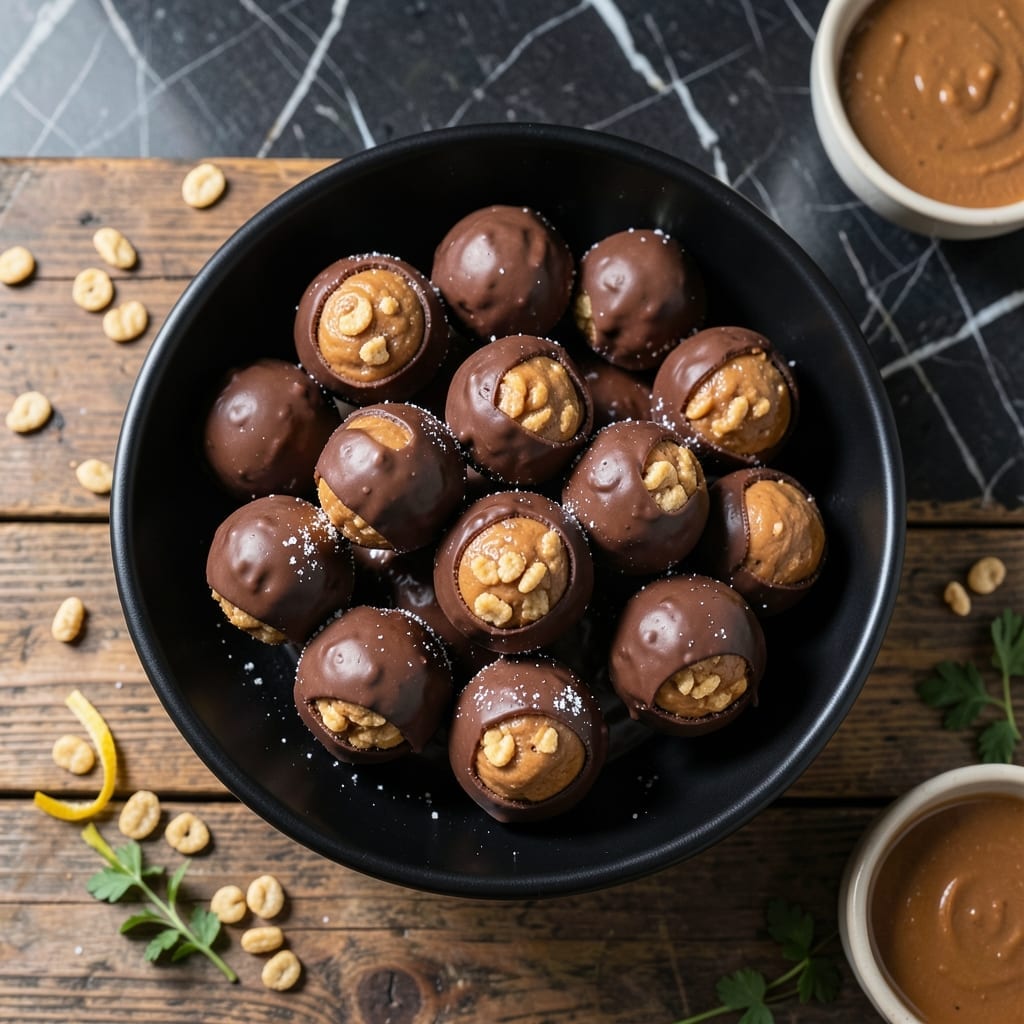
These no-bake treats combine creamy peanut butter, crispy rice cereal, and rich chocolate for a holiday classic. A proven method for perfect texture every time.
Ready in under an hour with simple ingredients, they deliver restaurant-quality results without turning on the oven.
Ingredients for Recipe for Chocolate Covered Peanut Butter Balls with Rice Krispies
Simple ingredients create these no-bake holiday favorites with creamy and crispy layers.
| Ingredient | Amount | Notes |
|---|---|---|
| Creamy Peanut Butter 🥜 | 1 ½ cups | Natural or regular variety |
| Rice Krispies Cereal 🥣 | 2 cups | Crispy rice cereal |
| Powdered Sugar 🍚 | 1 ½ cups | Sifted for smooth texture |
| Unsalted Butter 🧈 | ½ cup | Softened to room temperature |
| Vanilla Extract 🌿 | 1 tsp | Pure vanilla for best flavor |
| Salt 🧂 | ¼ tsp | Kosher or fine sea salt |
| Semi-Sweet Chocolate Chips 🍫 | 2 cups | High-quality for smooth melting |
| Coconut Oil 🥥 | 1 tbsp | Optional for chocolate shine |
| Parchment Paper 📜 | 1 sheet | For lining baking trays |
| Baking Sheet 🍪 | 1 whole | For chilling the balls |
[recipe_ingredient_scaler]
The peanut butter is key here. Jif or Skippy work perfectly, but natural peanut butter (the kind that separates) gives a richer, less sweet result. Costco’s Kirkland brand is a great bulk option if you make these often. For the Rice Krispies, any crispy rice cereal works—Kellogg’s is classic, but store brands are identical. Butter should be unsalted so you control the seasoning, and Land O’Lakes is a reliable choice.
No peanut butter? Almond or cashew butter work in a pinch (add a pinch of salt if unsalted). Swap Rice Krispies for cornflakes or crushed pretzels for a different crunch. If avoiding powdered sugar, coconut sugar won’t work the same—stick to the original. Semi-sweet chocolate can be swapped for dark or milk chocolate, but dark will firm up faster.
Store in an airtight container at room temperature for up to 1 week, or freeze for 3 months. These hold shape best chilled, so keep them cool until serving. The coconut oil in the chocolate helps them set with a glossy finish.
Why You’ll Love This Recipe
- No-Bake Bliss: I just mix peanut butter, powdered sugar, and Rice Krispies—no oven, no fuss.
- Crunch Meets Creamy: That snap of Rice Krispies with the smooth peanut butter center? Ridiculously good.
- Crowd Pleaser: I bring these to potlucks and they disappear before the casseroles.
- Budget Friendly: Five simple ingredients I usually have on hand, and they make a big batch.
Step-by-Step Instructions for Chocolate Covered Peanut Butter Balls With Rice Krispies
This no-bake method delivers perfect texture with minimal effort and maximum holiday appeal.
Step 1: Mix the Peanut Butter Base
In a large mixing bowl, combine the 1.5 cups Creamy Peanut Butter, 0.5 cup Unsalted Butter (softened), 1.5 cups Powdered Sugar, 1 tsp Vanilla Extract, and 0.25 tsp Salt. Use a wooden spoon or spatula to mix until smooth and fully incorporated.
The mixture should be thick but pliable. If it feels too dry, the peanut butter may have separated—simply fold it together more thoroughly. This base creates the rich, sweet center that pairs perfectly with the chocolate coating.
Step 2: Fold in the Rice Krispies Cereal
Add the 2 cups Rice Krispies Cereal to the peanut butter mixture. Gently fold until the cereal is evenly distributed and fully coated in the peanut butter base. The cereal adds a satisfying crunch to each bite.
Be careful not to overmix, or the cereal will lose its crisp texture. The mixture should hold together when pressed but still feel slightly loose. If it’s too sticky, chill it for 10 minutes to firm up before shaping.
Step 3: Shape into Balls and Chill
Line the 1 whole Baking Sheet with the 1 sheet Parchment Paper. Scoop 1-tablespoon portions of the mixture and roll them into balls between your palms. Place them on the prepared baking sheet.
Once all balls are formed, refrigerate them for at least 30 minutes. This chilling step is crucial—it prevents the balls from falling apart when dipped in chocolate. They should be firm to the touch before moving to the next step.
Step 4: Melt the Chocolate Coating
In a microwave-safe bowl, combine the 2 cups Semi-Sweet Chocolate Chips and 1 tbsp Coconut Oil. Microwave in 30-second intervals, stirring between each, until fully melted and smooth. The coconut oil ensures a glossy finish and easier dipping.
Alternatively, use a double boiler on the stovetop over low heat, stirring constantly to avoid scorching. The chocolate is ready when it’s completely liquid with no visible chips remaining.
Step 5: Dip and Set the Chocolate Covering
Working one at a time, use a fork to dip each chilled peanut butter ball into the melted chocolate, turning to coat completely. Tap the fork gently on the edge of the bowl to remove excess chocolate, then place the ball back on the parchment-lined baking sheet.
Repeat with all balls, then refrigerate for another 15-20 minutes until the chocolate is fully set. The coating should be firm and glossy, with no sticky residue when touched. Serve chilled or at room temperature for the best texture.
Pro Tips For Making Recipe For Chocolate Covered Peanut Butter Balls With Rice Krispies
- Chill Before Dipping: Let the peanut butter mixture firm up in the fridge for at least 30 minutes before rolling into balls—I learned this the hard way after my first batch kept falling apart in the melted chocolate.
- Use Fresh Rice Krispies: Sounds weird, but it works: stale cereal won’t give you that satisfying crunch, so double-check the box’s freshness date or open a new one.
- Melt Chocolate Slowly: Resist the urge to blast the chocolate in the microwave; 30-second bursts with stirring in between prevents seizing and keeps it smooth for dipping.
- Add Extra Powdered Sugar: My grandmother swore by this, and she was right: if your mixture feels too sticky, a Tablespoon or two more of powdered sugar makes rolling the balls much easier.
Common Mistakes When Making recipe for chocolate covered peanut butter balls with rice krispies
Skipping the Chill
Never skip chilling the peanut butter balls before dipping. At room temperature, they’ll crumble in the warm chocolate. I always refrigerate mine for the full 30 minutes—no shortcuts here. 🔥
Overmixing the Base
When combining the peanut butter mixture, mix just until incorporated. Overworking it makes the balls dense. I use a spatula and stop as soon as the Rice Krispies Cereal is evenly coated.
Chocolate Temperature
If the chocolate is too hot, it’ll melt the peanut butter centers. I microwave in 30-second intervals, stirring between each, and let it cool 2-3 minutes before dipping. This prevents a gooey mess.
Uneven Sizes
Use a tablespoon to portion the mixture for consistent sizing. Rolling by hand leads to uneven balls that dip inconsistently. I weigh mine for perfect uniformity—1 oz each works great.
Poor Coating
Tap off excess chocolate after dipping to avoid thick, uneven layers. I use a fork to roll the balls, letting excess drip off for 5 seconds before transferring to parchment.
Rushing the Set
Let the chocolate set completely before storing. Moving them too soon leaves fingerprints. I refrigerate for the full 20 minutes, then test one before handling the rest. ✨
Nutrition Facts
Frequently Asked Questions
Can I use crunchy peanut butter instead of creamy?
Yes, but the texture will be slightly different. Crunchy peanut butter adds extra nuttiness and bite, but may make the balls harder to shape. For best results, stick with creamy to maintain the classic smooth center.
How long do these keep in the fridge?
Store in an airtight container for up to 1 week in the fridge. For longer storage, freeze for up to 3 months. Let them sit at room temperature for 10 minutes before serving for the best texture.
Why did my chocolate coating turn dull?
This happens if the chocolate wasn’t tempered properly. To fix, add 1 tsp coconut oil when melting to restore shine. Avoid overheating the chocolate, as this can cause a streaky or matte finish.
Can I swap Rice Krispies for another cereal?
Try cornflakes or crushed pretzels for a different crunch. Just ensure the cereal stays crispy after mixing. Adjust quantities slightly if needed for texture.

Trained in classic French technique but raised on slow-cooked ribs and spicy rubs, she blends culinary skill with smoke and soul.
- Recipe for Boneless Pork Chops in Cast Iron Skillet: Sear and Baste to Juicy Perfection - October 3, 2026
- Recipe for Boneless Cross Rib Roast: Slow-Roasted Beef with Herb Crust - October 3, 2026
- Hamburgers in Sauce Recipe Crock Pot: Slow-Cooked Savory Delight - October 3, 2026