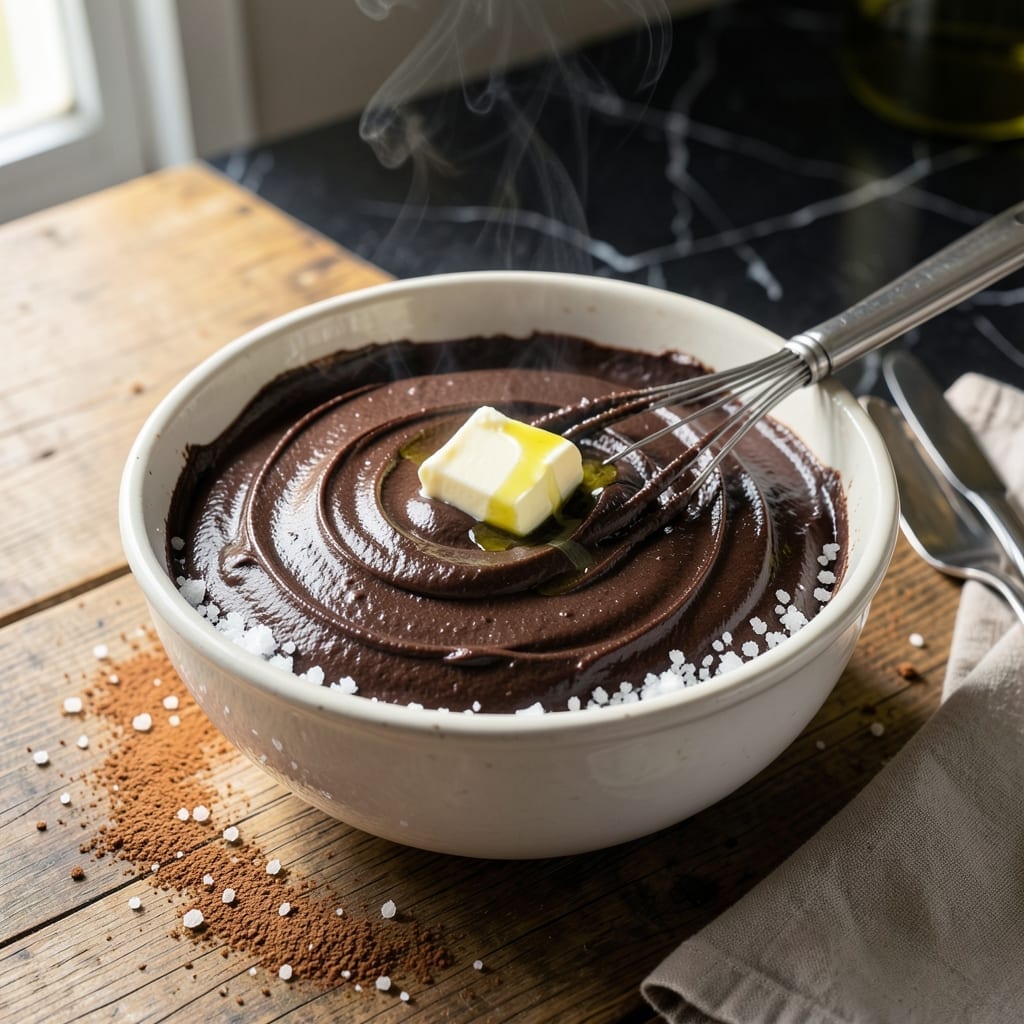
This cooked chocolate frosting delivers a rich, velvety texture that elevates any dessert. Unlike store-bought versions, it offers depth of flavor and a spreadable consistency that holds its shape.
I developed this recipe to achieve professional-quality results with simple ingredients. The cooking process ensures a smooth finish and a glossy sheen that looks as good as it tastes.
Ingredients for Recipe for Cooked Chocolate Frosting
Eight ingredients transform into this luxurious, velvety chocolate topping with professional finish.
| Ingredient | Amount | Notes |
|---|---|---|
| Granulated Sugar 🍚 | 1 ½ cups | Fine white sugar preferred |
| Unsweetened Cocoa Powder 🥣 | ½ cup | Dutch-process for richer flavor |
| Whole Milk 🥛 | ½ cup | Full-fat for creaminess |
| Unsalted Butter 🧈 | ½ cup | Cut into tablespoons for melting |
| Vanilla Extract 🌿 | 1 tsp | Pure extract, not imitation |
| Salt 🧂 | ¼ tsp | Fine sea salt preferred |
| Heavy Cream 🥛 | ¼ cup | Cold, for final texture |
| Semi-Sweet Chocolate Chips 🍫 | 1 cup | High-quality for best melt |
[recipe_ingredient_scaler]
The cocoa powder is non-negotiable for depth—Hershey’s Special Dark or Valrhona deliver that intense flavor. Use Dutch-process for smoother results (the good stuff, not the natural kind). Butter quality matters here; Plugrá or European-style have higher fat content, which creates that signature sheen. Whole milk is ideal, but 2% works in a pinch if that’s what you have on hand.
No Dutch-process cocoa? Natural cocoa plus a pinch of baking soda mimics the effect. Short on milk? Evaporated milk at half the quantity adds richness. The chocolate chips can be swapped for chopped bars—Ghirardelli or Guittard are reliable. Vanilla extract is worth the splurge; Nielsen-Massey is a professional favorite for its pure, complex flavor.
This keeps beautifully at room temperature for 3-4 days in an airtight container. For longer storage, refrigerate for up to 2 weeks—just bring to room temperature and rewhip before using. Don’t freeze; it can separate and lose that silky texture.
Why You’ll Love This Recipe
- One Pot Wonder: I love that I can make this in a single saucepan—no mixer, no fuss, just melt, stir, and cool.
- Rich Chocolate Hit: The cocoa and butter create a deep, velvety taste that’s way better than store-bought.
- Cake’s Best Friend: Honestly, it’s my go-to for birthdays, cupcakes, or even just a spoon when no one’s looking.
Step-by-Step Instructions for Cooked Chocolate Frosting
This method delivers a silky, spreadable texture with deep chocolate flavor every time.
Step 1: Combine Dry Ingredients and Milk
In a medium saucepan, whisk together the 1.5 cups Granulated Sugar and 0.5 cup Unsweetened Cocoa Powder until no lumps remain. I use Dutch-process cocoa here for its smoother, richer taste and darker color.
Gradually whisk in the 0.5 cup Whole Milk until the mixture is completely smooth. This step prevents clumping when you apply heat. Place the saucepan over medium heat and stir constantly with a silicone spatula.
Step 2: Cook to Thickened Consistency
Add the 0.5 cup Unsalted Butter (cut into tablespoons) and continue stirring as the mixture heats. You’ll notice it begins to thicken after 3-4 minutes—this is the sugar dissolving and the cocoa blooming.
Cook for an additional 2-3 minutes until the mixture reaches a pudding-like consistency and starts to pull away from the sides of the pan. The color will deepen significantly. Remove from heat immediately when it reaches this stage to prevent scorching.
Step 3: Incorporate Chocolate and Flavorings
Stir in the 1 cup Semi-Sweet Chocolate Chips until completely melted and smooth. The residual heat from the pan will melt them without additional cooking. Add the 1 tsp Vanilla Extract and 0.25 tsp Salt, stirring to combine thoroughly.
Let the mixture cool for 5 minutes, stirring occasionally. This brief rest period allows the chocolate to set slightly before adding the final ingredient.
Step 4: Finish with Heavy Cream
Gradually whisk in the 0.25 cup Heavy Cream (cold) until fully incorporated. The cream adds richness and helps achieve that perfect spreadable consistency. You’ll notice the frosting becomes glossier and more fluid.
Let the frosting cool to room temperature, stirring every 5 minutes to prevent a skin from forming. This cooling process takes about 30-45 minutes. The final texture should be thick but still pourable, with a beautiful sheen.
Step 5: Achieve Optimal Spreading Consistency
Once cooled to room temperature, beat the frosting with a hand mixer on medium speed for 1-2 minutes for an even lighter texture. This step incorporates air, making it easier to spread.
If the frosting is too thick after cooling, warm it gently over a double boiler for 1-2 minutes, stirring constantly. If it’s too thin, chill it in the refrigerator for 15-20 minutes, stirring occasionally. The ideal consistency should hold its shape when spread but still be smooth and glossy.
Pro Tips For Making Recipe For Cooked Chocolate Frosting
- Boil the Sugar: Cook the sugar and cocoa mixture to a full rolling boil for exactly 1 minute—I learned this the hard way after my frosting turned out grainy when I pulled it too soon.
- Use Room-Temp Butter: Make sure your butter is truly soft, about 65°F, or it’ll seize up when you mix in the hot sugar mixture. Sounds obvious, but I’ve rushed this step more times than I’d like to admit.
- Skip the Low-Fat Milk: Whole milk is non-negotiable here; the fat content keeps the frosting smooth and rich. After trying it with 2%, I ended up with a thin, sad mess.
- Cool Before Beating: Let the cooked mixture cool to lukewarm before adding vanilla and beating—about 10-15 minutes. I was skeptical until I tried it; hot sugar can scorch the vanilla and ruin the flavor.
Best Sauces and Condiments for This Recipe
Drizzling Sauces
For a decadent touch, warm ¼ cup of this frosting with 2 tbsp heavy cream to create a glossy ganache. Drizzle over ice cream or cheesecake for an instant gourmet presentation. I love this trick for dinner parties—it wows every time. 💫
Fruit Pairings
Balance the richness with fresh fruit. Thinly sliced strawberries or raspberries add bright acidity that cuts through the chocolate. A dusting of powdered sugar enhances the pairing without overpowering the frosting’s deep flavor.
Coffee Enhancements
Stir in 1 tsp instant espresso powder to intensify the chocolate notes. This works beautifully for mocha-flavored desserts or as a filling for layer cakes. The coffee won’t make it taste like coffee—just richer chocolate.
Nutty Additions
Fold in ½ cup toasted pecans or hazelnuts for crunch and depth. The nuts add a sophisticated texture contrast that elevates simple cupcakes or brownies to bakery-level treats. I always toast my nuts in a dry pan for 3-4 minutes first.
Spiced Variations
Add ½ tsp cinnamon or a pinch of cayenne pepper for warmth or heat. These spices complement the chocolate beautifully and add complexity. A tiny amount of chili powder can create a Mexican chocolate effect.
Citrus Zest Boost
Finish with 1 tsp orange or lemon zest for a bright, fresh note. The citrus oils lift the heavy chocolate flavor and add a professional touch. This works especially well with vanilla or white cakes. 🍊
Nutrition Facts
Frequently Asked Questions
Can I use milk chocolate instead of semi-sweet?
Yes, but reduce the sugar by ¼ cup since milk chocolate is sweeter. The frosting will be creamier and less intense in chocolate flavor.
Why does my frosting look grainy?
This usually means the sugar didn’t fully dissolve. Cook the mixture for an extra 1-2 minutes while stirring constantly to smooth it out.
How long can I store this at room temperature?
It stays fresh for 3-4 days in an airtight container. For longer storage, refrigerate for up to 2 weeks and rewhip before using.

Trained in classic French technique but raised on slow-cooked ribs and spicy rubs, she blends culinary skill with smoke and soul.
- Recipe for Boneless Pork Chops in Cast Iron Skillet: Sear and Baste to Juicy Perfection - October 3, 2026
- Recipe for Boneless Cross Rib Roast: Slow-Roasted Beef with Herb Crust - October 3, 2026
- Hamburgers in Sauce Recipe Crock Pot: Slow-Cooked Savory Delight - October 3, 2026