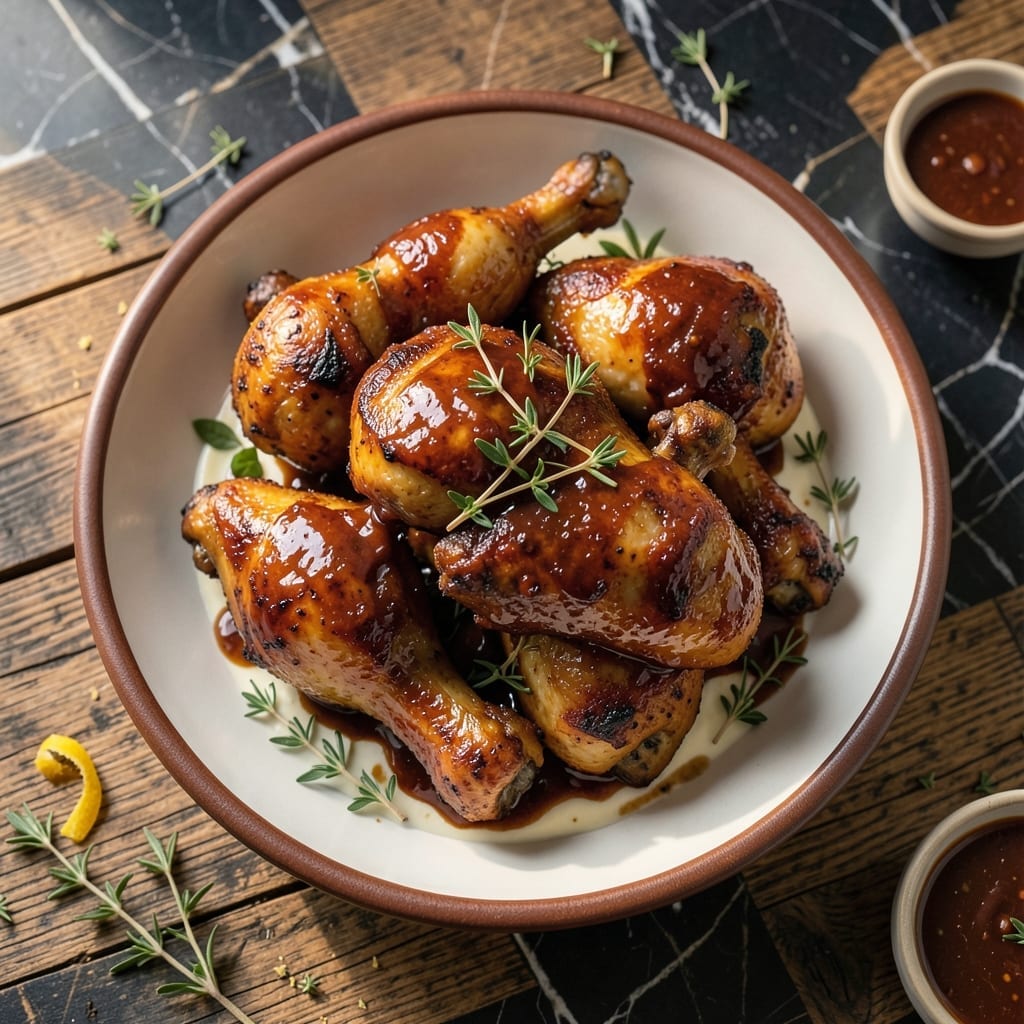
There’s nothing like the aroma of barbecued chicken fresh from the oven, especially when it boasts a saucy, caramelized finish. I developed this method to capture classic grill flavors without stepping outside.
The secret lies in the baking technique: high heat to sear the chicken, then a lower temperature to let the sauce thicken and cling. It delivers that familiar tender texture with minimal effort.
Each piece emerges glossy and deeply flavored, with edges that crisp beautifully under the broiler. This approach guarantees consistent results every time.
Serve with roasted potatoes or a crisp green salad for a complete meal. The oven does most of the work while you prepare the sides.
Ingredients for Recipe for Oven Barbecued Chicken
Bone-in chicken plus bold, smoky sauce ingredients create that classic barbecued flavor indoors.
| Ingredient | Amount | Notes |
|---|---|---|
| Chicken Thighs and Drumsticks 🍗 | 3 ½ lb | Bone-in, skin-on for flavor |
| Barbecue Sauce 🥫 | 1 ½ cups | High-quality, thick variety |
| Olive Oil 🫒 | 2 tbsp | For coating chicken before baking |
| Kosher Salt 🧂 | 1 tsp | Diamond Crystal preferred |
| Freshly Ground Black Pepper 🌶️ | 1 tsp | Coarse grind recommended |
| Garlic Powder 🧄 | 1 tsp | For depth of flavor |
| Onion Powder 🧅 | 1 tsp | Balances sweetness in sauce |
| Smoked Paprika 🌶️ | 1 tsp | Adds authentic smoky flavor |
| Brown Sugar 🍚 | 2 tbsp | Light or dark, for caramelization |
| Apple Cider Vinegar 🍏 | 1 tbsp | For tangy brightness |
| Worcestershire Sauce 🥫 | 1 tbsp | Use vegan if needed |
| Dijon Mustard 🟡 | 1 tsp | Smooth, not whole grain |
[recipe_ingredient_scaler]
The chicken is the foundation here. Bone-in, skin-on thighs and drumsticks stay juicy and crisp up beautifully—boneless will dry out. Look for plump pieces with smooth skin at your butcher or Whole Foods counter. Avoid pre-marinated chicken; the sauce needs to be the star. For the best texture, pat the pieces very dry before coating with oil and seasonings.
No smoked paprika? Regular paprika plus a pinch of liquid smoke gets you close. Out of Worcestershire? Soy sauce with a dash of lemon juice works in a pinch. The barbecue sauce can be store-bought (Stubb’s or Sweet Baby Ray’s are reliable), but if you’re making your own, don’t skip the vinegar—it cuts through the sweetness. Fresh garlic can replace the powder, but use half the amount to avoid bitterness.
The chicken keeps well in the fridge for 3-4 days and actually tastes better the next day. Freeze cooked portions for up to 3 months—reheat under the broiler to revive that crispy skin. Always bring chicken to room temperature before starting the baking process for even cooking.
Why You’ll Love This Recipe
- One Pan Magic: I just toss the thighs and drumsticks with olive oil, salt, and pepper, slather on the barbecue sauce, and let the oven do the rest.
- Sticky Sweet Perfection: The sauce caramelizes into this glossy, finger-licking coating that clings to every bite of juicy dark meat.
- Crowd Pleaser: Honestly, it’s my go-to for summer potlucks and lazy Sunday suppers—everyone from picky kids to barbecue snobs devours it.
- Leftovers Win: Between us, the flavors taste even better the next day, and it reheats beautifully for lunches or quick dinners.
Step-by-Step Instructions for Oven Barbecued Chicken
Achieve restaurant-quality results with this straightforward oven-baking method that guarantees tender meat.
Step 1: Season the Chicken for Maximum Flavor
Pat the 3.5 lb Chicken Thighs and Drumsticks dry with paper towels to ensure crispy skin. In a small bowl, combine 1 tsp Kosher Salt, 1 tsp Freshly Ground Black Pepper, 1 tsp Garlic Powder, 1 tsp Onion Powder, and 1 tsp Smoked Paprika.
Rub this seasoning blend evenly over all surfaces of the chicken, pressing gently to adhere. The smoked paprika adds depth, while the garlic and onion powders create a robust base. Let the seasoned chicken sit at room temperature for 15 minutes to allow the flavors to penetrate.
Step 2: Prepare the Barbecue Sauce Mixture
In a medium bowl, whisk together 1.5 cups Barbecue Sauce, 2 tbsp Brown Sugar, 1 tbsp Apple Cider Vinegar, 1 tbsp Worcestershire Sauce, and 1 tsp Dijon Mustard until smooth. The vinegar and mustard brighten the sauce, while the brown sugar enhances caramelization.
Taste and adjust seasoning if needed, though the sauce should already be well-balanced with sweet, tangy, and smoky notes. This mixture will coat the chicken and transform into a glossy, sticky glaze during baking.
Step 3: Sear the Chicken for Crispy Skin
Preheat your oven to 375°F. Heat 2 tbsp Olive Oil in a large oven-safe skillet or baking dish over medium-high heat. Add the chicken skin-side down and sear undisturbed for 4-5 minutes until the skin turns deep golden brown.
Flip the chicken and sear the other side for 3-4 minutes. This initial searing renders fat from the skin and creates a crispy foundation. Transfer the skillet to the preheated oven if using oven-safe cookware, or move the chicken to a baking dish.
Step 4: Bake and Glaze to Perfection
Brush half of the barbecue sauce mixture generously over the seared chicken. Bake uncovered at 375°F for 25 minutes. The sauce will begin to caramelize and adhere to the chicken.
After 25 minutes, flip the chicken and brush with the remaining sauce. Return to the oven and bake for another 15-20 minutes until the chicken reaches an internal temperature of 175°F and the sauce has thickened into a glossy glaze. The meat should pull away from the bone easily when done.
If the sauce begins to darken too quickly, tent the pan loosely with foil to prevent burning while ensuring the chicken cooks through.
Step 5: Rest and Serve
Remove the chicken from the oven and let it rest for 5-10 minutes before serving. This allows the juices to redistribute, ensuring moist, flavorful meat in every bite.
Serve the oven barbecued chicken with additional sauce from the pan spooned over the top. The skin should be crispy and deeply caramelized, while the meat remains juicy and tender. Pair with classic sides like coleslaw or cornbread for a complete meal.
Pro Tips For Making Recipe For Oven Barbecued Chicken
- Pat It Dry: After rinsing the chicken, pat it thoroughly dry with paper towels—moisture is the enemy of crispy skin. I learned this the hard way after my first few batches came out steamed instead of caramelized.
- Start Hot, Finish Low: Roast at 425°F for the first 20 minutes to get that sauce sizzling, then drop to 375°F to cook through without burning the barbecue glaze.
- Season Under the Skin: Loosen the skin on the thighs and drumsticks, then rub salt and pepper directly on the meat underneath. It’s a small step, but the flavor actually penetrates where it matters.
- Sauce Last 10 Minutes: Brush on the barbecue sauce only in the last 10 minutes of baking—any earlier and it’ll burn before the chicken’s done. Sounds obvious, but I ruined two trays before I figured this out.
Dietary Considerations for This Dish
Gluten-Free Friendly
This dish is naturally gluten-free as long as you verify your barbecue sauce. Most commercial brands like Stubb’s are safe, but always check labels for hidden wheat. The olive oil and spices in this recipe contain no gluten, making it perfect for sensitive diets. 💪
Low-Carb Option
Swap the brown sugar for 2 tbsp monk fruit sweetener to reduce carbs. The chicken itself has 0g net carbs, and with this adjustment, the sauce adds minimal sugars. I find the flavor remains rich and caramelized just like the original.
Dairy-Free Naturally
No dairy appears in this recipe, so it fits perfectly into dairy-free meal plans. The olive oil provides healthy fats without any milk derivatives. Even the Worcestershire sauce can be found in dairy-free versions at most Whole Foods locations.
Reduced Sugar Version
Cut the brown sugar to 1 tbsp or use sugar-free maple syrup for a lower glycemic impact. The apple cider vinegar helps balance sweetness, so you won’t miss the extra sugar. I often make this adjustment for my health-conscious friends.
Allergen Considerations
The main allergen to watch is soy in some Worcestershire sauces. Use Lea & Perrins or a soy-free alternative. The chicken, olive oil, and spices are all top-8-allergen-free, making this a safe choice for most dietary restrictions. 🌱
Nutrition Facts
Frequently Asked Questions
What temperature should the oven be set to?
Start with 375°F for even cooking. The initial sear happens on the stovetop at medium-high heat, then the chicken finishes in the oven at this consistent temperature.
Can I use boneless chicken instead?
It’s not recommended—bone-in, skin-on pieces stay juicier and develop better flavor. Boneless tends to dry out during the longer baking time needed for the sauce to caramelize properly.
How do I know when it’s done?
The chicken is ready when it reaches 175°F internally and the meat pulls away from the bone easily. The sauce should be thick and glossy, not runny.
Can I make this ahead of time?
Yes! The chicken keeps well in the fridge for 3-4 days and tastes even better reheated. Freeze cooked portions for up to 3 months, then broil to crisp the skin.

Trained in classic French technique but raised on slow-cooked ribs and spicy rubs, she blends culinary skill with smoke and soul.
- Recipe for Crock Pot Swiss Steak: Slow-Cooked Beef With Mushroom Gravy - October 3, 2026
- Recipe for Kabsa Rice: Spiced Middle Eastern Feast in One Pot - October 3, 2026
- Hamburger Stir Fry Recipe Healthy: Lean Protein and Veggie-Packed Dinner - October 3, 2026