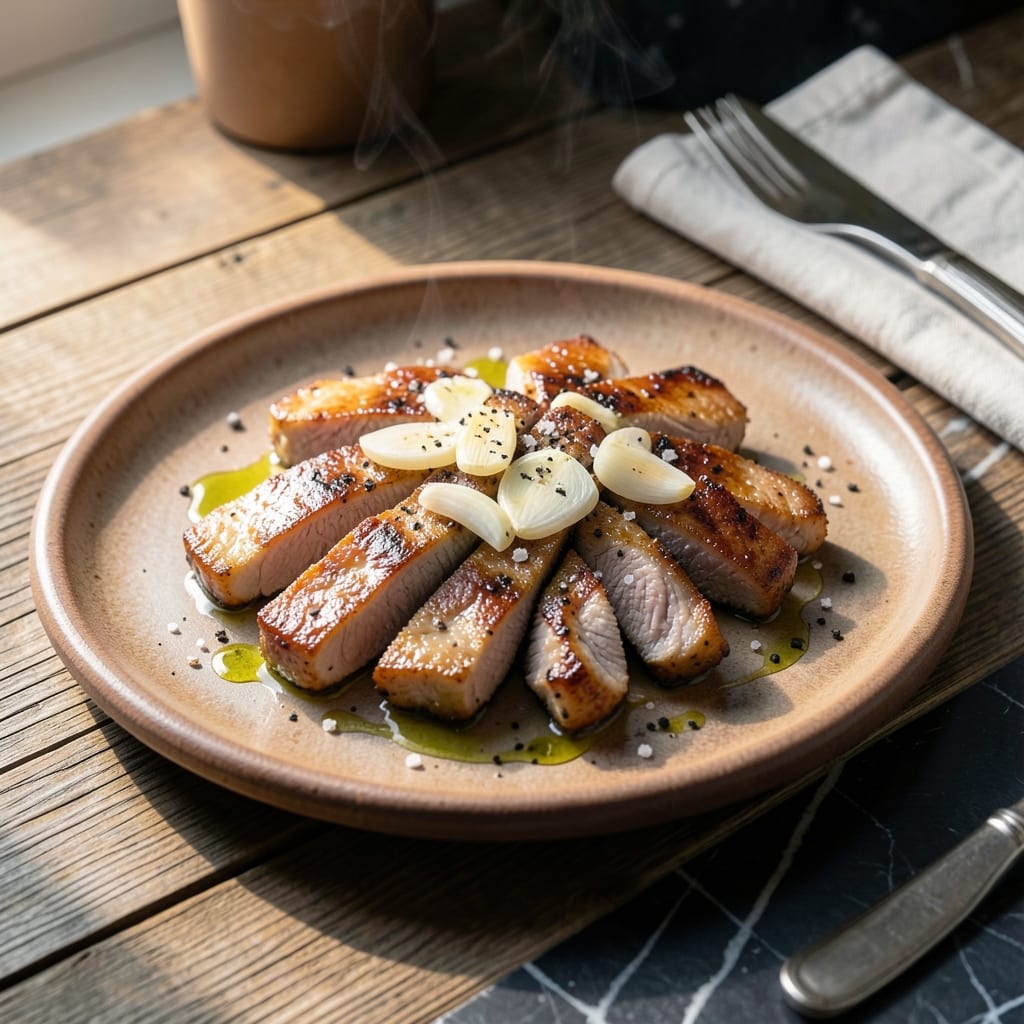
These pan-seared pork strips deliver quick, restaurant-quality results with minimal effort. The key is cutting the pork thinly for even cooking and achieving that perfect sear without drying out the meat.
I developed this method to create tender, juicy strips with a golden crust, using a simple garlic butter finish that elevates the flavor. The entire process takes less than 20 minutes from start to finish.
What you get are perfectly cooked pork strips that stay moist inside with a flavorful garlic butter coating. They’re versatile enough for stir-fries, salads, or serving as a main with your favorite sides.
This technique works with any cut of pork, making it a reliable go-to for busy weeknights.
Ingredients for Recipe for Pork Strips
Simple, flavorful ingredients for quick pan-seared pork with garlic butter finish.
| Ingredient | Amount | Notes |
|---|---|---|
| Pork Tenderloin 🥩 | 1 ½ lb | Cut into thin strips |
| Unsalted Butter 🧈 | 4 tbsp | For garlic butter finish |
| Garlic Cloves 🧄 | 4 cloves | Minced for butter |
| Olive Oil 🫒 | 2 tbsp | For searing pork |
| Kosher Salt 🧂 | 1 tsp | Adjust to taste |
| Black Pepper 🌶️ | ½ tsp | Freshly ground preferred |
| Dried Thyme 🍃 | ½ tsp | Optional for extra flavor |
| Dried Rosemary 🌿 | ½ tsp | Optional for extra flavor |
| Fresh Parsley 🌿 | 2 tbsp | Chopped, for garnish |
| Lemon Juice 🍋 | 1 tbsp | Freshly squeezed |
| Red Pepper Flakes 🌶️ | ¼ tsp | Optional for heat |
[recipe_ingredient_scaler]
The pork matters most here. Tenderloin stays juicy and cooks fast—perfect for thin strips. Look for pieces with even marbling at Costco or your local butcher. I prefer it slightly pink in the middle (145°F), but cook to your comfort. The butter? Kerrygold unsalted is my go-to for that rich, golden finish. Don’t skip the fresh garlic—it’s doing the heavy lifting in the flavor department.
No tenderloin? Pork loin or boneless chops work too—just slice them thin. Swap the butter for ghee if you want a higher smoke point. Out of fresh garlic? Garlic powder at half the amount (so 2 tsp instead of 4 cloves). The herbs are flexible—dried sage or oregano instead of thyme and rosemary. Want more heat? Double the red pepper flakes or add a pinch of cayenne.
Cooked strips keep in the fridge for 3-4 days—great for meal prep. Reheat gently in a pan to keep them moist. The garlic butter can be made ahead and reheated slowly. Leftovers? Toss into salads or stir-fries for an easy upgrade.
Why You’ll Love This Recipe
- 20-Minute Meal: I can slice the tenderloin, sear it in butter and garlic, and have dinner on the table faster than takeout arrives.
- Garlic Butter Magic: That sizzle when the pork hits the butter and garlic? It smells like a steakhouse and tastes even better.
- Weeknight MVP: I throw these strips on salads, stuff them in wraps, or serve over rice—no one complains.
- Leftovers Win: Cold pork strips taste amazing in next-day sandwiches, and they reheat in seconds without drying out.
Step-by-Step Instructions for Pan-Seared Pork Strips
Here’s how to get tender, flavorful pork strips on the table in no time.
Step 1: Prep and Season the Pork
Cut the pork tenderloin into thin strips, about ½-inch thick. I like to pat them dry with paper towels first—this ensures they sear properly without steaming in the pan.
Season the strips evenly with the 1 tsp Kosher Salt, 0.5 tsp Black Pepper, 0.5 tsp Dried Thyme, and 0.5 tsp Dried Rosemary. For a little kick, sprinkle on the 0.25 tsp Red Pepper Flakes. This dry rub creates a flavorful crust when seared.
Step 2: Sear the Pork Strips
Heat the 2 tbsp Olive Oil in a large skillet over medium-high heat until it shimmers. Add the pork strips in a single layer, working in batches if needed to avoid crowding the pan.
Cook for 2-3 minutes per side until the strips are golden brown and cooked through. You’ll know they’re done when they’re no longer pink inside and have a nice sear on the outside. Transfer the cooked strips to a plate and set aside.
Step 3: Make the Garlic Butter Sauce
In the same skillet, reduce the heat to medium and melt the 4 tbsp Unsalted Butter. Add the minced 4 cloves Garlic Cloves and sauté for 30-60 seconds until fragrant but not browned.
Stir in the 1 tbsp Lemon Juice and any accumulated juices from the resting pork. Let it simmer for 1-2 minutes until the sauce thickens slightly and the flavors meld together.
Step 4: Finish and Serve
Return the pork strips to the skillet and toss to coat them in the garlic butter sauce. Cook for an additional 1-2 minutes to heat everything through and let the flavors soak into the meat.
Sprinkle with the chopped 2 tbsp Fresh Parsley and serve immediately. The parsley adds a fresh, bright contrast to the rich garlic butter. These pork strips are perfect over rice, pasta, or with crusty bread to soak up the sauce.
Pro Tips For Making Recipe For Pork Strips
- Slice Against the Grain: Cut the pork tenderloin into strips perpendicular to the muscle fibers—this shortens them and makes every bite tender. I learned this the hard way after chewing through a few tough batches.
- Pat the Pork Dry: Blot the strips with a paper towel before cooking to get a proper sear. Sounds tedious, but it’s the only way to avoid steamed pork instead of crispy edges.
- Skip the Cold Butter: Let the unsalted butter sit out for 10 minutes so it melts evenly into the garlic and oil. Cold butter just clumps and burns in the pan.
- Pull at 145°F: Use a meat thermometer and yank the pork off the heat the moment it hits 145°F—it’ll keep cooking while resting, so don’t wait. After overcooking a few dinners, I finally got the memo.
Storing and Reheating Leftovers
Refrigerator Storage
Let your pork strips cool for no more than 2 hours before transferring to shallow airtight containers. They’ll stay fresh at 40°F or below for up to 3-4 days. I use glass containers—they’re easy to clean and don’t absorb odors. ❄️
Freezer Storage
For longer storage, freeze in a single layer on a tray first to prevent sticking. Then transfer to freezer bags, squeezing out excess air. They’ll keep at 0°F or below for up to 3 months without losing texture. Label with the date so you don’t forget.
Stovetop Reheating
My favorite method is reheating in a skillet over medium-low heat. Add a splash of water or broth to prevent drying out. Warm for 3-4 minutes, stirring occasionally, until heated through to 165°F. This keeps them juicy. 🔥
Microwave Reheating
For quick meals, arrange strips on a microwave-safe plate and cover with a damp paper towel. Heat on 50% power for 1-2 minutes, checking and stirring halfway. This prevents rubbery texture.
Reusing Leftovers
Toss cold pork strips into salads, wraps, or fried rice for a protein boost. They also work great in omelets or scrambled eggs. Just avoid overcooking during reheating to maintain tenderness.
Nutrition Facts
Frequently Asked Questions
What’s the best cut for tender strips?
Pork tenderloin is ideal—it’s lean yet stays juicy when sliced thin. Pork loin or boneless chops also work well if cut into ½-inch strips. Avoid fatty cuts for even cooking.
How do I prevent them from drying out?
Don’t overcook—remove from heat at 145°F internal temp. Searing quickly on medium-high heat locks in moisture. Resting in garlic butter adds richness.
Can I use frozen pork?
Yes, but thaw completely in the fridge first (overnight). Pat dry before cooking to ensure a good sear. Frozen strips cook unevenly and may steam instead of brown.
What if my pan isn’t big enough?
Cook in batches to avoid crowding. Overloading the pan lowers the temperature, causing strips to steam and turn rubbery. Keep cooked batches warm in a 200°F oven.

Trained in classic French technique but raised on slow-cooked ribs and spicy rubs, she blends culinary skill with smoke and soul.
- Recipe for Boneless Pork Chops in Cast Iron Skillet: Sear and Baste to Juicy Perfection - October 3, 2026
- Recipe for Boneless Cross Rib Roast: Slow-Roasted Beef with Herb Crust - October 3, 2026
- Hamburgers in Sauce Recipe Crock Pot: Slow-Cooked Savory Delight - October 3, 2026