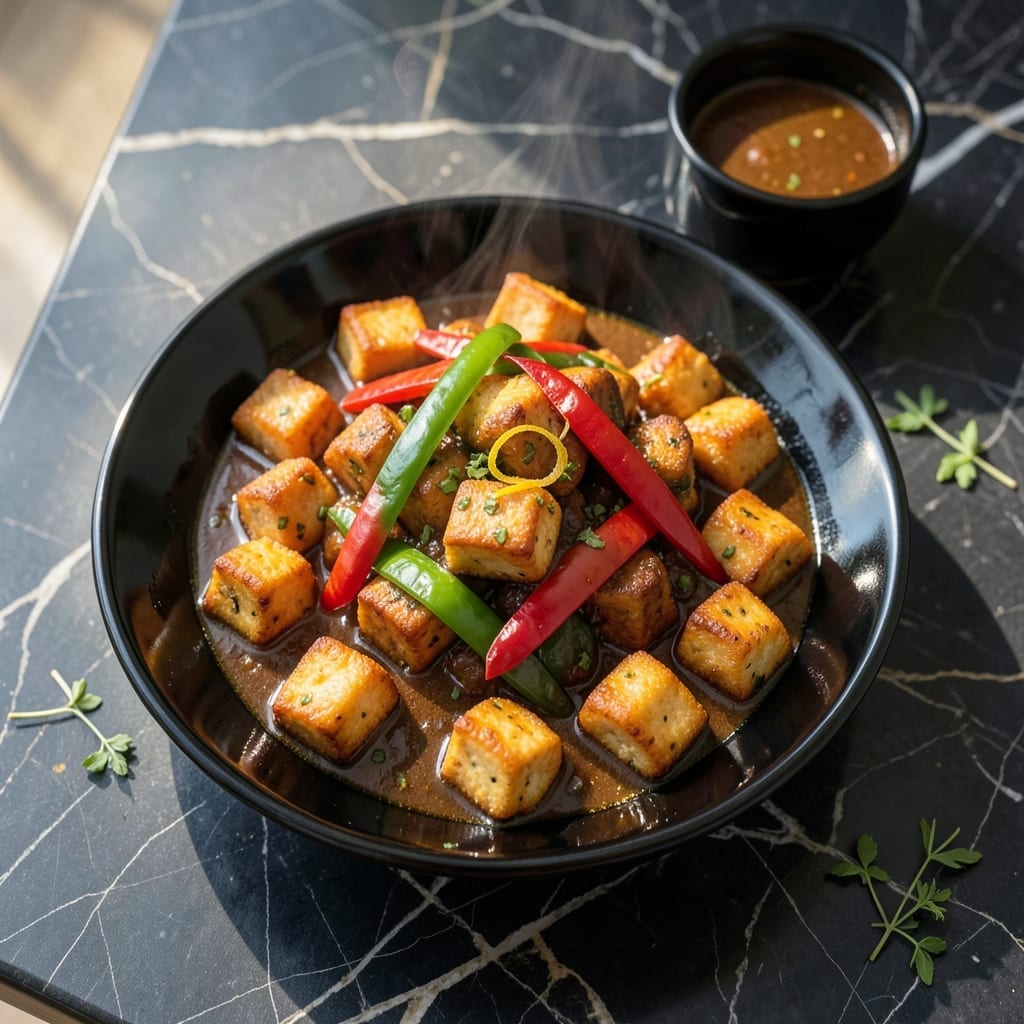
This Indo-Chinese fusion dish delivers crispy paneer cubes coated in a bold, spicy-sweet chili sauce. My French technique meets street food vibrancy here.
The secret is frying the paneer to golden perfection before tossing in the sauce. Each bite offers tender cheese with a satisfying crunch and complex flavors.
Ingredients for Recipe to Make Paneer Chilli
Cubes of paneer get a crispy coating before meeting a bold, spicy-sweet sauce packed with peppers and aromatics.
| Ingredient | Amount | Notes |
|---|---|---|
| Paneer 🧀 | 1 lb | Fresh, cubed, firm texture |
| All-Purpose Flour 🌾 | ½ cup | For coating paneer cubes |
| Cornstarch 🌾 | 2 tbsp | For extra crispiness |
| Vegetable Oil 🫒 | 1 ½ cups | For deep-frying paneer |
| Green Bell Pepper 🌶️ | 1 whole | Diced, medium-sized |
| Red Bell Pepper 🌶️ | 1 whole | Diced, medium-sized |
| Onion 🧅 | 1 whole | Large, finely chopped |
| Garlic Cloves 🧄 | 4 cloves | Minced for depth |
| Ginger Root 🌿 | 1 piece | 1-inch, grated |
| Green Chilies 🌶️ | 2 pieces | Finely chopped, adjust to taste |
| Soy Sauce 💧 | 2 tbsp | Low-sodium preferred |
| Red Chili Sauce 🌶️ | 3 tbsp | Spicy-sweet variety |
| Tomato Ketchup 🍅 | 2 tbsp | For sweetness and color |
| Rice Vinegar 💧 | 1 tbsp | For acidity balance |
| Brown Sugar 🧈 | 1 tbsp | Light or dark variety |
[recipe_ingredient_scaler]
The paneer is non-negotiable here—fresh, firm cubes from an Indian grocery or specialty store are ideal. Avoid pre-crumbled or overly soft varieties, as they won’t hold up to frying. The cornstarch in the coating is key to that restaurant-style crunch. Whole Foods or Patel Brothers carry high-quality paneer if your local store doesn’t. For the bell peppers, choose vibrant, unblemished ones (the good stuff, not the sad, wrinkled kind).
No red chili sauce? Sriracha mixed with a touch of honey gets you close. Fresh ginger is best, but ground ginger at half the amount works in a pinch. Swap bell peppers for cabbage or carrots if that’s what you have—just keep the dice even for consistent cooking. The soy sauce should be vegetarian-friendly (some brands use fish derivatives).
Paneer keeps in brine for 1 week unopened, 3-4 days once opened. The sauce can be made ahead and stored in the fridge for 5 days. Fry the paneer just before serving—it loses crispness if left to sit.
Why You’ll Love This Recipe
- I’ll be real: this comes together faster than takeout, and my kids actually eat the veggies.
- One Pan Wonder: I toss the paneer and bell peppers in one pan, and the cornstarch gives that golden crisp without a deep fryer.
- Crispy-Creamy Bite: That first crunch into the paneer with its soft center and the pepper’s freshness? Ridiculously good.
- Weeknight Hero: I’ll be real: this comes together faster than takeout, and my kids actually eat the veggies.
Step-by-Step Instructions for Paneer Chilli
This method ensures a crispy exterior and saucy finish with authentic Indo-Chinese flavors.
Step 1: Prepare and Coat the Paneer
Cut the 1 lb Paneer into uniform 1-inch cubes. Pat them dry with paper towels to remove excess moisture—this is essential for achieving a crispy coating. In a large bowl, combine the 0.5 cup All-Purpose Flour and 2 tbsp Cornstarch until well mixed.
Dredge each paneer cube in the flour mixture, pressing gently to ensure an even, thick coating. Shake off any excess flour. I like to let the coated cubes rest for 5 minutes before frying—this helps the coating adhere better during the frying process.
Step 2: Deep-Fry the Paneer to Golden Perfection
Heat the 1.5 cups Vegetable Oil in a deep, heavy-bottomed pan over medium-high heat until it reaches 350°F. To test the temperature, drop a small piece of coated paneer into the oil—it should sizzle immediately and rise to the surface.
Fry the paneer cubes in batches to avoid overcrowding the pan. Cook for 3-4 minutes, turning occasionally, until they turn a deep, golden brown and develop a crispy exterior. Use a slotted spoon to transfer the fried paneer to a paper towel-lined plate to drain excess oil. The cubes should be crispy on the outside while remaining soft inside.
Step 3: Stir-Fry the Vegetables and Aromatics
In a separate large wok or skillet, heat 1 tablespoon of the reserved Vegetable Oil over high heat. Add the finely chopped 1 whole Onion and cook for 2-3 minutes until it turns translucent and starts to soften.
Add the diced 1 whole Green Bell Pepper and 1 whole Red Bell Pepper, stir-frying for another 3-4 minutes until the peppers are tender-crisp. Stir in the minced 4 cloves Garlic Cloves, grated 1 piece Ginger Root, and finely chopped 2 pieces Green Chilies. Cook for 30-45 seconds until the aromatics release their fragrance—be careful not to burn the garlic.
Step 4: Combine and Finish with Sauce
Reduce the heat to medium and add the 2 tbsp Soy Sauce, 3 tbsp Red Chili Sauce, 2 tbsp Tomato Ketchup, 1 tbsp Rice Vinegar, and 1 tbsp Brown Sugar to the wok. Stir well to combine and let the sauce simmer for 1-2 minutes until it thickens slightly and becomes glossy.
Gently add the fried paneer cubes to the wok and toss everything together, ensuring each piece is evenly coated with the sauce. Cook for an additional 1-2 minutes to allow the flavors to meld. The sauce should cling to the paneer, creating a beautiful, sticky glaze. Serve immediately while hot, garnished with additional green chilies if desired.
Pro Tips For Making Recipe To Make Paneer Chilli
- Fry Paneer Hot: Use medium-high heat when frying the paneer cubes—any lower and they’ll absorb oil like a sponge instead of getting that light golden crust. I learned this the hard way after making greasy paneer more times than I’d like to admit.
- Coat Evenly: Toss the paneer in a mix of cornstarch and all-purpose flour until every cube is fully dusted, not just lightly sprinkled. This guarantees a crispy exterior that holds up to the saucy chillies.
- Skip Wet Peppers: Pat the green bell peppers dry before cooking, or they’ll steam the paneer instead of stir-frying it. Sounds minor, but it actually changes the outcome from soggy to perfectly tender-crisp.
- Rest Before Serving: Let the paneer chilli sit for 5 minutes off the heat before serving—this gives the flavors time to meld and the sauce to thicken slightly. I was skeptical until I tried it, and now it’s non-negotiable.
Essential Equipment for Great recipe to make paneer chilli
Deep-Frying Setup
For perfect crispy paneer, use a heavy-bottomed Dutch oven or stainless steel pot—I swear by my Le Creuset. A candy thermometer clipped to the side ensures your oil stays at that magic 350°F. 🌡️
Wok for Stir-Frying
A carbon steel wok is ideal for the high-heat stir-fry step. Look for one with a flat bottom if using an electric stove. I found mine at a local Asian market for under $30. The sloped sides make tossing ingredients effortless.
Slotted Spoon Essentials
Invest in a sturdy stainless steel slotted spoon for removing fried paneer from oil. A spider strainer works even better for draining without breaking the coating. Both tools are kitchen workhorses beyond this recipe.
Knife and Board
Use a sharp chef’s knife (8-inch is perfect) and a stable cutting board for uniform paneer cubes. I prefer bamboo boards for veggies and plastic for raw proteins. Consistent sizing ensures even cooking.
Mixing Bowls
A set of stainless steel mixing bowls in various sizes helps with coating and tossing. The large bowl is perfect for dredging paneer, while small bowls hold prepped aromatics. They nest for easy storage. 💡
Paper Towel Station
Keep a roll of paper towels or brown paper bags ready for draining fried paneer. The paper absorbs excess oil while maintaining crispness. I set mine on a wire rack for air circulation.
Nutrition Facts
Frequently Asked Questions
Can I bake the paneer instead of frying?
Yes! Toss coated cubes with 1 tbsp oil and bake at 400°F for 15-20 minutes, flipping halfway. It won’t be as crispy but still delicious.
What can I substitute for red chili sauce?
Mix 2 tbsp sriracha with 1 tbsp honey for similar sweet-spicy flavor. Adjust to taste.
How do I keep the paneer crispy?
Fry just before serving and toss in sauce quickly. Avoid letting it sit—moisture softens the coating.
Can I make this dish gluten-free?
Swap all-purpose flour for cornstarch or rice flour. Use tamari instead of soy sauce.

Trained in classic French technique but raised on slow-cooked ribs and spicy rubs, she blends culinary skill with smoke and soul.
- Recipe for Boneless Pork Chops in Cast Iron Skillet: Sear and Baste to Juicy Perfection - October 3, 2026
- Recipe for Boneless Cross Rib Roast: Slow-Roasted Beef with Herb Crust - October 3, 2026
- Hamburgers in Sauce Recipe Crock Pot: Slow-Cooked Savory Delight - October 3, 2026