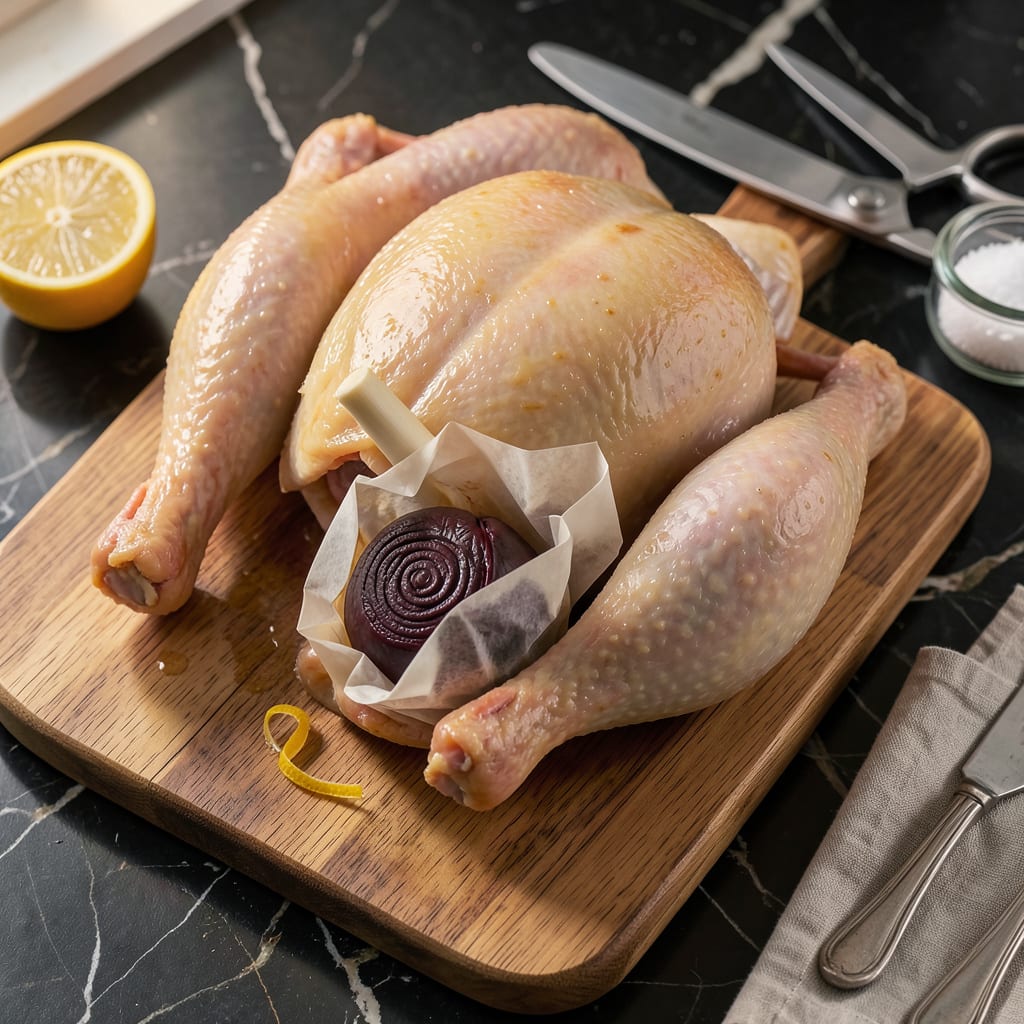
Let me walk you through removing giblets from a whole chicken—it’s simpler than you think and the first step to perfect roasted, grilled, or braised chicken. I’ve done this thousands of times in professional kitchens, and the key is working methodically with clean hands and sharp tools. This isn’t just about prep; it’s about setting up your entire dish for success.
You’ll find the giblet packet tucked inside the main cavity (sometimes the neck is separate in the neck cavity). It usually contains the heart, liver, gizzard, and sometimes kidneys—all perfectly usable for stock or gravy. I always keep mine for making rich pan sauces that elevate the final dish. Just be sure to rinse everything under cold water after removal.
Safety first: sanitize your workspace before and after handling raw chicken. I keep a bowl of soapy water nearby to wash my hands frequently, and I designate one cutting board just for raw poultry. These small habits prevent cross-contamination and keep your kitchen running smoothly.
Once your chicken is prepped, you’re ready for the good stuff—whether that’s a crispy-skinned roast, smoky grilled bird, or hearty chicken soup. The clean cavity ensures even cooking and better seasoning penetration. Trust me, this 5-minute step makes all the difference in your final dish.
📚 In This Guide
- What You’ll Need
- Instructions
- Tips and Common Mistakes
What Youll Need
- ● 1 whole chicken (fresh or thawed, 3–6 lbs) – ensure it’s not pre-giblet-free! 🍗
- ● Sharp kitchen shears or a boning knife (5–7-inch blade) – for precision cuts ✂️
- ● Cutting board (large, non-slip) – preferably plastic or wood, 12×18″ minimum
- ○ Disposable gloves (optional but recommended) – latex or nitrile, 1–2 pairs 🧤
- ● Paper towels – 3–5 sheets for wiping hands/tools
- ● Bowl or resealable bag – for giblet storage (if saving for stock/gravy) 🥘
- ● Running water – cool or lukewarm for rinsing 💦
- ○ Tongs or fork (optional) – to help pull out stubborn giblets
- ● Trash bin – lined and nearby for easy disposal 🗑️
- ○ Kitchen twine (optional) – if re-tying legs after removal
Step-by-Step Instructions for Removing Giblets From Chicken
Here’s the method I use every time—simple, clean, and foolproof for perfect prep.
Locate the Giblet Package Inside the Cavity
Start by placing your whole chicken breast-side up on a clean work surface. Look at the cavity where the legs meet—you’ll see a small bundle wrapped in thin paper or plastic. This package contains the giblets (heart, gizzard, liver, and sometimes neck).
If you don’t see it immediately, run your fingers along the cavity walls. The package is usually tucked against the back or side. Don’t worry if it feels a bit slippery—that’s normal. The key is to find the sealed edge of the package to grip it properly.
Remove the Giblet Package in One Piece
Once you’ve located the package, gently pull it out using your fingers. I like to use my thumb and index finger to pinch the sealed edge for better control. Pull slowly but firmly—you want to remove it in one piece without tearing the wrapping.
If the package resists, don’t force it. Instead, use kitchen shears to carefully snip the membrane attaching it to the cavity. This happens occasionally with fresh chickens where the giblets haven’t fully separated during processing. A clean removal prevents any residual paper or plastic from remaining in the bird.
Rinse and Inspect the Chicken Cavity
After removing the giblet package, hold the chicken over your sink and rinse the cavity under cool running water. Use your fingers to gently rub the inside walls, checking for any remaining bits of membrane or stray pieces that might have been missed.
Pay special attention to the area near the backbone and where the package was attached. I always do a final visual inspection by holding the chicken up to the light—this helps spot anything you might have missed. Pat the cavity completely dry with paper towels before proceeding with your recipe.
Decide What to Do With the Giblets
Now you have a choice with those giblets. For immediate use, rinse them under cold water and pat dry. The liver is particularly perishable, so use it within a day or two. I like to make a quick giblet gravy by simmering them with aromatics for about 45 minutes until tender.
If you’re not using them right away, store the giblets in an airtight container in the refrigerator for up to 2 days, or freeze them for up to 3 months. For freezing, I recommend wrapping them individually in plastic wrap first, then placing them in a freezer bag. This prevents freezer burn and makes it easy to use just what you need later.
Prep Your Chicken for Cooking
With the giblets removed, your chicken is now ready for whatever recipe you’re preparing. I always take this opportunity to do any additional prep work, like trussing the legs or tucking the wings. This is also the perfect time to season the cavity—don’t forget this step, as it flavors the meat from the inside out.
If you’re roasting the chicken, let it sit at room temperature for about 30 minutes before cooking. This ensures more even cooking throughout. For other preparations like grilling or frying, you can proceed immediately. The clean cavity will allow heat to circulate properly, giving you perfectly cooked chicken every time.
Tips and Common Mistakes for Perfect Giblet Removal
After years of prepping chickens, I’ve learned these subtle details make all the difference between a messy struggle and smooth, professional results.
Visual Inspection Trick: When you get to Step 3, hold the chicken cavity up to a bright light source after rinsing. The translucent skin will reveal any missed membrane fragments or tiny plastic bits that might have broken off during removal. I learned this after finding a stubborn piece that kept eluding me until I tried this simple trick.
Temperature Matters: The 30 minutes of room temperature resting mentioned in Step 5 isn’t just about even cooking—it also makes the chicken skin more pliable for any final prep like trussing. Cold chicken tears easily, while room-temperature skin stretches without ripping when you’re tucking wings or tying legs.
Gripping Technique: In Step 2, if the package feels slippery, try this: pinch the sealed edge between your thumb and forefinger, then use your middle finger to press against the chicken’s backbone for leverage. This three-finger grip gives you better control than just using two fingers, especially with larger birds where the cavity is deeper.
Storage Wisdom: When freezing giblets as mentioned in Step 4, wrap each piece individually in plastic wrap before bagging. This prevents the liver’s strong flavor from transferring to other giblets during storage. I also label each package with the date—liver only keeps its best quality for about 3 months, while hearts and gizzards last closer to 6 months.
Pro Tips for Remove Giblets From Chicken
- After years of prepping chickens, I’ve learned these subtle details make all the difference between a messy struggle …
- Visual Inspection Trick: When you get to Step 3, hold the chicken cavity up to a bright light source after rinsing. T…
- Temperature Matters: The 30 minutes of room temperature resting mentioned in Step 5 isn’t just about even cooking—it …
Frequently Asked Questions
Got questions about removing giblets from chicken? You’re not alone! Here are the most common queries—answered simply and clearly.
Do I have to remove giblets before cooking?
Yes! Leaving them in can ruin your dish with a bitter, gamey taste. Plus, they’re often wrapped in a paper packet that isn’t food-safe when cooked. Always check the cavity (even in pre-packaged birds) and remove them before seasoning or roasting.
What if I forgot to take them out before cooking?
Don’t panic! If the giblets were in a paper packet, discard the chicken—it’s unsafe. If loose and fully cooked (165°F+), you can carefully remove them and continue cooking. For undercooked meat, finish cooking to temp and monitor for off-flavors.
Can I freeze giblets for later use?
Rinse, pat dry, and store in an airtight container or freezer bag for up to 3 months. Use them for gravy, stock, or pet food (if unseasoned). Pro tip: Label with the date to track freshness!
What’s the easiest way to remove giblets from a whole chicken?
Reach into the main cavity (near the legs) or the neck cavity (under the flap). Use your fingers or tongs to pull out the packet or loose parts. Rinse the chicken inside and out with cold water afterward. No tools needed!
Are giblets edible? What can I make with them?
Yes! Giblets (heart, liver, gizzard, neck) are packed with flavor. Simmer them into homemade stock, chop for gravy, or pan-fry with onions for a rustic treat. Avoid the liver if you dislike strong flavors—it’s the most intense!
Removing giblets from chicken is simpler than you think—just follow the steps, trust your instincts, and you’ll master it in no time! 🎯 Whether you’re prepping for a juicy roast or a flavorful stock, this small step makes a big difference in taste and safety.
Now that you’re a pro, why not put your skills to the test? Grab a whole chicken and try a new recipe—your perfectly prepped bird is ready for its star moment! 🍗✨

Trained in classic French technique but raised on slow-cooked ribs and spicy rubs, she blends culinary skill with smoke and soul.
- Recipe for Boneless Pork Chops in Cast Iron Skillet: Sear and Baste to Juicy Perfection - October 3, 2026
- Recipe for Boneless Cross Rib Roast: Slow-Roasted Beef with Herb Crust - October 3, 2026
- Hamburgers in Sauce Recipe Crock Pot: Slow-Cooked Savory Delight - October 3, 2026