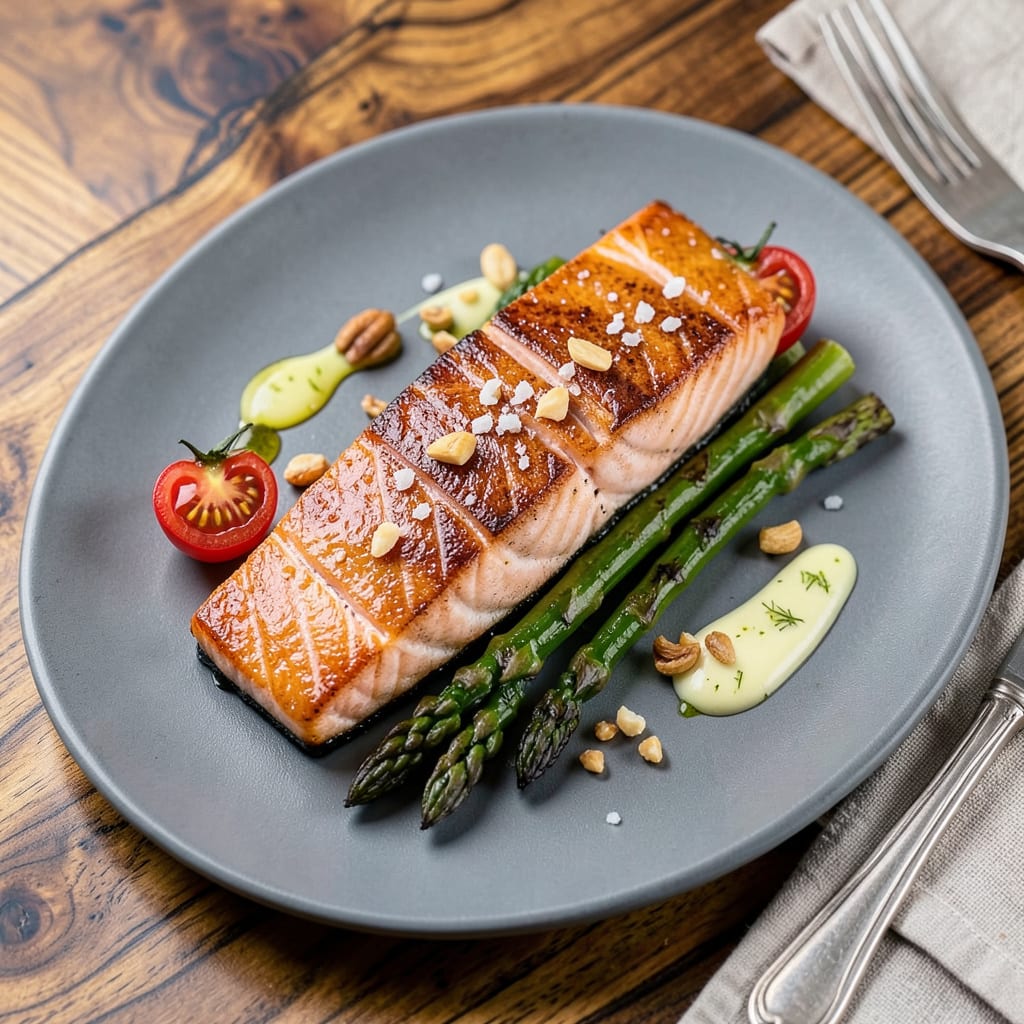
I’ll be real with you—this reverse seared salmon changed how I cook fish forever. No more dry edges or undercooked centers. The method flips everything: slow oven first for that ultra-tender center, then a screaming-hot sear for crispy skin that shatters with your fork. First time I tried it, I actually did a little victory dance in my kitchen.
Here’s the thing—most home cooks overcook salmon trying to get that golden crust. This technique solves that by baking the fish low and slow at 250°F until it’s just shy of done, then finishing with a quick sear in a cast-iron skillet. You control the doneness perfectly, hitting that sweet spot where the center stays silky and the skin gets that coveted crunch.
What you end up with is restaurant-quality salmon that looks as good as it tastes. The flesh flakes apart effortlessly, while the skin stays crisp enough to hear from across the table. I serve mine with a quick lemon-dill sauce and roasted asparagus—simple sides that let the salmon shine without competing.
Fair warning: once you master this, you’ll never go back to pan-searing alone. The difference is that dramatic. All you need is a thermometer, 30 minutes, and the confidence to trust the process. Let’s get that salmon in the oven.
📚 In This Guide
- What You’ll Need
- Instructions
- Tips and Common Mistakes
What Youll Need
- ● Salmon fillet (1–1.5 lbs) – Skin-on, preferably center-cut (1–1.5 inches thick for even cooking). Opt for wild-caught (sockeye or king) or high-quality farmed.
- ● Kosher salt (1–2 tbsp) – For dry-brining (Diamond Crystal or Morton’s).
- ● Neutral high-smoke-point oil (2–3 tbsp) – Avocado, grapeseed, or refined coconut oil work best.
- ● Black pepper (½ tsp, freshly cracked) – Or your favorite seasoning blend (e.g., lemon-pepper, garlic powder).
- ● Tools: Wire rack + baking sheet – For air circulation during the low-temp bake.
- ● Oven-safe skillet (cast iron or stainless steel) – 10–12 inches for searing.
- ● Instant-read thermometer – Critical for precision (target: 110–120°F internal before sear).
- ● Paper towels – To pat the salmon very dry before cooking.
- ○ Optional (but helpful!): Tongs or fish spatula – For flipping without breaking the skin.
- ● Blowtorch (culinary or propane) – For an extra-crispy crust if skipping the skillet.
- ● Lemon wedges or fresh herbs – For garnish (try dill or thyme!).
Step-by-Step Instructions for Reverse Seared Salmon
This foolproof method delivers that restaurant-quality balance of crispy skin and buttery-soft center every time.
Start with Perfectly Dry, Cold Salmon
Begin by patting your salmon fillets completely dry with paper towels—this is non-negotiable for achieving crispy skin later. I press down firmly on all surfaces, especially the skin side where moisture tends to linger. The drier the surface, the better the sear will be.
Place the fillets skin-side down on a wire rack set over a plate and refrigerate uncovered for at least 30 minutes (or up to 2 hours). This drying process is what creates that coveted crispy texture. You’ll notice the surface becomes slightly tacky—that’s exactly what you want for maximum browning.
Slow-Roast for Even Doneness
Preheat your oven to 250°F—this low temperature is the secret to that ultra-tender center. Place the chilled salmon on a parchment-lined baking sheet, still skin-side down. Roast for 15-20 minutes depending on thickness, until the internal temperature reaches 110°F at the thickest part.
You’re looking for the flesh to just begin flaking at the edges when gently pressed with a finger. The salmon will look slightly translucent in the center—that’s perfect because it’ll continue cooking during the sear. Don’t worry if it feels underdone; this is exactly where you want it to be at this stage.
Create the Perfect Crispy Skin
Heat a heavy skillet (cast iron works best) over medium-high heat until it’s screaming hot—you should see a slight shimmer when you hold your hand above it. Add just enough oil to coat the bottom (1-2 tablespoons), then carefully place the salmon in the pan skin-side down.
Press down gently with a fish spatula for the first 10 seconds to prevent curling, then don’t touch it for 2-3 minutes. You’ll know it’s ready to flip when the edges turn opaque and the skin releases easily from the pan. The skin should be deep golden brown and crispy—this is where that initial drying really pays off.
Finish with a Quick Sear
Flip the salmon and cook for just 30-60 seconds on the flesh side—you’re not trying to cook it through, just create a beautiful crust. The center should now reach 125°F for perfect medium doneness. Watch closely as salmon can overcook in seconds at this stage.
You’ll see the color change from translucent to opaque as it climbs those last few degrees. Remove from heat immediately when it hits temperature—the residual heat will bring it to perfect doneness as it rests. The flesh should flake easily but still feel slightly resistant in the very center.
Rest and Serve Immediately
Transfer the salmon to a warm plate and let it rest for 3-5 minutes before serving. This brief rest allows the juices to redistribute throughout the fillet instead of running out when you cut into it. You’ll notice the color evens out during this time.
Serve immediately while the skin is still crispy. Each bite should deliver that perfect contrast—crispy, crackling skin giving way to silky, tender flesh. The center should be just barely opaque with a hint of translucency, melting in your mouth with that buttery richness salmon is famous for.
Tips and Common Mistakes
Perfecting this technique comes down to understanding why each step matters. Here’s what I’ve learned from years of refining this method.
Drying is Everything: That 30 minutes to 2 hours in the fridge isn’t just waiting time—it’s when the magic happens. The surface moisture evaporates, creating that tacky texture that transforms into crispy perfection. I’ve found that thicker fillets benefit from the full 2 hours, while thinner pieces are perfect at 30 minutes. Don’t rush this step or you’ll sacrifice that satisfying crunch.
Low and Slow Precision: The 250°F oven temperature might seem unusually low, but it’s the key to that buttery center. When roasting for 15-20 minutes, watch for the edges to just begin flaking while the center remains slightly translucent. This is where an instant-read thermometer becomes your best friend—pull it at exactly 110°F for that perfect medium finish after searing.
Pan Heat Control: When you move to the stovetop, that medium-high heat needs to be screaming hot before the salmon hits the pan. I test it by sprinkling a drop of water—it should dance and evaporate instantly. The 2-3 minutes skin-side down might feel long, but resist the urge to peek. That undisturbed contact creates the crispy crust you’re after. Pressing gently for the first 10 seconds prevents curling without compromising texture.
Resting Matters More Than You Think: Those 3-5 minutes of resting time aren’t optional. I learned this the hard way after cutting into a beautiful fillet too soon and watching all those precious juices escape. The salmon continues cooking gently during this time, and the fibers relax, making each bite more tender. Serve it immediately after resting while the skin is still at its crispiest.
Pro Tips for Reverse Seared Salmon
- Perfecting this technique comes down to understanding why each step matters. Here’s what I’ve learned from years of r…
- Drying is Everything: That 30 minutes to 2 hours in the fridge isn’t just waiting time—it’s when the magic happens. T…
- Low and Slow Precision: The 250°F oven temperature might seem unusually low, but it’s the key to that buttery center….
Frequently Asked Questions
Can I reverse sear frozen salmon, or does it need to be thawed first?
Always thaw your salmon first! Reverse searing works best with evenly tempered fish. Thaw it overnight in the fridge or use the cold-water method (sealed in a bag, submerged for 30-60 mins). Pat it very dry before cooking to ensure crispy skin.
How long should I bake the salmon before searing?
Bake at 200–225°F until the center reaches 110–115°F (about 20–30 mins, depending on thickness). Use a meat thermometer for precision—this low-and-slow step is key for that buttery texture!
What’s the best oil for searing, and can I use butter?
High-smoke-point oils like avocado, grapeseed, or refined coconut oil work best. Butter burns easily but can be added last for flavor—baste with it off-heat! For extra crispiness, try a mix of oil and clarified butter.
Why did my salmon skin stick to the pan? How do I fix it?
Sticking usually means the pan wasn’t hot enough or the skin wasn’t dry. Heat your pan on medium-high until shimmering, press the salmon gently with a spatula for 10 seconds after adding, and don’t move it until ready to flip! Pro tip: A well-seasoned cast-iron or stainless-steel pan helps.
Can I reverse sear salmon on a grill instead of the oven?
Use indirect heat (turn off one burner) to bake the salmon first, then sear over direct high heat. Keep the lid closed during baking to maintain low temps—aim for the same internal temp (110–115°F) before searing.
Mastering reverse seared salmon is your ticket to restaurant-quality results at home—juicy, tender flesh with irresistible crispy skin every time! 🎉 Whether you’re prepping a weeknight dinner or impressing guests, this method delivers foolproof perfection with minimal effort. The secret? Low-and-slow heat followed by a quick sear—simple, but game-changing.
Ready to try it yourself? Grab your salmon fillet, fire up the oven (or smoker!), and let the magic happen. Don’t forget to snap a pic of your golden crust—tag us so we can cheer you on! For more seafood wins, check out our guide on pan-seared scallops next. Happy cooking! 🍽️

Trained in classic French technique but raised on slow-cooked ribs and spicy rubs, she blends culinary skill with smoke and soul.
- Recipe for Boneless Pork Chops in Cast Iron Skillet: Sear and Baste to Juicy Perfection - October 3, 2026
- Recipe for Boneless Cross Rib Roast: Slow-Roasted Beef with Herb Crust - October 3, 2026
- Hamburgers in Sauce Recipe Crock Pot: Slow-Cooked Savory Delight - October 3, 2026