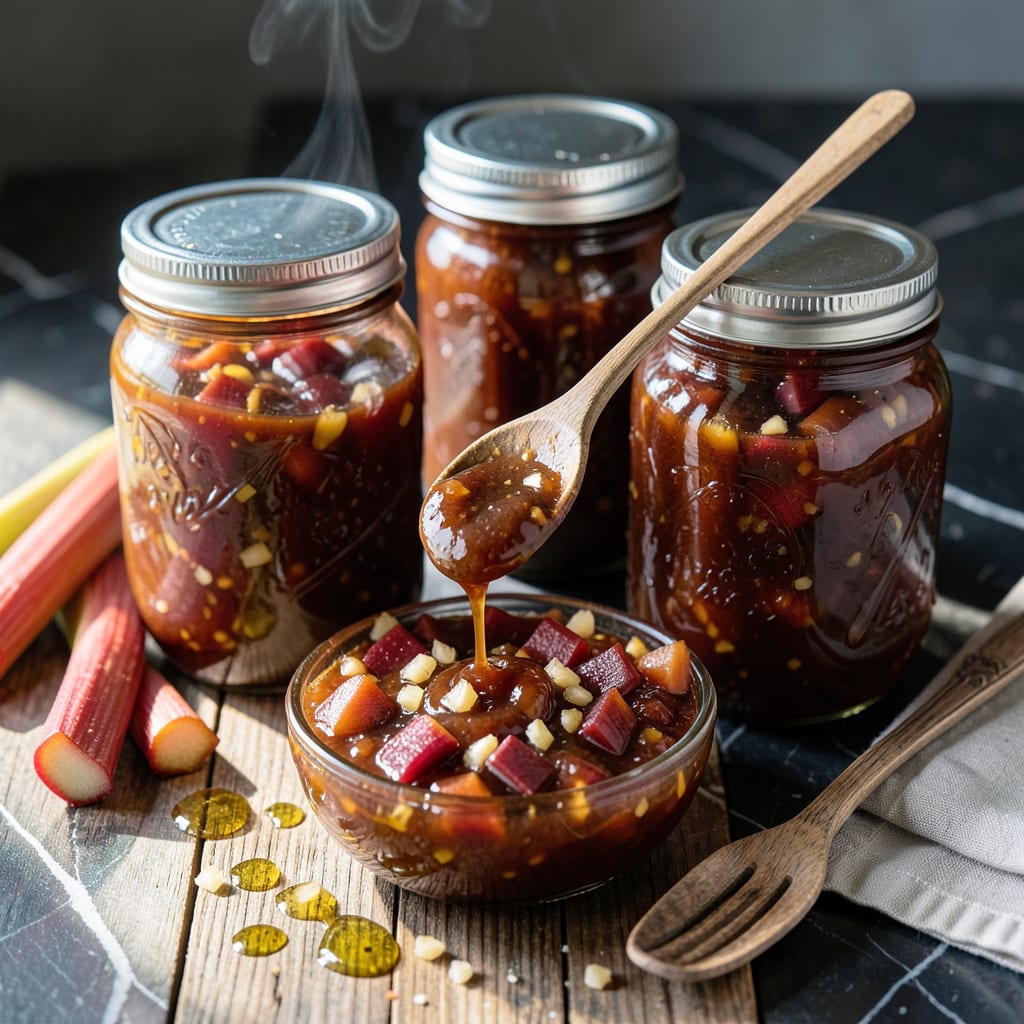
This rhubarb BBQ sauce captures the perfect balance of tart and sweet for canning. I developed it to preserve summer’s bounty for year-round grilling.
With simple ingredients and proper canning, you’ll have a tangy sauce that elevates ribs, chicken, or even veggie burgers. The process ensures shelf stability without sacrificing flavor.
Ingredients for Rhubarb Bbq Sauce Recipe for Canning
Ten simple ingredients transform into a tangy, shelf-stable sauce perfect for preserving summer flavors.
| Ingredient | Amount | Notes |
|---|---|---|
| Fresh Rhubarb 🌱 | 6 cups | Chopped into 1-inch pieces |
| Apple Cider Vinegar 🍏 | 1 ½ cups | 5% acidity for canning safety |
| Light Brown Sugar 🍚 | 2 cups | Packed, for balanced sweetness |
| Tomato Paste 🍅 | ½ cup | For depth and thickness |
| Yellow Onion 🧅 | 1 whole | Finely diced for texture |
| Garlic Cloves 🧄 | 4 cloves | Minced for aromatic base |
| Smoked Paprika 🌶️ | 1 tbsp | For signature BBQ smokiness |
| Ground Black Pepper 🌶️ | 1 tsp | Freshly ground preferred |
| Kosher Salt 🧂 | 1 ½ tsp | Diamond Crystal brand preferred |
| Worcestershire Sauce 💧 | 2 tbsp | Vegan version required |
[recipe_ingredient_scaler]
The rhubarb is non-negotiable here. Farmers markets have the best stuff in spring—look for crisp, bright red stalks (green means it’s past peak). I grab mine from Trader Joe’s when I’m in a pinch, but fresh is always better. Brown sugar adds molasses depth—Domino or C&H are reliable. For the vinegar, stick with 5% acidity (check the label) to ensure safe canning.
No fresh rhubarb? Frozen works perfectly—just thaw and drain first. Swap brown sugar for white if needed, but you’ll lose some caramel notes. If you can’t find vegan Worcestershire, coconut aminos plus a dash of molasses gets you close. The smoked paprika is key for that BBQ vibe—Penzeys has great quality. Onion can be white in a pinch, but yellow adds better sweetness.
This sauce keeps for 12-18 months unopened in a cool, dark place. Once cracked, refrigerate and use within 1 month. Pro tip: Freeze in ice cube trays for single-serving portions (thaw in 10 minutes on the counter). Always check jar seals before storing—if the lid pops, reprocess immediately.
Why You’ll Love This Recipe
- Minimal Chopping Required: I just dice the rhubarb and onion, then everything else goes straight into the pot.
- Tangy Sweet Balance: The rhubarb’s tartness with brown sugar and vinegar hits that perfect BBQ sweet-spice notes.
- Pantry Staple: I can this sauce and have homemade BBQ flavor ready for ribs, chicken, or even as a pizza base.
- Budget Friendly: Rhubarb is cheap in season, and this makes more than enough to last us through winter.
Step-by-Step Instructions for Rhubarb BBQ Sauce for Canning
This method transforms tart rhubarb into a rich, smoky sauce that preserves beautifully.
Step 1: Sauté Aromatics and Bloom Spices
Finely dice the yellow onion and mince the 4 cloves garlic cloves. Heat a heavy pot over medium heat and add the onion. Cook for 5-6 minutes until translucent and beginning to caramelize around the edges.
Add the minced garlic, 1 tbsp smoked paprika, 1 tsp ground black pepper, and 1.5 tsp kosher salt. Stir constantly for 1 minute until the spices become fragrant and the paprika darkens slightly. This blooming step deepens the flavor profile significantly.
Step 2: Combine All Ingredients and Simmer
Add the 6 cups fresh rhubarb (chopped into 1-inch pieces), 1.5 cups apple cider vinegar, 2 cups light brown sugar, 0.5 cup tomato paste, and 2 tbsp Worcestershire sauce to the pot. Stir thoroughly to combine, breaking up any clumps of tomato paste.
Increase heat to medium-high and bring the mixture to a boil. Once boiling, reduce heat to medium-low to maintain a gentle simmer. Partially cover the pot to prevent splattering while allowing steam to escape.
Step 3: Reduce to Desired Consistency
Simmer the sauce for 45-60 minutes, stirring every 10-15 minutes to prevent sticking. The sauce is ready when it has thickened enough to coat the back of a spoon and the rhubarb has completely broken down into a smooth purée.
Toward the end of cooking, the color will deepen to a rich, reddish-brown. The sauce will continue to thicken as it cools, so aim for a consistency slightly thinner than your final goal. Taste and adjust seasoning if needed, though the measurements provided should yield perfect balance.
Step 4: Process for Safe Canning
Ladle the hot sauce into sterilized canning jars, leaving ½-inch headspace. Remove any air bubbles by running a clean knife around the inside of each jar. Wipe the rims clean with a damp cloth to ensure a proper seal.
Process the jars in a water bath canner for 15 minutes (adjusting for altitude if necessary). The sauce is safe for canning due to the 5% acidity from the apple cider vinegar. After processing, let the jars cool undisturbed for 12-24 hours to set the seal properly.
Pro Tips For Making Rhubarb Bbq Sauce Recipe For Canning
- Simmer Low and Slow: Cook the sauce at a gentle simmer for at least 30-40 minutes—rushing it with high heat will leave the rhubarb fibrous instead of breaking down into that smooth, jammy texture.
- Trim the Rhubarb: Slice off all the leafy ends and discard them (they’re toxic), then chop the stalks into 1-inch pieces so they soften evenly in the pot.
- Balance the Tartness: Taste before canning and adjust with a touch more brown sugar if the rhubarb’s sharpness overpowers, but resist oversweetening—apple cider vinegar should still cut through.
- Use a Fine Mesh Strainer: After cooking, press the sauce through a fine mesh strainer for a silky finish—this removes any stubborn rhubarb strings without thinning the sauce too much.
Pro Cooking Tips for This Recipe
Acid Balance Check
Always verify your vinegar is 5% acidity—this is non-negotiable for safe canning. I use Bragg Organic from the farmers market. The 1.5 cups in this recipe ensures the pH stays below 4.6, which prevents botulism growth in low-acid foods. 💡
Consistency Control
The sauce thickens as it cools, so pull it off heat when it’s slightly thinner than desired. I test by dragging a spoon through—if the line holds for 2-3 seconds, it’s ready. For thicker sauce, simmer an extra 5-10 minutes.
Jar Preparation
Sterilize jars by boiling for 10 minutes before filling. Keep them hot until ready to use—I keep mine in the canner while the sauce cooks. Use new lids each time; rings can be reused if in good condition.
Headspace Matters
Leave exactly ½-inch headspace in each jar. Too little causes siphoning; too much prevents proper sealing. I use a plastic ruler designed for canning to measure precisely. This small detail makes all the difference. 🔥
Altitude Adjustments
For elevations above 1,000 feet, increase processing time by 5 minutes per 1,000 feet. I learned this the hard way at a mountain BBQ competition—my seals failed at 5,000 feet without adjustment.
Testing Seals
After 24 hours, test seals by pressing the lid center. If it doesn’t pop, it’s sealed. Any unsealed jars go straight to the fridge for immediate use. I label mine with the date and batch number for tracking.
Nutrition Facts

Trained in classic French technique but raised on slow-cooked ribs and spicy rubs, she blends culinary skill with smoke and soul.
- Recipe for Boneless Pork Chops in Cast Iron Skillet: Sear and Baste to Juicy Perfection - October 3, 2026
- Recipe for Boneless Cross Rib Roast: Slow-Roasted Beef with Herb Crust - October 3, 2026
- Hamburgers in Sauce Recipe Crock Pot: Slow-Cooked Savory Delight - October 3, 2026