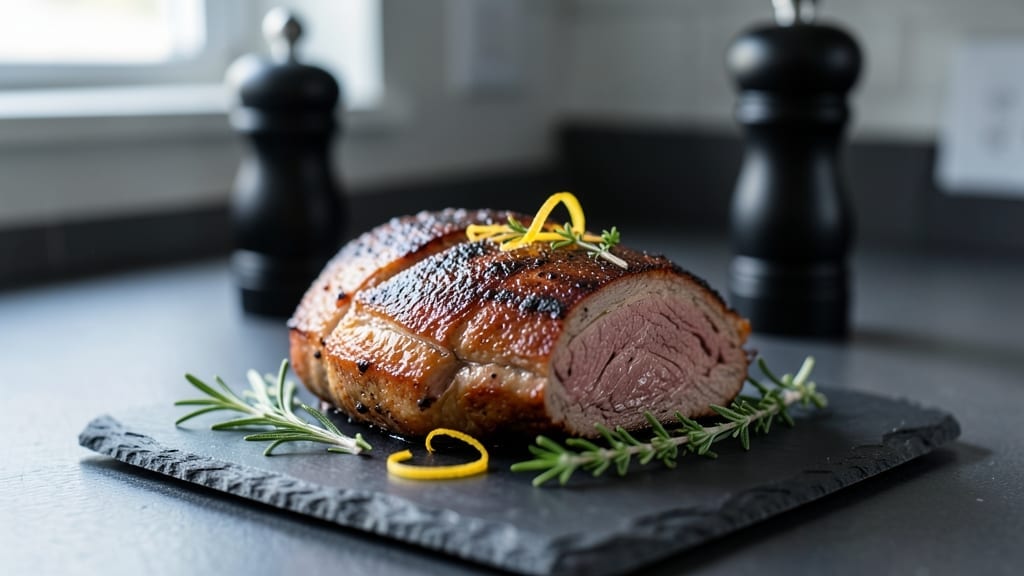
Slow-roasted beef brisket transforms tough cuts into melt-in-your-mouth perfection that makes every bite unforgettable. The key lies in patience—low heat, ample time, and a simple seasoning blend that lets the beef’s natural richness shine through.
I still remember my first backyard cookout when my grandfather showed me how to coax tenderness from brisket using just salt, pepper, and time.
This method delivers restaurant-quality results at home without fancy equipment. A 300°F oven ensures even cooking while preserving moisture, and the 6-8 hour process breaks down connective tissue for that signature fall-apart texture.
The secret weapon? Basting with its own juices every hour to build a caramelized crust that seals in flavor. No marinades or complex rubs—just quality beef and the magic of slow cooking.
By the time you carve into that golden-brown crust, you’ll uncover layers of juicy, tender meat that practically melts on the tongue. The aroma alone will have everyone gathering around the table, and the first bite delivers that perfect balance of savory richness and melt-in-your-mouth satisfaction.
This is the kind of dish that turns ordinary weeknights into special occasions.
Pair it with classic sides like roasted potatoes or caramelized onions for a complete meal. The brisket’s versatility makes it perfect for holiday feasts or casual family dinners alike. Let’s get started on creating your most tender brisket yet.
Ingredients for roasted beef brisket
Just quality beef, simple seasonings, and time—everything you need to create melt-in-your-mouth brisket.
| Ingredient | Amount | Notes |
|---|---|---|
| Beef Brisket 🥩 | 5 lb | Whole packer cut, fat cap intact |
| Kosher Salt 🧂 | 2 tbsp | Diamond Crystal preferred, coarse |
| Freshly Ground Black Pepper 🌶️ | 1 ½ tbsp | Freshly cracked for maximum flavor |
| Garlic Cloves 🧄 | 8 cloves | Peeled, smashed for aroma infusion |
| Yellow Onions 🧅 | 2 whole | Yellow or red, sliced into wedges |
| Fresh Rosemary 🌿 | ½ cup | Needles only, chopped fine |
| Fresh Thyme 🌿 | ¼ cup | Leaves only, stems removed |
| Extra-Virgin Olive Oil 🫒 | ¼ cup | High quality, fruity variety |
| Apple Cider Vinegar 🍎 | 2 tbsp | For tenderizing, unfiltered preferred |
| Beef Tallow or Butter 🧈 | ½ cup | For basting, tallow preferred |
| Beef Broth 💧 | 1 cup | Low-sodium, homemade or quality store-bought |
| Brown Sugar 🍯 | 2 tbsp | Light or dark, for caramelization |
[recipe_ingredient_scaler]
The brisket is non-negotiable here. Packer cut from Whole Foods or your local butcher delivers the best results—look for good marbling and a thick fat cap (at least 1/4-inch). If you’re buying pre-trimmed, add back some of that fat—it’s what creates that signature crust. I always ask for the whole brisket (not pre-cut flat or point) since it cooks more evenly. For a true backyard cookout vibe, grab yours from Costco or a farmers market where they still sell whole cuts. The fat cap should be intact—this is what renders down during cooking and keeps the meat moist. If yours is too thin, wrap it in foil with a little extra fat before roasting.
No fresh rosemary? Dried at half the amount works in a pinch, but trust me on the fresh stuff—it makes all the difference. Short on time? Smoked paprika plus a pinch of cayenne can mimic that earthy aroma. The apple cider vinegar might seem odd, but it tenderizes the meat beautifully—Bragg or Texas Pete are my go-tos. For basting, I use a mix of rendered beef tallow and butter (if you can’t find tallow, unsalted butter works perfectly). The brown sugar isn’t just for sweetness—it helps create that caramelized crust. If you’re making this ahead, the brisket actually tastes better the next day once all the flavors meld together. And if you’re worried about the garlic burning, smash the cloves instead of mincing them—they’ll infuse flavor without turning bitter.
This keeps beautifully for 5 days in the fridge, wrapped tightly in butcher paper (not plastic). For longer storage, vacuum-seal portions and freeze for up to 6 months. The leftovers reheat wonderfully—wrap them in foil and warm in a 275°F oven for about 20 minutes. I always make extra because it’s perfect for sandwiches, tacos, or even brisket hash the next day. The fat cap will render down as it cools, so don’t be surprised if you have extra rendered fat—save it for future roasts or cookouts. And if you’re serving a crowd, consider cooking it in a Dutch oven for easier basting and more even heat distribution.
Why You’ll Love This Recipe
- No Extra Effort Needed: This isn’t one of those recipes that demands hours of prep—just a quick trim, a 30-minute room-temperature rest, and a single sear. The magic happens in the oven while you do other things, like loading the dishwasher or scrolling through memes.
- Herb-Infused Perfection: Stuffing the cavity with smashed garlic, onions, and a splash of apple cider vinegar? That’s how you get brisket with layers of flavor that aren’t just on the surface. The rosemary and thyme? They turn ordinary into ridiculously good.
- Feeds a Crowd (or Your Weeknight): Five pounds of brisket isn’t just for holidays—it’s your secret weapon for game day, potlucks, or even a lazy Sunday dinner. And honestly? The leftovers are even better the next day, wrapped in butcher paper like a pro.
- Budget-Friendly Luxury: Brisket is one of those cuts that feels fancy but won’t break the bank. Plus, with five days of fridge life or six months frozen, you’re not tossing money down the drain. Every bite tastes like you splurged, but your wallet won’t complain.
Step-by-step instructions for roasted beef brisket
Here’s how to transform a tough cut into melt-in-your-mouth perfection using just your oven.
Prepare the Brisket with Dry Rub and Aromatics
Begin by trimming the fat cap of the 5 lb beef brisket to about ¼-inch thickness, leaving enough to protect the meat during roasting. In a small bowl, combine the 2 tbsp kosher salt, 1½ tbsp freshly ground black pepper, 2 tbsp brown sugar, ½ cup finely chopped fresh rosemary, and ¼ cup fresh thyme. Rub this mixture generously over the entire surface of the brisket, working it into the crevices.
In a separate bowl, mix the 8 smashed garlic cloves with the 2 tbsp apple cider vinegar. Stuff this garlic-vinegar mixture along with the 2 sliced yellow onions into the cavity of the brisket. This infusion of aromatics will penetrate the meat during roasting, creating layers of flavor. Let the brisket sit at room temperature for 30 minutes while you prepare the oven.
Sear and Roast for Deep Flavor Development
Preheat your oven to 325°F. Heat a Dutch oven or heavy roasting pan over medium-high heat. Add ¼ cup extra-virgin olive oil and ½ cup beef tallow (or butter) to the pan. Once the fat is shimmering but not smoking, carefully place the brisket fat-side down and sear for 5 minutes. Flip and sear the other side for another 5 minutes until a deep golden crust forms.
Remove the brisket from the pan and place it fat-side up on a wire rack set inside a roasting tray. Pour the rendered fat from the pan into a measuring cup – you should have about ½ cup. Return this flavorful fat to the roasting tray, then add 1 cup beef broth. Roast uncovered for 3 hours, basting with the pan juices every 45 minutes. The brisket is ready when it reaches an internal temperature of 195°F and the meat pulls apart easily with two forks.
Rest and Serve with Pan Sauce
Transfer the brisket to a cutting board and tent loosely with aluminum foil. Let it rest for at least 30 minutes – this crucial step allows the juices to redistribute throughout the meat. Meanwhile, place the roasting tray on the stovetop over medium heat. Add the sliced yellow onions to the pan and cook for 5 minutes until caramelized. Pour in any accumulated juices from the brisket and simmer for 3-4 minutes until slightly thickened.
Slice the brisket against the grain into ½-inch thick slices. Spoon the pan sauce over the top and serve immediately with the remaining caramelized onions. The result should be fork-tender meat with a perfect balance of smoky, herby, and slightly sweet flavors that melt in your mouth with every bite.
Pro Tips For Making Roasted Beef Brisket
- Trim That Fat Cap: Cut the brisket’s fat down to a crisp ¼-inch layer—no thinner, or you’ll dry out the meat. I learned this the hard way when my first attempt turned the fat into a sad, greasy puddle instead of a flavor shield.
- Don’t Skip the Vinegar: The 2 tbsp apple cider vinegar isn’t just for show—it tenderizes the brisket while infusing that bright, tangy depth. Mix it with the garlic cloves and stuff it inside; the acid works its magic during roasting.
- Sear Until It Screams: Those 5 minutes per side on high heat aren’t optional. The brisket should sizzle loudly and develop a crust darker than your patience. If it’s not golden by then, crank the heat and try again.
- Save the Rendered Fat: That shimmering fat you pour out after searing? Don’t toss it—return it to the roasting tray with the broth. It’s liquid gold for basting, and skipping it means missing out on the richest flavor in the pan.
Common mistakes when making perfect results
Skipping the Room Temp Step
One of my biggest mistakes early on was rushing the room temperature step. Letting that 5 lb brisket sit uncovered for 30 minutes at room temperature is crucial—it ensures even cooking and prevents temperature shock.
I’ve learned the hard way that skipping this can lead to uneven doneness, especially in thicker cuts. Trust me, those extra 30 minutes pay off in juicy, evenly cooked meat. 🔥
Overcrowding the Pan
Using a small pan or overcrowding the roasting tray is a common pitfall. When I first started, I’d try to fit the entire brisket into a 12-inch Dutch oven meant for smaller cuts. The result? Uneven searing and less flavorful crust.
Always use a large enough pan—at least 16×12 inches—so the fat can render properly and the brisket gets that beautiful golden crust. I now use a 18-inch roasting pan for this recipe.
Ignoring the Basting Ritual
Basting every 45 minutes with the pan juices isn’t just a suggestion—it’s non-negotiable for that perfect crust and moisture retention. I’ve seen home cooks skip this step, thinking it’s unnecessary, and the brisket ends up dry or overly crispy.
The rendered fat and broth create a protective layer that keeps the meat juicy. Don’t skip it! I’ve even kept a basting brush handy for this exact reason. 💫
Underestimating Rest Time
The 30-minute rest after roasting is where the magic happens—juices redistribute, and the meat becomes tender. I’ve sliced brisket too soon out of impatience, and the results were disappointing: dry, stringy meat. Resting is just as important as the cooking process itself.
I’ve even wrapped my brisket in a towel and placed it on top of the oven to retain heat during this time for extra tenderness.
Using the Wrong Thermometer
A cheap or inaccurate thermometer can ruin your brisket. I’ve had instances where my instant-read thermometer failed to reach the 195°F internal temperature target, leaving the meat tough. Invest in a quality probe thermometer like the Thermoworks Smoke—it’s a game-changer.
I’ve also kept a backup in my pocket for outdoor cooking adventures. Trust me, precision matters!
Nutrition facts
Frequently asked questions
Why does my brisket need to rest before slicing?
The 30-minute rest after roasting lets the brisket’s juices redistribute evenly throughout the meat. Skipping this step causes the juices to pool on the surface, leading to dry slices. I’ve found that tenting it loosely with foil while resting helps maintain warmth and tenderness—just like my grandmother taught me for holiday roasts.
Can I use a smaller pan for roasting?
Avoid small pans like 12-inch Dutch ovens—they don’t give the brisket enough room to render fat properly. I use an 18-inch roasting pan to ensure even searing and a flavorful crust. Overcrowding leads to uneven cooking and less crispy edges. Trust me, the extra space makes all the difference!
What if my brisket isn’t tender enough?
If it doesn’t reach 195°F after 3 hours, return it to the oven with ½ cup extra beef broth and cook another 30-60 minutes, basting frequently. The key is patience—my first attempt was tough because I checked it too early. Let it cook until it pulls apart easily with forks.
How do I store leftovers properly?
Wrap cooled brisket tightly in butcher paper (not plastic) for up to 5 days in the fridge. For longer storage, vacuum-seal portions and freeze for 6 months. I always reheat leftovers wrapped in foil at 275°F for 20 minutes to keep them moist. The rendered fat makes reheating a breeze!
What’s the best way to check doneness?
Use a probe thermometer to check the thickest part of the brisket—it should reach 195°F. I recommend the Thermoworks Smoke model for accuracy. The meat should also pull apart easily with two forks when done. Never rely on visual cues alone—they can be misleading!

Trained in classic French technique but raised on slow-cooked ribs and spicy rubs, she blends culinary skill with smoke and soul.
- Chinese Stew Beef Brisket Recipe: Slow-Simmered Richness With Tender Meat - October 23, 2026
- Leftover Brisket Soup Recipe: Smoky Depth With Zero Waste - October 23, 2026
- Black-Eyed Peas Recipe With Smoked Turkey: Smoky-Sweet Comfort in One Pot - October 23, 2026