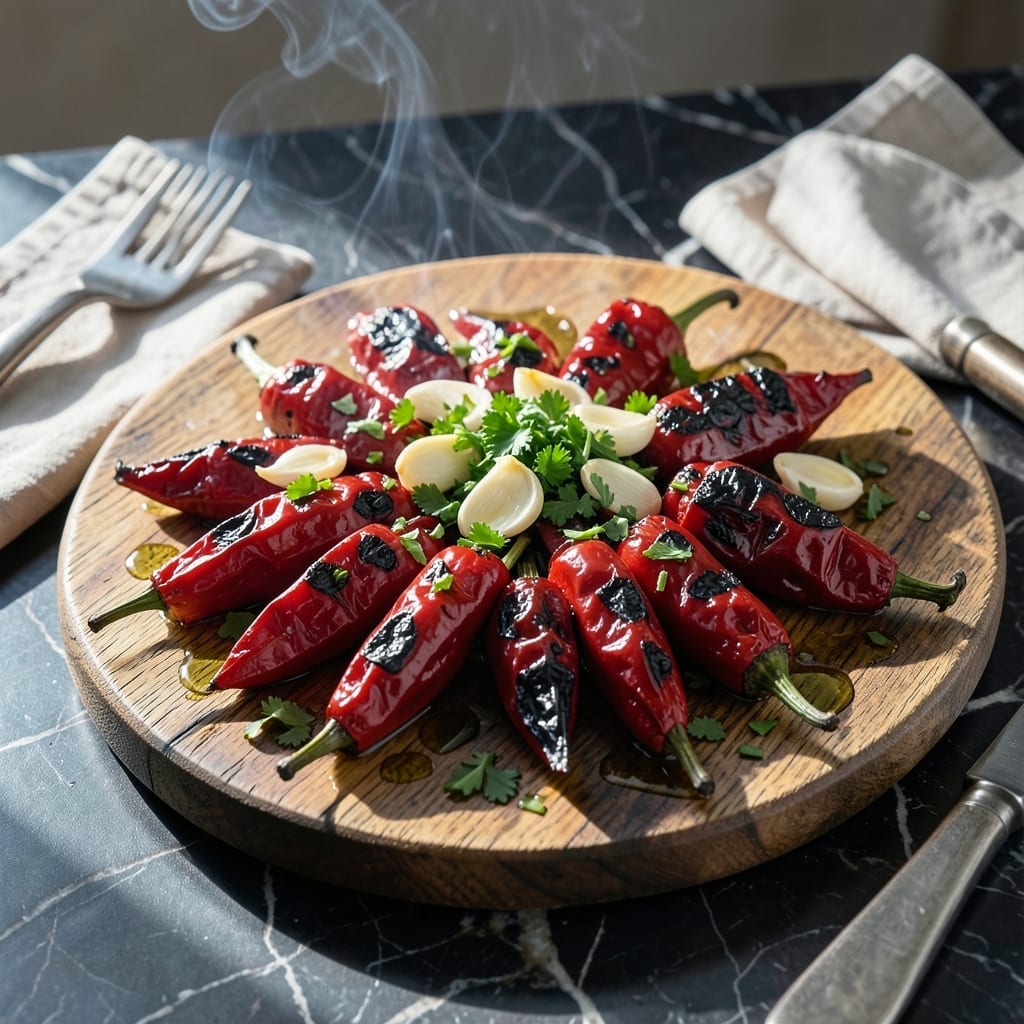
Grilling red peppers transforms their natural sweetness into something deeply complex. The direct heat creates charred blisters that peel away to reveal silky, smoky flesh beneath.
This method requires minimal effort but delivers restaurant-quality results every time. The peppers develop a depth of flavor that works in sauces, salads, or as a standalone side.
Ingredients for Roasted Red Peppers on the Grill
Minimal ingredients transform into restaurant-quality roasted red peppers with smoky depth and sweetness.
| Ingredient | Amount | Notes |
|---|---|---|
| Red Bell Peppers 🌶️ | 6 whole | Large, firm, unblemished |
| Extra-Virgin Olive Oil 🫒 | 2 tbsp | Divided for brushing and finishing |
| Sea Salt 🧂 | 1 tsp | Flaky or fine grain |
| Freshly Ground Black Pepper 🌶️ | ½ tsp | Coarse grind preferred |
| Garlic Cloves 🧄 | 3 cloves | Minced, optional for finishing |
| Fresh Parsley 🌿 | ¼ cup | Chopped, for garnish |
| Fresh Thyme Sprigs 🌿 | 2 pieces | Optional for aromatic smoke |
| Lemon Zest 🍋 | 1 tsp | From 1 medium lemon |
| Balsamic Vinegar 💧 | 1 tbsp | Aged, for drizzling |
| Red Pepper Flakes 🌶️ | ¼ tsp | Crushed, optional for heat |
[recipe_ingredient_scaler]
The peppers are everything here. Select large, firm red bell peppers with smooth, unblemished skin—they’ll char evenly and peel cleanly. Organic varieties from Whole Foods or a local farmers market often have thicker walls, which hold up better to direct heat. Avoid green or yellow peppers; their flavor lacks the necessary sweetness. If grilling in bulk, buy extra—these keep well once roasted.
No fresh thyme? Dried thyme at half the amount works fine, but add it to the olive oil before brushing. Skip the parsley if unavailable—fresh basil or cilantro make great substitutes. Aged balsamic vinegar adds complexity, but red wine vinegar in a pinch works too. The garlic is optional, but I always include it (the charred edges mellow beautifully into the peppers).
Store roasted peppers submerged in olive oil in an airtight container—they’ll keep for 1 week in the fridge or 6 months frozen. For best texture, peel and seed before storing. The oil absorbs the smoky flavor, so save it for dressings or sautéing.
Why You’ll Love This Recipe
- Hands-Off Cooking: Honestly, just toss the peppers with olive oil, salt, and pepper, then let the grill do all the work.
- Smoky Sweetness: That charred, blistered skin gives way to the most tender, caramelized flesh with a hint of garlic.
- Meal Prep Magic: I roast a big batch on Sunday and use them in sandwiches, pasta, or straight from the fridge all week.
- Pocketbook Friendly: A bag of red bell peppers costs pennies compared to jarred roasted ones, and tastes way better.
Step-by-Step Instructions for Roasted Red Peppers on the Grill
Master the technique for perfectly charred peppers with smoky depth and vibrant flavor.
Step 1: Prepare the Peppers and Grill
Begin by preheating your grill to medium-high heat. While it heats, rinse the 6 whole Red Bell Peppers and pat them completely dry. I leave the stems intact and avoid cutting into the flesh—this helps maintain their structure during grilling.
Lightly brush the peppers with 1 tbsp Extra-Virgin Olive Oil from the 2 tbsp Extra-Virgin Olive Oil. This thin coating encourages even charring without creating flare-ups. Place the 2 pieces Fresh Thyme Sprigs directly on the grates if you want a subtle aromatic smoke to infuse the peppers.
Step 2: Char the Peppers Evenly
Place the peppers on the grill, ensuring they have space between them. Cook for 8-10 minutes, turning every 2-3 minutes with tongs, until the skins blacken and blister on all sides. The goal is deep, even char—not just superficial burns.
You’ll notice the peppers soften as they cook. Don’t rush this step; under-charred peppers lack the smoky depth this dish promises. If your grill has hot spots, rotate the peppers to ensure consistent exposure to heat.
Step 3: Steam and Peel the Peppers
Transfer the charred peppers to a large bowl and immediately cover it with a plate or lid. This traps steam, which loosens the skins for easy removal. Let them sit for 10-15 minutes—this waiting period is crucial for effortless peeling.
Once cooled slightly, gently peel away the skins using your fingers or a paring knife. Avoid rinsing under water, as this washes away flavor. Discard the stems, seeds, and any remaining membranes. The peppers should now be tender with a slightly smoky aroma.
Step 4: Season and Finish
Arrange the peeled peppers on a serving platter. Drizzle with the remaining 1 tbsp Extra-Virgin Olive Oil and sprinkle evenly with 1 tsp Sea Salt and 0.5 tsp Freshly Ground Black Pepper. Add the 1 tsp Lemon Zest for brightness and the 0.25 tsp Red Pepper Flakes for a subtle kick.
For an extra layer of complexity, drizzle with 1 tbsp Balsamic Vinegar and garnish with 0.25 cup Fresh Parsley. If using, mince the 3 cloves Garlic Cloves and sprinkle over the top just before serving. The flavors should meld beautifully, with the charred sweetness of the peppers shining through.
Pro Tips For Making Roasted Red Peppers On The Grill
- Char Evenly: Rotate the peppers every 3-4 minutes to prevent blackened spots—high heat is good, but uneven char means bitter bits. I learned this the hard way after tossing out a batch that tasted like ash.
- Oil After Grilling: Skip the oil before grilling; it can cause flare-ups. Instead, toss the peppers in olive oil right after they come off the heat, then season—this way, the flavor sticks better.
- Don’t Skip the Steam: After grilling, seal the peppers in a bowl with a plate or foil for 10 minutes. Sounds weird, but it works: the steam loosens the skins so they peel off effortlessly.
- Smash the Garlic: Lightly crush the garlic cloves before adding them to the oil and peppers—this mellows the bite and infuses the oil without overpowering the dish. My grandmother swore by this, and she was right.
Creative Variations of roasted red peppers on the grill
Smoky Chipotle Twist
After grilling, toss the peeled peppers with 1 tsp chipotle powder from my go-to Penzeys stash. The smoky heat amplifies the charred flavors beautifully. Finish with 1 tbsp lime juice for brightness—this combo reminds me of coastal rides with the wind carrying that first whiff of smoke. 🔥
Garlic-Herb Marinade
Combine the peeled peppers with 3 minced Garlic Cloves, 0.25 cup Fresh Parsley, and 2 tbsp Extra-Virgin Olive Oil. Let them marinate for 30 minutes before serving. I forage wild thyme to add here when I can—it’s a game-changer.
Balsamic Glaze Drizzle
Simmer ½ cup Balsamic Vinegar until reduced by half, then drizzle over the finished peppers. The sweet-tart glaze pairs perfectly with the smoky depth. I use an aged vinegar from the farmers market for extra complexity.
Stuffed with Goat Cheese
Slice the roasted peppers open and fill with a mix of 4 oz goat cheese, 1 tbsp Lemon Zest, and ¼ tsp Red Pepper Flakes. Broil for 2-3 minutes until warm. The creamy cheese balances the charred sweetness.
Spicy Harissa Version
Toss the warm peppers with 1 tbsp harissa paste and 1 tbsp Extra-Virgin Olive Oil. The North African spice blend adds a fiery kick that’s perfect for local BBQ competitions. I add a pinch of Sea Salt to tie it all together.
Citrus-Zest Finish
After peeling, sprinkle with 1 tsp Lemon Zest and 1 tsp orange zest. The dual citrus notes brighten the smoky flavors. I learned this trick during my French training—simple but stunning. ✨
Nutrition Facts
Frequently Asked Questions
How do I know when they’re done charring?
Look for deep black blisters covering at least 80% of the surface. The peppers should feel soft when pressed with tongs. This usually takes 8-10 minutes over medium-high heat, turning every 2-3 minutes.
Should I remove the seeds before or after grilling?
Always after. Grilling whole peppers protects the flesh from drying out. The seeds and membranes come out easily once they’re charred and steamed. This method preserves more of their natural juices.
Can I use a gas grill instead of charcoal?
Gas grills work perfectly fine. Preheat to medium-high heat and follow the same timing. For extra smoky flavor, add wood chips to a smoker box or wrap them in foil with holes poked through.
How long do they keep in the fridge?
Store peeled peppers submerged in olive oil in an airtight container for up to 1 week. For longer storage, freeze for up to 6 months. The oil absorbs their smoky flavor, making it great for dressings.

Trained in classic French technique but raised on slow-cooked ribs and spicy rubs, she blends culinary skill with smoke and soul.
- Recipe for Boneless Cross Rib Roast: Slow-Roasted Beef with Herb Crust - October 3, 2026
- Hamburgers in Sauce Recipe Crock Pot: Slow-Cooked Savory Delight - October 3, 2026
- Sanjeev Kapoor Egg Biryani Recipe: Fragrant Spiced Rice With Boiled Eggs - October 3, 2026