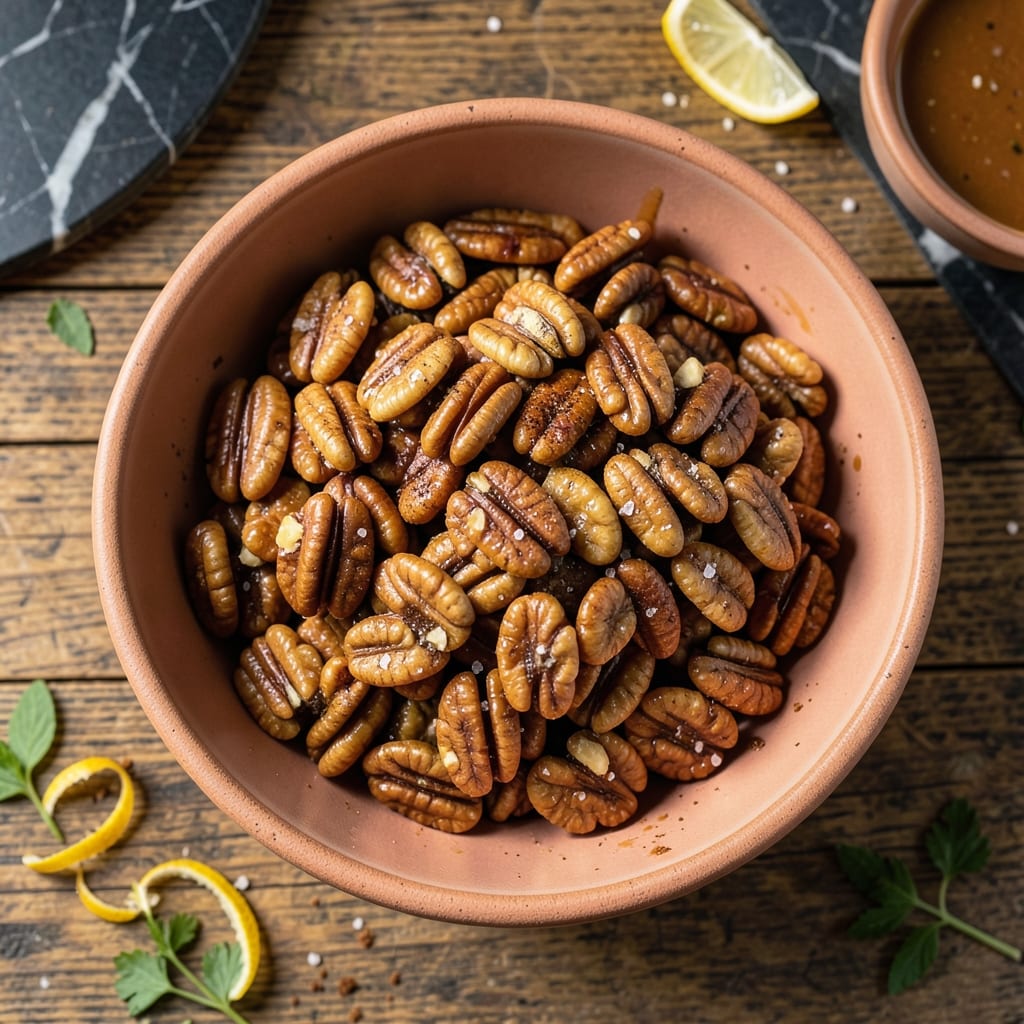
This roasted walnut recipe transforms a simple ingredient into something extraordinary with minimal effort. The process enhances their natural richness while adding a subtle sweetness that elevates every bite.
With just 10 minutes in the oven at 350°F, you’ll achieve perfectly toasted walnuts with a light maple glaze. The heat draws out their natural oils, creating a crisp texture and deep, nutty flavor.
The addition of maple syrup caramelizes slightly, balancing the earthy notes with a touch of sweetness. These walnuts work as a standalone snack or as a topping for salads, oatmeal, or desserts.
Versatile and effortless, this method ensures consistently delicious results every time.
Ingredients for Roasted Walnuts
Transform simple walnuts into gourmet bites with these quality ingredients.
| Ingredient | Amount | Notes |
|---|---|---|
| Walnuts 🌰 | 4 cups | Raw, whole or halves |
| Pure Maple Syrup 🍁 | 2 tbsp | Grade A or B preferred |
| Olive Oil 🫒 | 1 tbsp | Light or extra-virgin |
| Sea Salt 🧂 | ½ tsp | Fine grain for even coating |
| Ground Cinnamon 🌿 | ¼ tsp | Optional for warmth |
| Vanilla Extract 💧 | ½ tsp | Pure, not imitation |
| Brown Sugar 🏝️ | 1 tbsp | Light or dark variety |
| Black Pepper 🌶️ | 0.125 tsp | Freshly ground preferred |
[recipe_ingredient_scaler]
The walnuts are the foundation—raw and fresh is non-negotiable. Look for pieces with vibrant color and no bitterness; stale nuts won’t crisp properly. Costco and Trader Joe’s carry excellent bulk options. For maple syrup, Grade A or B works, but avoid pancake syrup blends. The olive oil should be neutral if you prefer the maple to shine.
No maple syrup? Agave nectar or honey (skip for strict vegan) works at a 1:1 ratio. Brown sugar can be swapped for coconut sugar if needed. For extra crunch, add a pinch of cayenne (one-eighth teaspx). If using pre-chopped walnuts, reduce roasting time by 2-3 minutes to prevent burning.
Store in an airtight container at room temperature for up to 2 weeks. For longer storage, freeze for 6 months. These reheat beautifully in a dry pan over low heat—perfect for reviving the crispness.
Why You’ll Love This Recipe
- 5-Minute Prep: I toss walnuts with olive oil, maple syrup, and cinnamon, then roast—no chopping, no fuss.
- Sweet-Savory Crunch: The maple syrup caramelizes just enough to balance the sea salt and warm cinnamon.
- Snack or Salad: I sprinkle these on oatmeal, salads, or just eat by the handful straight from the jar.
- Pantry Staple: One batch lasts a week in my kitchen, and walnuts are cheaper than pre-packaged nut mixes.
Step-by-Step Instructions for Roasted Walnuts
This method delivers perfectly toasted nuts with a glossy maple glaze and aromatic warmth.
Step 1: Prepare the Oven and Walnuts
Preheat your oven to 325°F. This moderate temperature ensures even toasting without burning the delicate walnuts. Spread all 4 cups Walnuts in a single layer on a rimmed baking sheet. I recommend using parchment paper for easy cleanup.
At this stage, inspect the walnuts and remove any shell fragments. The single-layer arrangement prevents steaming, which would make the nuts soggy instead of crisp. You want each piece to have direct contact with the hot air circulating in the oven.
Step 2: Create the Maple Spice Mixture
In a small bowl, whisk together the 2 tbsp Pure Maple Syrup, 1 tbsp Olive Oil, 0.5 tsp Sea Salt, 0.25 tsp Ground Cinnamon, 0.5 tsp Vanilla Extract, 1 tbsp Brown Sugar, and 0.125 tsp Black Pepper. The brown sugar should dissolve completely into the syrup.
I use a fork for whisking to break up any clumps in the brown sugar. The mixture should be smooth and pourable but thick enough to coat the back of a spoon. This glaze will caramelize slightly during roasting, creating a beautiful sheen on the finished nuts.
Step 3: Coat and Roast the Walnuts
Drizzle the maple mixture evenly over the walnuts on the baking sheet. Use a silicone spatula to toss everything together until the nuts are thoroughly coated. The mixture will seem scant at first, but it spreads easily as you stir.
Roast for 12-15 minutes, then remove the pan and stir the walnuts, spreading them back into a single layer. Return to the oven for another 8-10 minutes until they’re deep golden brown and the coating appears slightly bubbly. The nuts are done when they smell deeply toasted and the edges of the pan have some caramelized residue.
Step 4: Cool and Crisp the Walnuts
Transfer the hot walnuts to a clean piece of parchment paper, spreading them out so they cool quickly. As they cool, the residual heat will continue to crisp the coating. Resist the urge to taste immediately—they’ll be too soft when hot but will develop the perfect crunch as they cool.
Let them cool completely, which takes about 20-30 minutes. The coating will harden into a glossy shell that crackles when you bite into it. Once fully cooled, break apart any clusters that formed during roasting. The walnuts should have a uniform, deep amber color with a subtle sheen from the maple glaze.
Pro Tips For Making Roasted Walnuts
- Preheat the Pan: Start with a cold oven and preheat to 325°F—any hotter and the maple syrup will burn before the walnuts toast evenly.
- Dry the Walnuts: Spread walnuts on a towel first to remove any moisture; wet nuts steam instead of roast, and I learned this the hard way after three soggy batches.
- Skip the Overcrowding: Use a large baking sheet and spread walnuts in a single layer—piling them up leads to uneven cooking and sticky clumps.
- Stir Twice: Give the walnuts a good stir halfway through roasting, then again at 10 minutes; this guarantees the syrup coats every nook without burning in spots.
Storing and Reheating Leftovers
Room Temperature Storage
Once completely cooled, store these in an airtight container at room temperature. I use mason jars with tight-sealing lids. They’ll stay fresh and crisp for up to 2 weeks. Keep them away from direct sunlight and heat sources. 🌰
Extended Freezer Life
For longer storage, freeze in a single layer on a baking sheet first, then transfer to a freezer bag. This prevents clumping. They’ll keep for up to 6 months without losing texture or flavor. Vacuum-sealed bags work even better if you have them.
Re-crisping Method
If they lose their crunch, spread on a baking sheet and warm at 300°F for 5-7 minutes. Watch closely to prevent burning. This works for both room temperature and thawed frozen walnuts. I do this often when reviving older batches.
Fridge Storage Tip
While not ideal, you can refrigerate for up to 1 month in an airtight container. Place a silica gel packet inside to absorb moisture. The cold can make the coating slightly sticky, but the flavor remains excellent.
Portioning Advice
I like to divide large batches into 1-cup portions before freezing. This makes it easy to grab exactly what I need for recipes. Use small freezer-safe containers or reusable silicone bags for portion control.
Nutrition Facts
Frequently Asked Questions
Can I use a different sweetener?
Swap maple syrup for honey or agave at a 1:1 ratio. Keep in mind honey isn’t vegan. For a sugar-free option, try monk fruit syrup.
How do I prevent burning?
Stir the walnuts halfway through roasting and watch closely after 10 minutes. Lower the oven temp to 300°F if they brown too quickly. The sugar in the glaze can caramelize fast.
Can I roast them in an air fryer?
Yes! Use 325°F and cook for 6-8 minutes, shaking the basket halfway. Reduce the maple mixture slightly to avoid excess pooling. Air fryers can crisp them even faster.
Why do they turn out soft?
Under-roasting or storing before cooling completely causes sogginess. Ensure they’re spread in a single layer and fully cooled post-roast. A wire rack helps air circulate underneath.

Trained in classic French technique but raised on slow-cooked ribs and spicy rubs, she blends culinary skill with smoke and soul.
- Recipe for Pan Fried: Golden Crust with Savory Depth - October 3, 2026
- Recipe For Fried Chicken In A Pressure Cooker: Crispy Golden Bites in Half the Time - October 3, 2026
- Recipe For Leftover Fried Fish: Crunchy Leftovers Transformed - October 3, 2026