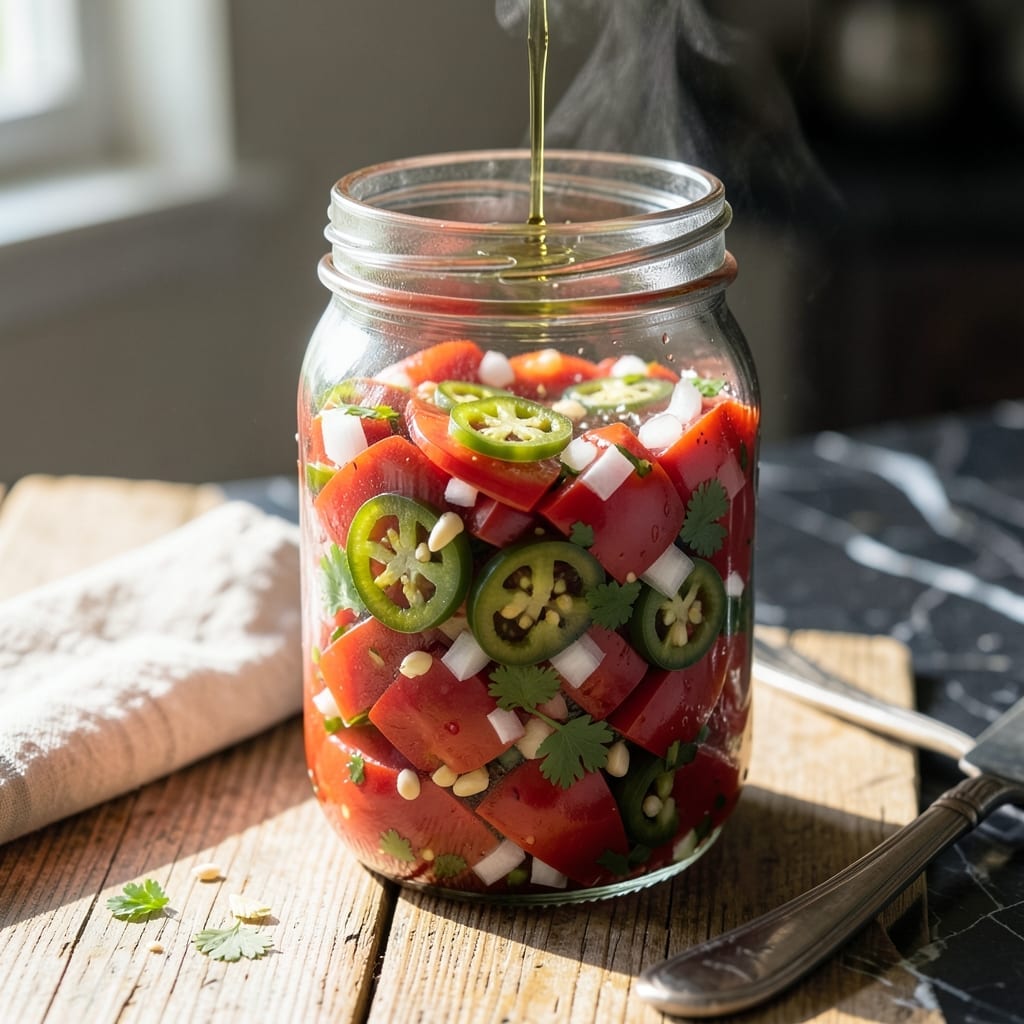
This proven method captures peak tomato flavor at home while meeting all safety standards for water bath canning. The balance of acidity and seasoning ensures both taste and preservation.
With simple ingredients and precise timing, you’ll create a shelf-stable salsa that stays vibrant and delicious for up to a year. Follow the tested ratios for reliable results every batch.
Ingredients for Salsa Recipe for Canning
Garden-fresh tomatoes and bold seasonings create this shelf-stable condiment with precise acidity balance.
| Ingredient | Amount | Notes |
|---|---|---|
| Roma Tomatoes 🍅 | 8 lb | Peeled, cored, and chopped |
| White Onions 🧅 | 2 whole | Finely diced |
| Jalapeño Peppers 🌶️ | 4 whole | Seeds removed, finely chopped |
| Garlic Cloves 🧄 | 6 cloves | Minced |
| Cilantro 🌿 | 1 ½ cups | Fresh, finely chopped |
| White Vinegar 💧 | 1 ½ cups | 5% acidity for safety |
| Lime Juice 🍋 | ½ cup | Freshly squeezed preferred |
| Canning Salt 🧂 | 2 tbsp | Or pickling salt |
| Ground Cumin 🌿 | 1 tbsp | Toasted for depth |
| Dried Oregano 🍃 | 1 tbsp | Mexican oregano preferred |
[recipe_ingredient_scaler]
Roma tomatoes are ideal for canning due to their low moisture and meaty texture. Farmers markets or homegrown are best, but store-bought work if fully ripe. For jalapeños, wear gloves when handling (trust me on this). Ball or Kerr jars are the gold standard for canning—inspect for nicks or cracks before use. The vinegar must be 5% acidity to ensure safety, so check the label carefully.
No fresh cilantro? Flat-leaf parsley at half the amount works in a pinch, though the flavor differs. Short on jalapeños? Serrano peppers at one-to-one ratio add similar heat. Want more depth? Toast the cumin seeds before grinding. If you’re out of lime juice, bottled works but fresh is brighter (worth the extra minute).
Processed salsa stays fresh in sealed jars for 12-18 months in a cool, dark place. Once opened, refrigerate and use within 1 week. Always check the seal before storing—if the lid pops when pressed, it didn’t seal properly and needs reprocessing or refrigeration.
Why You’ll Love This Recipe
- One-Pot Wonder: I toss the Roma tomatoes, onions, and jalapeños in a single pot—no fancy tools, just a chop and simmer.
- Fresh Garden Taste: The cilantro and garlic give it that bright, zesty kick that store-bought just can’t match.
- Pantry Staple: Honestly, I can it in batches and pull a jar out for tacos, eggs, or even a quick snack.
- Stretches the Harvest: My summer tomato haul lasts all year with this—no waste, just flavor on demand.
Step-by-Step Instructions for Salsa for Canning
This tested method ensures proper acidity and safe preservation of your garden-fresh salsa.
Step 1: Prepare Vegetables and Aromatics
Begin by peeling, coring, and chopping all 8 lb Roma Tomatoes. I find that quartering them first makes the process more manageable. Finely dice the 2 whole White Onions—consistent small pieces ensure even distribution throughout the salsa.
Remove seeds from the 4 whole Jalapeño Peppers and finely chop them. For milder heat, remove all ribs as well. Mince the 6 cloves Garlic Cloves and finely chop the 1.5 cups Cilantro. This prep work creates the base for a well-balanced salsa.
Step 2: Combine All Ingredients
In a large, non-reactive pot, combine the prepared tomatoes, onions, jalapeños, garlic, and cilantro. Stir in the 1.5 cups White Vinegar, 0.5 cup Lime Juice, 2 tbsp Canning Salt, 1 tbsp Ground Cumin, and 1 tbsp Dried Oregano.
Bring the mixture to a gentle boil over medium-high heat, stirring occasionally to prevent sticking. You’ll notice the salsa beginning to thicken slightly as the juices from the tomatoes release and the flavors meld together. This process typically takes 10-15 minutes.
Step 3: Simmer to Desired Consistency
Once boiling, reduce the heat to medium-low and let the salsa simmer for 15-20 minutes. Stir frequently to prevent scorching at the bottom of the pot. The salsa is ready when it has thickened enough to coat the back of a spoon but still maintains a pourable consistency.
The vegetables will soften but retain some texture. Taste and adjust seasoning if needed, though remember the flavors will intensify slightly during the canning process. The acidity from the vinegar and lime juice ensures safe preservation.
Step 4: Process for Safe Canning
Ladle the hot salsa into clean, hot canning jars, leaving ½ inch headspace. Remove any air bubbles by gently running a clean knife around the inside of each jar. Wipe the rims with a clean, damp cloth to ensure a proper seal.
Process the jars in a water bath canner for 15 minutes (adjust for altitude if necessary). After processing, place the jars on a towel-lined countertop to cool completely. You’ll hear the satisfying “ping” as each jar seals. Let the jars rest undisturbed for 12-24 hours before checking the seals.
Pro Tips For Making Salsa Recipe For Canning
- Blanch the Tomatoes: Drop Roma tomatoes in boiling water for 30 seconds, then ice bath—makes peeling them a breeze and keeps the texture perfect for canning.
- Wear Gloves for Peppers: I learned this the hard way: jalapeño oils linger on your hands, so always wear gloves when seeding and chopping.
- Acidify Before Jarring: Stir in 1 tablespoon of bottled lemon juice per pint jar right before canning to guarantee safe acidity levels.
- Pulse, Don’t Purée: Use short pulses in the food processor for a chunky salsa—over-blending turns it into a thin, watery mess.
Make-Ahead Tips for This Recipe
Batch Prep Efficiency
I always prep all 8 lb Roma Tomatoes at once—peel, core, and chop in one session. Use a food processor for the 2 whole White Onions and 4 whole Jalapeño Peppers to save time, but pulse carefully for consistent texture. This approach cuts prep time in half. 💡
Double the Recipe
This salsa freezes beautifully before canning. Double the batch, can half, and freeze the rest in quart-sized freezer bags for up to 3 months. Thaw overnight in the fridge before processing later.
Jar Preparation
Sterilize Ball or Kerr jars by boiling for 10 minutes while you cook the salsa. Keep them hot until filling—cold jars can crack when filled with hot salsa. I keep mine warm in the canner.
Altitude Adjustments
For altitudes over 1,000 feet, add 5 minutes to processing time for every additional 1,000 feet. At 5,000 feet, that means 30 minutes total. Always check your local extension office for precise guidelines.
Labeling System
Use masking tape and marker to label jars with date and contents. I include the recipe variation too—like “extra cumin” or “mild”—so I remember next year. This simple step saves guesswork later.
Equipment Cleanup
Soak pots and utensils in warm, soapy water immediately after use. Tomato acids make dried-on salsa incredibly stubborn to remove. A quick soak means easy cleanup while you listen for those sealing pings. ✨
Nutrition Facts
Frequently Asked Questions
Do I need to add extra acid if using low-acid tomatoes?
Yes, stick to the recipe’s 1.5 cups vinegar and 0.5 cup lime juice. These ensure safe acidity levels, especially with modern tomato varieties. Never reduce these amounts.
Can I use a different type of vinegar?
White vinegar is recommended for its neutral flavor and consistent 5% acidity. Apple cider vinegar works too, but may alter the taste slightly. Avoid balsamic or wine vinegars.
How long will the canned salsa last?
Properly sealed jars stay fresh for 12-18 months in a cool, dark place. Once opened, refrigerate and use within 1 week for best quality.
What if my jars don’t seal?
If lids don’t pop when pressed after 24 hours, reprocess with new lids or refrigerate and use within 3 days. Check rims for nicks that might prevent sealing.

Trained in classic French technique but raised on slow-cooked ribs and spicy rubs, she blends culinary skill with smoke and soul.
- Recipe for Boneless Pork Chops in Cast Iron Skillet: Sear and Baste to Juicy Perfection - October 3, 2026
- Recipe for Boneless Cross Rib Roast: Slow-Roasted Beef with Herb Crust - October 3, 2026
- Hamburgers in Sauce Recipe Crock Pot: Slow-Cooked Savory Delight - October 3, 2026