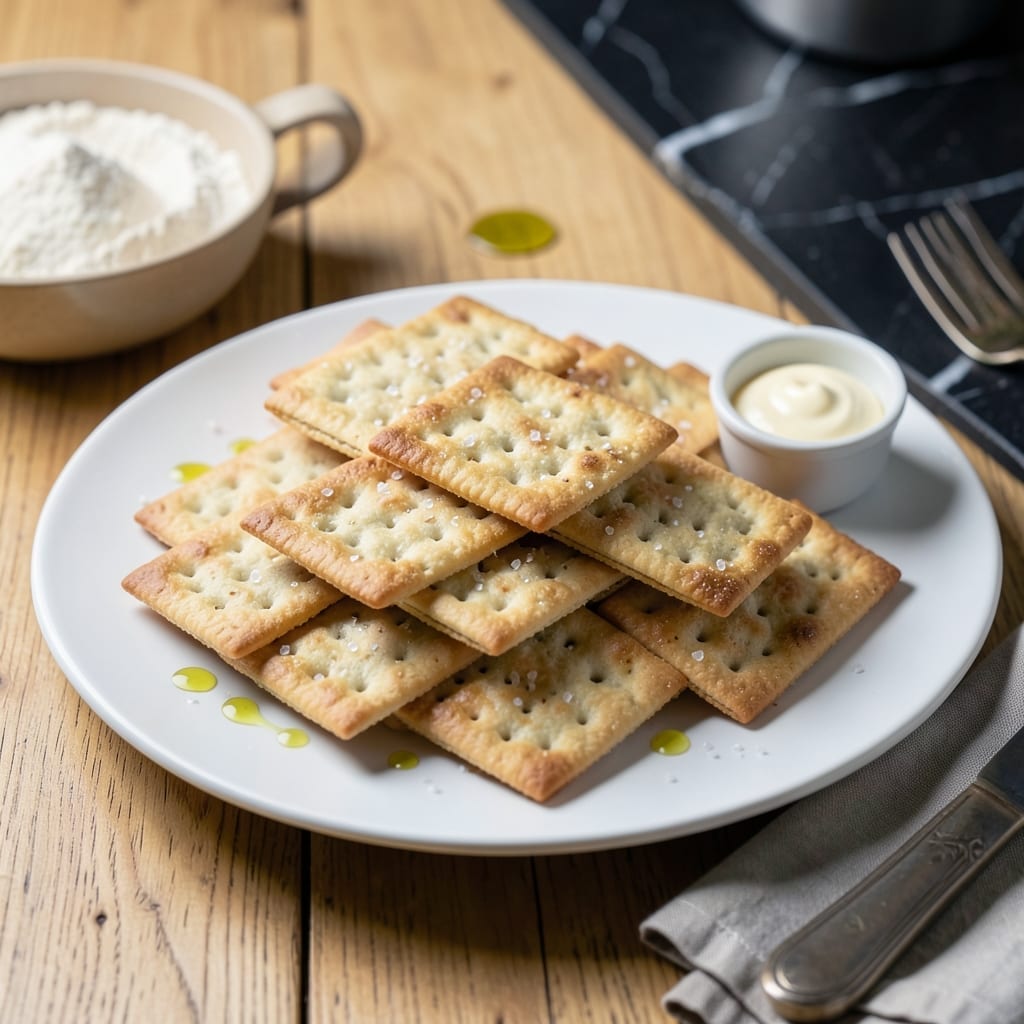
There’s nothing like the classic crunch of homemade saltine crackers fresh from the oven. This recipe delivers that nostalgic snap with a simple dough and precise baking time.
I’ve refined the technique to ensure every cracker bakes evenly to a golden, crisp finish. The dough comes together quickly, and the rolling method guarantees uniform thickness for consistent results.
Ingredients for Saltine Crackers
Eight ingredients deliver that nostalgic snap. Simple dough, precise method, classic crunch.
| Ingredient | Amount | Notes |
|---|---|---|
| All-Purpose Flour 🌾 | 2 cups | Sifted for even texture |
| Unsalted Butter 🧈 | ½ cup | Cold, cubed for flakiness |
| Fine Sea Salt 🧂 | 1 tsp | Plus extra for topping |
| Ice Water 💧 | ⅓ cup | Chilled for dough cohesion |
| Baking Powder 🧂 | ½ tsp | For subtle lift |
| Granulated Sugar 🍚 | ½ tsp | Balances saltiness |
| Olive Oil 🫒 | 1 tbsp | For brushing tops |
| Coarse Kosher Salt 🧂 | 1 tbsp | For finishing sprinkle |
[recipe_ingredient_scaler]
The flour is the foundation—King Arthur or Gold Medal all-purpose give consistent results. Butter must be cold (straight from the fridge) to create those flaky layers. Use European-style unsalted if you can find it; the higher fat content yields a more tender cracker. For the salt, Diamond Crystal kosher is ideal for the finishing sprinkle due to its coarse texture and clean flavor.
No all-purpose flour? Bread flour works but yields a slightly denser cracker. Out of unsalted butter? Use salted but reduce the added salt by half. Ice water is non-negotiable—warm water = tough dough. The baking powder can be omitted for a flatter cracker, but you’ll lose that signature snap. For extra flavor, add 1/2 tsp garlic powder to the dough.
Dough can rest in the fridge for up to 24 hours before rolling—actually improves texture. Baked crackers stay fresh in an airtight container for 1 week. Freeze uncooked dough for 1 month; thaw in the fridge overnight before using. Always bring butter and water to room temperature separately before mixing.
Why You’ll Love This Recipe
- Minimal Effort: I roll out the dough while my coffee brews—5 ingredients, no fancy tools, just my hands and a fork.
- Buttery Crunch: The unsalted butter and fine sea salt make these crackers taste like the fancy ones, but better because they’re fresh from my oven.
- Snack or Side: I pack them in lunchboxes, serve with soup, or eat straight from the cooling rack. Between us, they never last long.
- Penny Wise: A batch costs less than a box at the store and I control the salt. Honestly, I make a double batch and freeze half for later.
Step-by-Step Instructions for Saltine Crackers
Master the technique for achieving that signature crisp texture and clean, salty flavor.
Step 1: Prepare the Dough
In a food processor, combine the 2 cups All-Purpose Flour, 0.5 tsp Baking Powder, 1 tsp Fine Sea Salt, and 0.5 tsp Granulated Sugar. Pulse briefly to aerate the dry ingredients. This ensures even distribution of leavening and seasoning throughout the dough.
Add the 0.5 cup Unsalted Butter (cold and cubed) to the processor. Pulse in 1-second bursts until the mixture resembles coarse crumbs with some pea-sized butter pieces remaining. The visible butter flakes will create the flaky layers characteristic of saltines.
With the processor running, drizzle in the 0.33 cup Ice Water through the feed tube. Continue processing just until the dough comes together—about 10-15 seconds. Overmixing develops gluten, which would make the crackers tough rather than crisp.
Step 2: Chill and Roll the Dough
Turn the dough out onto a lightly floured surface and shape it into a 1-inch thick rectangle. Wrap it in plastic wrap and refrigerate for at least 1 hour or up to 24 hours. Chilling relaxes the gluten and makes the dough easier to roll thinly without shrinking.
Divide the chilled dough into 2 equal portions. On a floured surface, roll one portion into a 1/16-inch thick rectangle. Use a ruler for precision—the thickness directly affects the final texture. If the dough resists rolling, let it rest for 5 minutes to relax the gluten.
Step 3: Cut and Dock the Crackers
Using a pizza cutter or sharp knife, score the rolled dough into 2-inch squares. For traditional saltines, aim for uniform squares—this ensures even baking. Prick each square 4-5 times with a fork to create dock holes. These holes prevent the crackers from puffing up during baking.
Transfer the scored dough to a parchment-lined baking sheet. Brush the surface lightly with 1 tbsp Olive Oil and sprinkle evenly with 1 tbsp Coarse Kosher Salt. The oil helps the salt adhere and promotes even browning.
Step 4: Bake to Golden Perfection
Preheat your oven to 375°F. Bake the crackers for 12-15 minutes or until the edges are just beginning to turn light golden brown. Rotate the baking sheet halfway through for even baking, as oven hot spots can cause uneven browning.
Watch closely during the last 2 minutes—saltines can go from perfectly baked to over-browned quickly. The crackers should be crisp and lightly golden at the edges when done. If some squares brown faster than others, remove the finished ones and return the rest to the oven.
Step 5: Cool and Store
Remove the baking sheet from the oven and transfer the crackers to a wire rack. Let them cool completely—about 30 minutes. They will crisp up further as they cool. Breaking them apart while still warm can result in uneven edges.
Once cooled, store the saltines in an airtight container at room temperature for up to 1 week. If they lose their crispness, revive them in a 300°F oven for 5 minutes to restore the texture. For best results, bake and consume within 3 days of preparation.
Pro Tips For Making Saltine Crackers
- Chill the Dough: Let the dough rest in the fridge for at least 30 minutes—this keeps the butter firm so your crackers stay flaky instead of greasy.
- Roll It Thin: Use a pasta roller or rolling pin to get the dough paper-thin, about 1/16 inch. Any thicker and they won’t crisp up right.
- Dock the Sheets: Poke holes all over the rolled dough with a fork to prevent air pockets from puffing up during baking.
- Bake Until Pale: Pull them out when they’re just barely golden at the edges—overbaking makes them bitter, not crisp.
Perfect Pairings for This saltine crackers
Soup Companions
Nothing beats dipping these crackers into a warm bowl of tomato soup. I like to use San Marzano tomatoes for my homemade version—their sweetness pairs beautifully with the salty crunch. The classic combo never fails to transport me back to childhood. 💛
Cheese Pairings
Create a simple charcuterie board with sharp aged cheddar or creamy brie. The contrast between the rich cheese and crisp cracker is magical. I often add a drizzle of local honey from our farmers market to elevate the experience.
Spicy Dips
Try serving with a spicy pimento cheese spread for a Southern twist. Mix 2 cups shredded cheddar with ½ cup mayo and 1 jar diced pimentos, then add a dash of cayenne pepper for heat. This combination has won over many at our local BBQ gatherings.
Wine Choices
A crisp Sauvignon Blanc or dry Riesling cuts through the saltiness perfectly. I prefer wines from California’s Central Coast for their bright acidity. For beer lovers, a light pilsner offers a refreshing contrast. 🍷
Sweet Contrasts
Balance the salt with something sweet like strawberry jam or apple butter. The sweet-salty combo is addictive. I make my own apple butter with Granny Smith apples and a touch of cinnamon for depth.
Picnic Perfect
Pack these crackers with sliced salami and cornichons for an easy picnic. The salty-sour combo is ideal for coastal rides on my vintage motorcycle. They travel well in airtight containers for up to 3 days.
Nutrition Facts
Frequently Asked Questions
Can I use salted butter instead?
Yes, but reduce the added salt by half. The dough already has 1 tsp of fine sea salt, so using salted butter could make them too salty.
How thin should I roll the dough?
Aim for 1/16-inch thickness for classic crispness. Use a ruler for precision—any thicker and they won’t get that signature snap.
Why do I need to dock the crackers?
Pricking holes prevents puffing during baking. Without docking, they’ll rise unevenly instead of staying flat and crisp.
Can I make these gluten-free?
Swap all-purpose flour for a 1:1 gluten-free blend. Add 1 tsp xanthan gum to help bind the dough. Texture may vary slightly.

Trained in classic French technique but raised on slow-cooked ribs and spicy rubs, she blends culinary skill with smoke and soul.
- Recipe for Boneless Pork Chops in Cast Iron Skillet: Sear and Baste to Juicy Perfection - October 3, 2026
- Recipe for Boneless Cross Rib Roast: Slow-Roasted Beef with Herb Crust - October 3, 2026
- Hamburgers in Sauce Recipe Crock Pot: Slow-Cooked Savory Delight - October 3, 2026