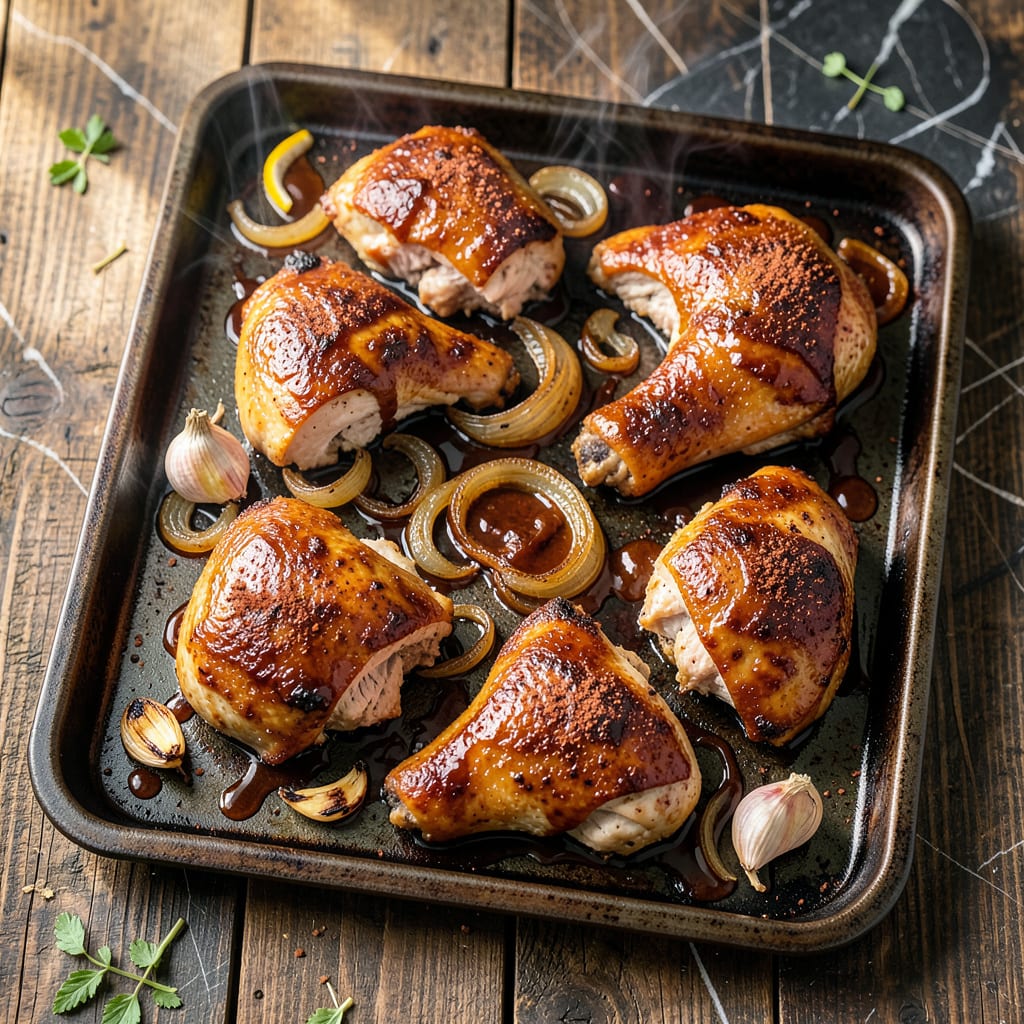
This sheet pan method delivers restaurant-quality BBQ chicken with minimal cleanup. The high heat caramelizes the sauce while keeping the meat juicy.
I developed this technique for busy weeknights when I crave smoky flavors without firing up the grill. The oven does all the work while you prepare sides.
Ingredients for Sheet Pan Bbq Chicken
Pantry staples and a few fresh items for smoky, sweet sheet pan magic.
| Ingredient | Amount | Notes |
|---|---|---|
| Chicken Thighs 🍗 | 2 lb | Boneless, skinless, trimmed |
| BBQ Sauce 🍯 | 1 ½ cups | Your favorite brand or homemade |
| Olive Oil 🫒 | 2 tbsp | Extra-virgin for richness |
| Garlic Powder 🧄 | 1 tsp | For extra depth of flavor |
| Onion Powder 🧅 | 1 tsp | Balances the sweetness |
| Smoked Paprika 🌶️ | 1 tsp | Adds that smoky touch |
| Salt 🧂 | 1 tsp | Kosher or sea salt preferred |
| Black Pepper 🌶️ | ½ tsp | Freshly ground for best flavor |
| Brown Sugar 🍚 | 2 tbsp | For caramelization boost |
| Apple Cider Vinegar 🍏 | 1 tbsp | Brightens the sauce |
| Worcestershire Sauce 🍶 | 1 tbsp | Adds umami depth |
| Red Onion 🧅 | 1 whole | Medium, sliced for serving |
[recipe_ingredient_scaler]
The chicken matters most here. Boneless, skinless thighs stay juicier than breasts—Costco or Sam’s Club have great bulk options. Look for even-sized pieces so they cook uniformly. I always grab a few extra for leftovers (they reheat surprisingly well). The BBQ sauce is where you can really play—Sweet Baby Ray’s or Stubb’s are solid grocery store picks.
No thighs? Drumsticks work too (just add 5-10 minutes). Short on BBQ sauce? Mix ketchup with a little molasses and vinegar in a pinch. The smoked paprika is key for that grill-like flavor—Penzeys has the good stuff. Swap brown sugar for honey if that’s what you’ve got (or skip it entirely). The vinegar and Worcestershire balance the sweetness, so don’t skip them.
Leftovers keep 4-5 days in the fridge—great cold or reheated. Freeze cooked chicken for up to 3 months (sauce and all). I like to slice the onions thin so they soften nicely alongside the chicken. (Pro tip: Line the pan with foil for even easier cleanup.)
Why You’ll Love This Recipe
- One Pan Magic: I toss the thighs with olive oil and spices, spread them out, and let the oven do the rest—no babysitting required.
- Smoky Sweet Bite: That sticky BBQ glaze caramelizes on the crispy skin while the garlic and onion powder work their magic underneath.
- Feeds My Crew: It’s my go-to for Sunday dinner, game day, or when the kids have friends over—always disappears.
- Leftovers? Yes Please: The chicken tastes even better the next day in sandwiches, and the whole meal costs less than takeout.
Step-by-Step Instructions for Sheet Pan BBQ Chicken
Here’s how to get smoky, caramelized chicken with minimal effort and maximum flavor.
Step 1: Season and Marinate the Chicken Thighs
In a large bowl, combine the 2 lb Chicken Thighs with 2 tbsp Olive Oil, 1 tsp Garlic Powder, 1 tsp Onion Powder, 1 tsp Smoked Paprika, 1 tsp Salt, and 0.5 tsp Black Pepper. I like to use my hands to ensure every piece is evenly coated—this is where the flavor begins.
Let the chicken marinate for 10-15 minutes while you preheat the oven. This short rest allows the spices to penetrate the meat, giving you deeper flavor in every bite. Don’t skip this—it makes a noticeable difference.
Step 2: Prepare the BBQ Sauce Mixture
In a separate bowl, whisk together the 1.5 cups BBQ Sauce, 2 tbsp Brown Sugar, 1 tbsp Apple Cider Vinegar, and 1 tbsp Worcestershire Sauce. The vinegar and Worcestershire cut through the sweetness, balancing the sauce perfectly.
Taste and adjust if needed—I sometimes add a pinch more smoked paprika for extra depth. This mixture will caramelize beautifully as it bakes, creating that sticky, finger-licking glaze we’re after.
Step 3: Arrange and Bake on the Sheet Pan
Preheat your oven to 400°F. Arrange the seasoned chicken thighs on a parchment-lined sheet pan, leaving space between each piece for even cooking. Pour about half of the sauce mixture over the chicken, brushing to coat evenly.
Slide the pan into the oven and bake for 20 minutes. You’ll start to see the edges of the chicken turn golden brown and the sauce begin to bubble—this is your cue to add the remaining sauce.
Step 4: Add Onions and Finish Baking
After the initial 20 minutes, carefully flip each chicken thigh. Thinly slice the 1 whole Red Onion and scatter the slices over the pan. Brush the tops with the remaining sauce, making sure to coat the onions as well.
Return the pan to the oven and bake for another 15-20 minutes, or until the chicken reaches an internal temperature of 165°F and the onions are tender. The sauce should be thick and glossy, with charred edges in spots—that’s the flavor we want.
Step 5: Rest and Serve
Remove the pan from the oven and let the chicken rest for 5 minutes. This allows the juices to redistribute, ensuring every bite is moist and flavorful. The onions will have softened and absorbed all that smoky-sweet goodness from the sauce.
Serve the chicken and onions straight from the pan, drizzling any extra sauce from the tray over the top. Each piece should be sticky, slightly charred, and packed with that signature BBQ flavor you love.
Pro Tips For Making Sheet Pan Bbq Chicken
- Pat Thighs Dry: I learned this the hard way—wet chicken steams instead of sears, so blot those thighs with a paper towel before oiling them up. You’ll get crispier skin and better sauce adhesion.
- Preheat the Pan: Sounds obvious, but a screaming-hot sheet pan (425°F for 10 minutes) is non-negotiable for avoiding soggy chicken. Tossing cold thighs on a cold pan just leads to disappointment.
- Sauce Late, Not Early: Resist the urge to slather on BBQ sauce at the start—it burns. Brush it on during the last 10 minutes of baking for sticky, caramelized perfection without the bitterness.
- Skip the Overcrowding: After burning three batches, I finally figured out that leaving space between thighs lets heat circulate, so they crisp instead of steam. Use two pans if you have to.
Pro Cooking Tips for This Dish
Preheat Properly
Always preheat your oven to 400°F for at least 15 minutes before baking. This ensures consistent heat from the start, which is crucial for getting that perfect caramelization on your sauce. I use an oven thermometer—I recommend Taylor Precision—to verify the temperature. 🌡️
Use Parchment Paper
Line your sheet pan with parchment paper for easy cleanup and to prevent sticking. The sauce can get quite sticky, and parchment ensures your chicken releases easily. I prefer Reynolds Kitchens parchment—it holds up well at high temperatures.
Space the Chicken
Leave 1-2 inches between each chicken thigh on the pan. Crowding causes steaming instead of roasting, which means soggy skin and less caramelization. Even spacing also ensures each piece cooks at the same rate.
Flip and Sauce
After the first 20 minutes, flip the chicken and baste with the remaining sauce. This double-basting technique builds layers of flavor and gives you that glossy, restaurant-style finish. Don’t skip flipping—it ensures even cooking.
Check Internal Temp
Use a digital meat thermometer to confirm the chicken reaches 165°F internally. I trust my ThermoWorks Instant Read for accuracy. The thickest part of the thigh should register the temperature without touching the pan.
Rest Before Serving
Let the chicken rest for 5 minutes after baking. This allows the juices to redistribute, keeping the meat moist. The onions will soften further during this time, soaking up all that delicious sauce. 💡
Nutrition Facts

Trained in classic French technique but raised on slow-cooked ribs and spicy rubs, she blends culinary skill with smoke and soul.
- Recipe for Boneless Pork Chops in Cast Iron Skillet: Sear and Baste to Juicy Perfection - October 3, 2026
- Recipe for Boneless Cross Rib Roast: Slow-Roasted Beef with Herb Crust - October 3, 2026
- Hamburgers in Sauce Recipe Crock Pot: Slow-Cooked Savory Delight - October 3, 2026