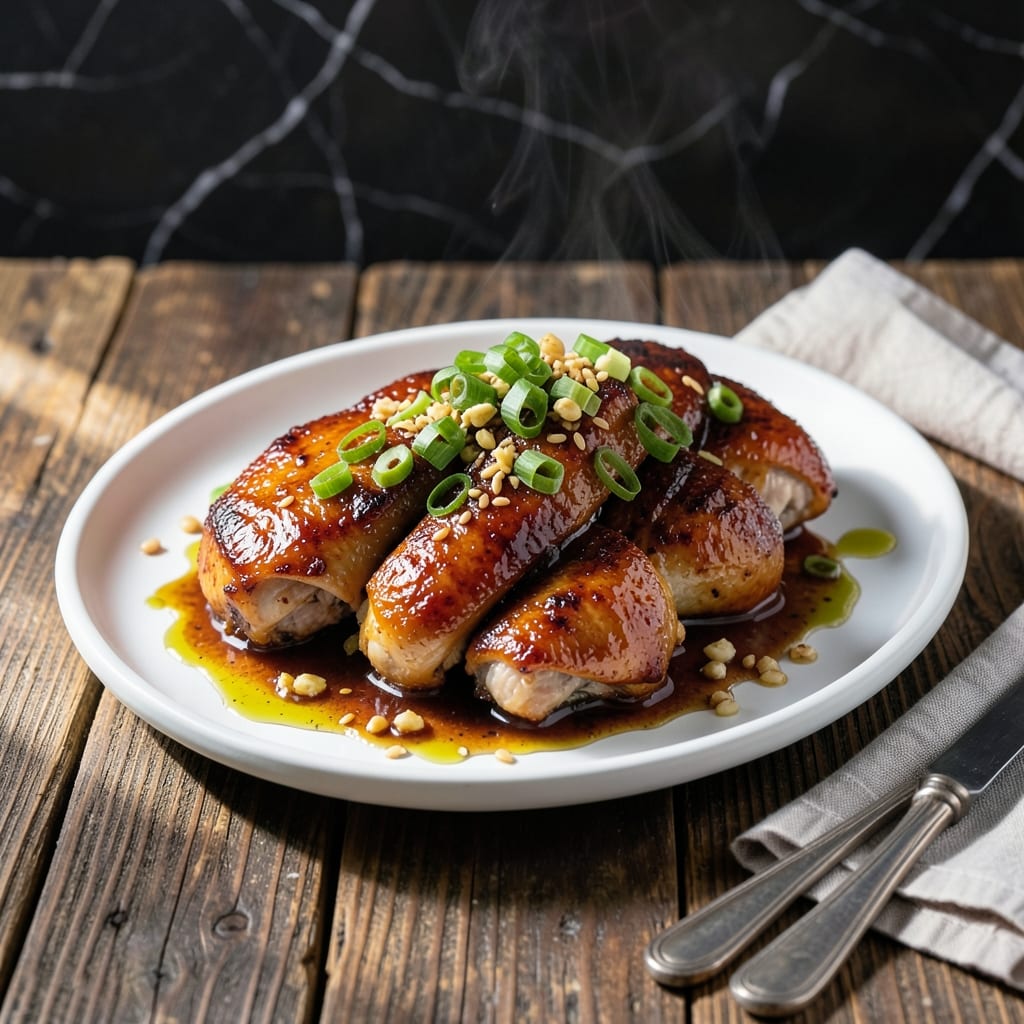
This Instant Pot version brings Hawaiian shoyu chicken to your table with minimal effort and maximum flavor. I developed this method after testing countless variations to achieve the perfect balance of sweet and savory.
The recipe combines soy sauce, brown sugar, and ginger for an authentic taste. Set it and forget it while the pressure cooker works its magic, creating tender chicken in 30 minutes.
What emerges is fall-off-the-bone chicken with a rich, glossy glaze that’s both salty and sweet. The Instant Pot locks in flavors that would normally take hours to develop.
Serve over rice to soak up every drop of the delicious sauce. This dish proves that restaurant-quality results can happen in your home kitchen.
Ingredients for Shoyu Chicken Recipe Instant Pot
Simple ingredients, bold Hawaiian flavors. Most are already in your pantry.
| Ingredient | Amount | Notes |
|---|---|---|
| Boneless Chicken Thighs 🍗 | 2 lb | Skin-on or off, your choice |
| Soy Sauce 🫙 | ¾ cup | Low-sodium preferred for balance |
| Brown Sugar 🍚 | ½ cup | Light or dark works |
| Fresh Ginger 🌿 | 1 tbsp | Minced or grated fine |
| Garlic Cloves 🧄 | 4 cloves | Minced for even flavor |
| Green Onions 🧅 | 4 whole | Sliced, for garnish |
| Water 💧 | ½ cup | For pressure cooking liquid |
| Apple Cider Vinegar 🍏 | 1 tbsp | Balances sweetness with acidity |
| Sesame Oil 🫒 | 1 tsp | Toasted variety preferred |
| White Rice 🍚 | 2 cups | Uncooked, for serving |
| Cornstarch 🌾 | 2 tbsp | Optional, for thickening sauce |
| Red Pepper Flakes 🌶️ | ½ tsp | Optional, for heat |
[recipe_ingredient_scaler]
The chicken thighs are non-negotiable here—they stay juicy under pressure. Costco has great boneless, skinless packs, or grab them from your regular supermarket. I always go for the skin-on version (cheaper, more flavor) and remove the skin after cooking if needed. The soy sauce matters too—Kikkoman or Yamasa are my go-tos for that authentic shoyu taste.
No fresh ginger? Ground ginger at half the amount works in a pinch, but fresh is brighter. Out of brown sugar? White sugar plus 1 tbsp molasses per cup gets you close. Apple cider vinegar can be subbed with rice vinegar or lemon juice. For gluten-free, use tamari instead of soy sauce. The rice is just for serving—jasmine or basmati both soak up that sauce beautifully.
Leftovers taste even better the next day. Keeps 4-5 days in the fridge, freezes for 3 months. Reheat the sauce gently—it thickens up as it cools. I make extra rice to stretch the sauce further.
Why You’ll Love This Recipe
- Set and Forget: I dump everything into the Instant Pot, press a button, and walk away. The soy sauce and brown sugar do all the work while I tackle the rest of my evening.
- Sticky Sweet Goodness: The brown sugar caramelizes with the soy sauce, coating the chicken thighs in this glossy, finger-licking glaze. Honestly, I’ve caught myself sneaking bites straight from the pot.
- Meal Prep MVP: This tastes even better the next day, so I make a big batch for lunches all week. The ginger and garlic keep it exciting, never boring.
- Budget-Friendly Feast: Boneless thighs are cheap, and a little soy sauce goes a long way. I’ll be real: it feels like a luxury dish for the cost of a weeknight dinner.
Step-by-Step Instructions for Hawaiian-Style Shoyu Chicken
Here’s the method that makes this dish foolproof and packed with bold flavor.
Step 1: Sear the Chicken for Depth of Flavor
Set your Instant Pot to the Sauté function on Normal heat. Add the 2 lb Boneless Chicken Thighs in batches, searing for 2-3 minutes per side until golden brown. This step builds a rich fond in the pot that will deepen the sauce’s flavor.
Don’t overcrowd the pot—if you add all the chicken at once, it’ll steam instead of sear. I like to season the thighs lightly with salt before searing, even though the soy sauce will add plenty of saltiness later. Transfer the seared chicken to a plate and set aside.
Step 2: Build the Sauce Base with Aromatics
In the same pot, add the minced 1 tbsp Fresh Ginger, minced 4 cloves Garlic Cloves, and 0.5 cup Brown Sugar. Stir for 1-2 minutes until the mixture becomes fragrant and the sugar starts to melt. You’ll smell the ginger and garlic blooming—that’s your cue they’re ready.
Pour in the 0.75 cup Soy Sauce, 0.5 cup Water, 1 tbsp Apple Cider Vinegar, and 1 tsp Sesame Oil. Stir well to combine, scraping up any browned bits from the bottom of the pot. This ensures all that caramelized flavor gets incorporated into the sauce. Add the 0.5 tsp Red Pepper Flakes now if you want a subtle heat.
Step 3: Pressure Cook to Tender Perfection
Return the seared chicken to the pot, along with any accumulated juices. Secure the lid and set the valve to Sealing. Cook on High Pressure for 8 minutes. The chicken will become fall-apart tender while soaking up all the bold, sweet-savory flavors of the sauce.
Once the cooking time is complete, let the pressure release naturally for 5 minutes, then quick-release any remaining pressure. Open the lid carefully, tilting it away from you to avoid the hot steam. The chicken should be fully cooked and easily pull apart with a fork.
Step 4: Thicken the Sauce for a Glossy Finish
Remove the chicken from the pot and set it aside. In a small bowl, mix the 2 tbsp Cornstarch with 2 tablespoons of cold water to make a slurry. Stir this into the sauce in the Instant Pot.
Set the pot back to Sauté mode and cook for 2-3 minutes, stirring constantly, until the sauce thickens to a glossy consistency that coats the back of a spoon. This final step transforms the cooking liquid into a rich, clingy sauce that will coat every piece of chicken beautifully.
Step 5: Serve Over Rice with Fresh Garnish
Return the chicken to the pot and stir to coat it in the thickened sauce. Let it sit for 2-3 minutes to soak up the flavors. Meanwhile, cook the 2 cups White Rice according to package instructions—it’ll soak up any extra sauce on the plate.
Serve the chicken and sauce over the cooked rice, garnished with the sliced 4 whole Green Onions. The contrast of the bright green onions against the deep brown sauce makes this dish as beautiful as it is delicious. Each bite should deliver tender chicken, a perfect balance of sweet and salty, and a hint of umami richness.
Pro Tips For Making Shoyu Chicken Recipe Instant Pot
- Sear First: Always brown the chicken thighs in the Instant Pot before pressure cooking—I learned this the hard way after my first batch came out pale and flavorless. That quick sear on each side (2-3 minutes) locks in the juices and builds the deep, caramelized base for the shoyu sauce.
- Trim the Fat: Cut off excess fat from the thighs before cooking, or you’ll end up with a greasy sauce that separates. A little fat is fine, but too much makes the dish look and taste oily instead of rich.
- Deglaze Well: After searing, pour in a splash of water or chicken stock and scrape the bottom hard with a wooden spoon. Those browned bits are pure flavor, and skipping this step means your sauce will taste flat.
- Use Fresh Ginger: Sounds like a small thing, but fresh ginger grated straight into the sauce makes a real difference compared to powdered. It brightens the whole dish and cuts through the saltiness of the soy sauce.
Dietary Considerations for This Dish
Gluten-Free Adaptation
For a gluten-free version, simply swap the soy sauce for tamari. I use San-J brand—it maintains the same rich umami flavor without wheat. Check labels carefully, as some tamari brands still contain gluten.
Lower Sodium Option
To reduce sodium, use low-sodium soy sauce or tamari and cut the amount by ¼ cup. Balance the flavor with an extra 1 tbsp apple cider vinegar and a pinch more brown sugar. It’s just as delicious with less salt.
Sugar Alternatives
Replace the brown sugar with coconut sugar or honey for a refined sugar-free version. Use ⅓ cup honey (it’s sweeter) and reduce the water by 2 tbsp to compensate for the added liquid.
Dairy-Free Confirmation
This dish is naturally dairy-free, so no modifications are needed. The sauce gets its richness from the caramelized brown sugar and soy sauce, not from any dairy products. Perfect for lactose-intolerant diners.
Nut Allergy Note
Double-check your soy sauce label if nut allergies are a concern. Some brands process their products in facilities that also handle nuts. Kikkoman soy sauce is typically safe, but always verify.
No nuts are used in this recipe, so it’s inherently nut-free.
Nutrition Facts
Frequently Asked Questions
Can I use chicken breasts instead of thighs?
You can, but they’ll be less forgiving. Thighs stay juicy under pressure, while breasts can dry out. If using breasts, reduce cooking time to 6 minutes and add ¼ cup extra water to prevent drying.
What if my sauce is too thin?
Mix 1 tbsp cornstarch with 1 tbsp cold water and stir into the sauce on Sauté mode. Cook for 2-3 minutes until thickened. Avoid adding dry cornstarch directly—it’ll clump.
How do I store leftovers?
Store in an airtight container in the fridge for up to 5 days. The sauce thickens as it cools, so reheat gently with a splash of water. Freeze for up to 3 months.

Trained in classic French technique but raised on slow-cooked ribs and spicy rubs, she blends culinary skill with smoke and soul.
- Recipe for Boneless Pork Chops in Cast Iron Skillet: Sear and Baste to Juicy Perfection - October 3, 2026
- Recipe for Boneless Cross Rib Roast: Slow-Roasted Beef with Herb Crust - October 3, 2026
- Hamburgers in Sauce Recipe Crock Pot: Slow-Cooked Savory Delight - October 3, 2026