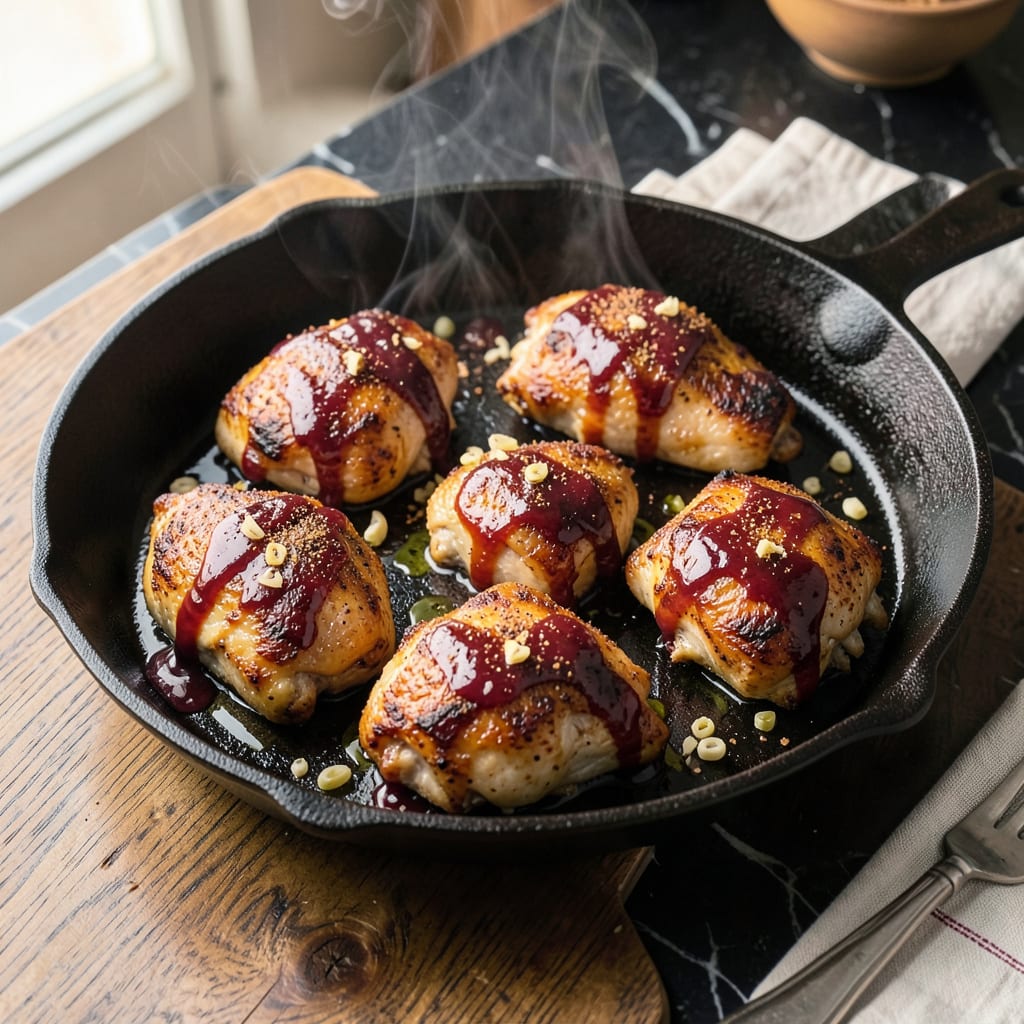
This skillet method delivers crispy chicken skin with a smoky-sweet glaze that rivals any grill. The cast iron ensures even browning while the sauce caramelizes into a sticky coating.
I developed this technique to bring pitmaster quality to your stovetop. The result is juicy meat with that coveted charred finish, all in one pan.
Ingredients for Skillet Bbq Chicken
Simple list for juicy, crispy chicken with a sticky, smoky glaze in one skillet.
| Ingredient | Amount | Notes |
|---|---|---|
| Chicken Thighs 🍗 | 8 pieces | Bone-in, skin-on for crispiness |
| Barbecue Sauce 🍯 | 1 ½ cups | Your favorite brand or homemade |
| Olive Oil 🫒 | 2 tbsp | For initial searing |
| Garlic Powder 🧄 | 1 tsp | Adds depth to the glaze |
| Onion Powder 🧅 | 1 tsp | Balances sweetness |
| Smoked Paprika 🌶️ | 1 tsp | For that authentic smoky flavor |
| Salt 🧂 | 1 tsp | Kosher or sea salt preferred |
| Black Pepper 🌶️ | ½ tsp | Freshly ground for best flavor |
| Brown Sugar 🍚 | 2 tbsp | Enhances caramelization |
| Apple Cider Vinegar 🍏 | 1 tbsp | Adds tang to the glaze |
| Worcestershire Sauce 🍶 | 1 tbsp | Deepens umami flavor |
| Chicken Broth 🥫 | ¼ cup | Thins sauce if needed |
[recipe_ingredient_scaler]
The chicken is the star here. Bone-in, skin-on thighs give you that crispy finish mentioned in the intro—breasts dry out too fast. Most grocery stores stock them, but butcher shops often have better quality. Look for even sizing so everything cooks at the same rate. If you only have breasts, brining them first helps (30 minutes in saltwater).
No barbecue sauce? Ketchup plus molasses and vinegar gets you 80% there. Smoked paprika is key for that grilled flavor—don’t skip it. Out of brown sugar? White sugar plus a touch of molasses works. The vinegar can be white or red wine vinegar in a pinch, but cider vinegar’s fruitiness balances the sweetness best.
Leftovers keep 4-5 days in the fridge—reheat in the skillet to crisp the skin again. Freezes for 3 months (without the sauce). Make extra sauce and store separately—it’s great on sandwiches or as a dip.
Why You’ll Love This Recipe
- I’ll be real: chicken thighs are budget-friendly, and leftovers make killer sandwiches the next day.
- One Pan Magic: I just toss the chicken thighs in the skillet with olive oil and spices, then let the barbecue sauce do its thing.
- Finger-Licking Good: The combo of garlic powder, onion powder, and smoky BBQ sauce makes every bite ridiculously good.
- Weeknight Hero: Between us, this is my go-to for busy evenings—ready before the kids finish their homework.
Step-by-Step Instructions for Skillet BBQ Chicken
Here’s the method. Straightforward, tested, works every time.
Step 1: Season and Sear the Chicken Thighs
Pat the 8 pieces Chicken Thighs dry with paper towels—moisture prevents crispy skin. Season both sides generously with the 1 tsp Salt, 0.5 tsp Black Pepper, 1 tsp Garlic Powder, 1 tsp Onion Powder, and 1 tsp Smoked Paprika. Press the spices into the skin so they adhere well.
Heat the 2 tbsp Olive Oil in a large skillet over medium-high heat until shimmering. Add the chicken thighs skin-side down and sear undisturbed for 6-8 minutes until the skin is deep golden brown and crispy. Flip and cook for another 4-5 minutes until the meat is cooked through.
Step 2: Prepare the BBQ Glaze
While the chicken cooks, combine the 1.5 cups Barbecue Sauce, 2 tbsp Brown Sugar, 1 tbsp Apple Cider Vinegar, and 1 tbsp Worcestershire Sauce in a bowl. Stir until the brown sugar dissolves completely. This glaze will caramelize beautifully on the crispy skin.
The vinegar and Worcestershire add depth and balance the sweetness of the barbecue sauce, while the brown sugar enhances the caramelization process. Taste and adjust seasoning if needed, though the sauce should be well-balanced as is.
Step 3: Glaze and Simmer the Chicken
Once the chicken is cooked through, reduce heat to medium-low. Pour the prepared glaze over the chicken thighs, coating each piece evenly. Let it simmer for 3-4 minutes, basting the chicken occasionally with the sauce in the pan.
If the sauce thickens too much or starts to stick, add the 0.25 cup Chicken Broth a little at a time to loosen it. The sauce should coat the back of a spoon but still be pourable. You want it to cling to the chicken without being overly thick or syrupy.
Step 4: Rest and Serve
Transfer the chicken to a serving platter and spoon any remaining sauce from the skillet over the top. Let it rest for 5 minutes before serving—this allows the juices to redistribute and the sauce to set slightly on the crispy skin.
Serve immediately while hot. The skin should remain crispy, and the glaze should have a glossy, slightly sticky texture that complements the tender, juicy chicken underneath. This step ensures every bite delivers that perfect balance of smoky, sweet, and savory flavors.
Pro Tips For Making Skillet Bbq Chicken
- Sear Skin First: I learned this the hard way—start with the skin-side down in a screaming hot skillet with 2 tablespoons of olive oil for 5-6 minutes until golden and crisp. This builds flavor and keeps the thighs juicy.
- Dry the Thighs: Pat the chicken thighs bone-dry with paper towels before seasoning. Sounds tedious, but it actually changes the outcome—no steam means better browning.
- Skip Overcrowding: Resist the urge to cram all the thighs in at once. Give them space in the skillet, or they’ll steam instead of sear—batch cook if needed.
- Sauce Last: Brush on the barbecue sauce only in the last 2-3 minutes of cooking. Add it too early and the sugars burn, leaving a bitter taste instead of that sticky, sweet glaze.
Dietary Considerations for These Flavors
Gluten-Free Friendly
This dish is naturally gluten-free as long as you use a gluten-free barbecue sauce. I love Stubb’s Original or Annie’s Organic—both are widely available at grocery stores. Always check labels, as some brands add wheat-based thickeners. 💪
Lower Sugar Option
To reduce sugar, swap the 2 tbsp brown sugar for 1 tbsp monk fruit sweetener or simply omit it. The barbecue sauce provides enough sweetness on its own. The glaze will still caramelize, just with less intensity.
Keto Adaptation
For a keto version, use sugar-free barbecue sauce like G Hughes and skip the brown sugar entirely. The chicken thighs are already keto-friendly, with their skin-on for maximum crispiness and flavor.
Dairy-Free Naturally
No modifications needed here—this recipe contains no dairy ingredients. The glaze gets its richness from the olive oil and the natural fats in the chicken thighs. Perfect for anyone avoiding dairy or cooking for lactose-intolerant guests.
Lower Sodium Tip
To cut sodium, use low-sodium barbecue sauce and reduce the 1 tsp salt to ½ tsp. Boost flavor with extra smoked paprika or garlic powder instead. The chicken will still be packed with taste.
Allergen Note
This dish is free from nuts, soy, and dairy, but always verify your barbecue sauce ingredients. Some brands contain soy or mustard. I forage wild herbs sometimes, but store-bought spices work just fine here. ✨
Nutrition Facts

Trained in classic French technique but raised on slow-cooked ribs and spicy rubs, she blends culinary skill with smoke and soul.
- Recipe for Boneless Pork Chops in Cast Iron Skillet: Sear and Baste to Juicy Perfection - October 3, 2026
- Recipe for Boneless Cross Rib Roast: Slow-Roasted Beef with Herb Crust - October 3, 2026
- Hamburgers in Sauce Recipe Crock Pot: Slow-Cooked Savory Delight - October 3, 2026