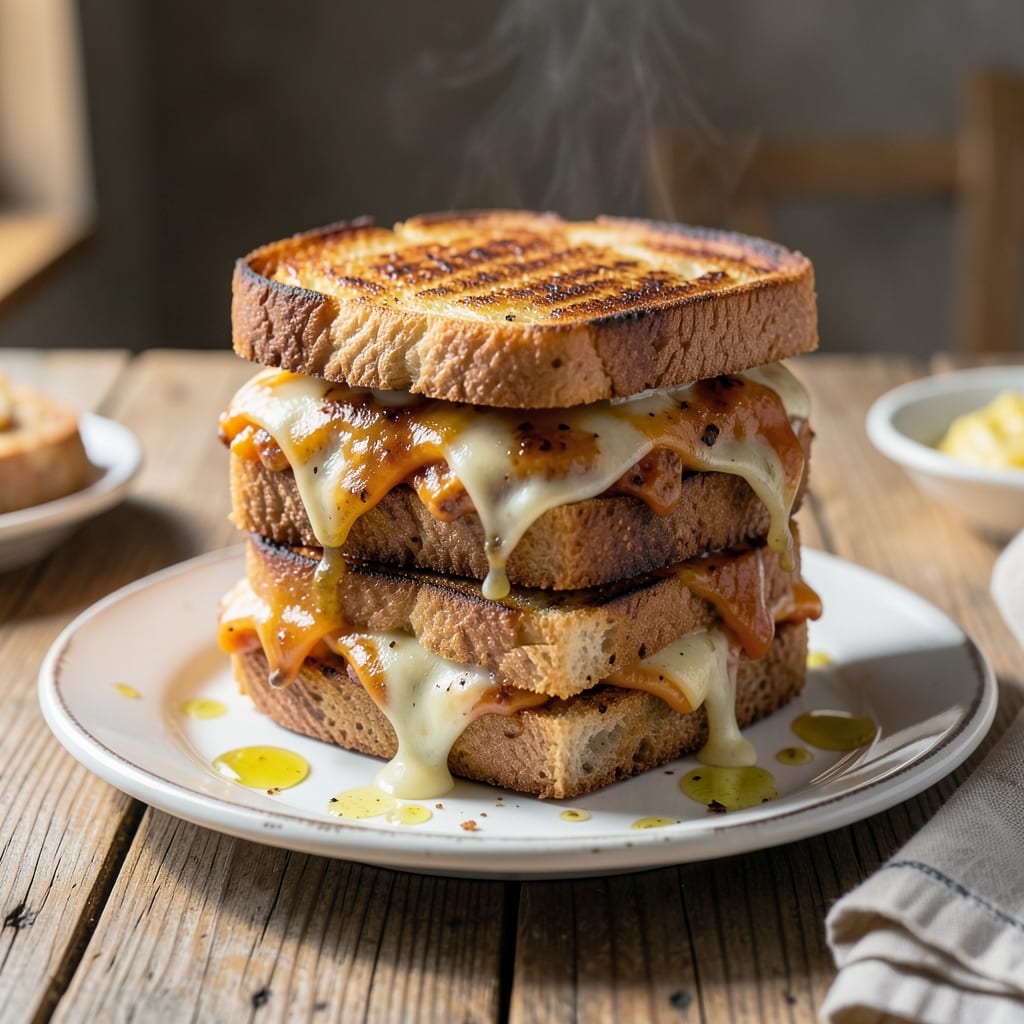
Two American classics collide in this gooey sandwich that’s pure comfort food. The tangy sloppy joe filling meets melted cheese between buttery, toasted bread for a meal that’s nostalgic yet exciting.
This isn’t just a sandwich—it’s a flavor bomb. The filling’s bold, savory notes pair perfectly with the creamy cheese, creating a bite that’s both familiar and unforgettable.
Ingredients for Sloppy Joe Grilled Cheese Sandwich
Classic American flavors unite in this ultimate comfort food sandwich with bold, tangy filling.
| Ingredient | Amount | Notes |
|---|---|---|
| Ground Beef 🥩 | 1 lb | 80/20 lean-to-fat ratio preferred |
| Yellow Onion 🧅 | 1 whole | Finely diced for even texture |
| Garlic Cloves 🧄 | 3 cloves | Minced for maximum flavor infusion |
| Ketchup 🍅 | ¾ cup | Quality brand for balanced sweetness |
| Tomato Paste 🍅 | 2 tbsp | For deep umami richness |
| Yellow Mustard 🟡 | 1 tbsp | For tangy brightness |
| Worcestershire Sauce 💧 | 1 tbsp | Adds complex savory depth |
| Apple Cider Vinegar 🍏 | 1 tbsp | Balances sweetness with acidity |
| Brown Sugar 🍚 | 1 tbsp | Light or dark works equally |
| Chili Powder 🌶️ | 1 tsp | Adjust heat level to preference |
| Cheddar Cheese Slices 🧀 | 8 slices | Sharp cheddar for bold flavor |
| Sourdough Bread 🍞 | 8 slices | Sturdy texture holds filling well |
| Unsalted Butter 🧈 | 4 tbsp | For golden, crispy exterior |
| Kosher Salt 🧂 | 1 tsp | Enhances all flavors evenly |
| Ground Black Pepper 🌶️ | ½ tsp | Freshly ground preferred |
[recipe_ingredient_scaler]
The ground beef is the foundation—80/20 blend from your butcher or Whole Foods gives the best texture and flavor. Avoid leaner cuts as they can dry out during cooking. For the cheese, sharp cheddar from Boar’s Head or Tillamook delivers that perfect melt and tang. Sourdough from a local bakery adds the right chewy resistance against the sloppy filling.
No Worcestershire? Soy sauce plus a dash of vinegar works in a pinch. Swap cheddar for American cheese if you want extra gooeyness (no shame—it’s delicious). The bread can be Texas toast or brioche for a softer bite. For a smokier flavor, add half a teaspoon of smoked paprika to the beef mixture.
Assemble and cook sandwiches just before serving for best texture. Leftovers? The filling keeps 4-5 days refrigerated, but the sandwich itself is best fresh. Freeze the filling for up to 3 months—perfect for quick meals later.
Why You’ll Love This Recipe
- One Pot Wonder: I brown the beef with onion and garlic, stir in ketchup and tomato paste, then pile it on bread—same skillet, zero extra dishes.
- That Saucy Crunch: The tomato paste caramelizes a bit, giving the beef this deep, almost sweet tang that pairs crazy well with melty cheese.
- Feeds the Gang: I make a double batch of the sloppy joe mix, then everyone assembles their own sandwiches—picky eaters included.
- Stretches Far: A pound of ground beef turns into six hearty sandwiches. Honestly, it’s my go-to for filling hungry teens without breaking the bank.
Step-by-Step Instructions for Sloppy Joe Grilled Cheese Sandwich
Master the technique and you will create a nostalgic fusion with crispy perfection every time.
Step 1: Prepare the Sloppy Joe Filling
Heat a large skillet over medium-high heat. Add the 1 lb Ground Beef and cook, breaking it up with a wooden spoon, until it is no longer pink, about 5-7 minutes. Drain off all but 1 tablespoon of the fat to keep the filling rich but not greasy.
Stir in the finely diced 1 whole Yellow Onion and cook for 3-4 minutes until softened and translucent. Add the minced 3 cloves Garlic Cloves and cook for 30 seconds until fragrant. This builds the aromatic base that deepens the flavor of the filling.
Reduce the heat to medium and add the 0.75 cup Ketchup, 2 tbsp Tomato Paste, 1 tbsp Yellow Mustard, 1 tbsp Worcestershire Sauce, 1 tbsp Apple Cider Vinegar, 1 tbsp Brown Sugar, 1 tsp Chili Powder, 1 tsp Kosher Salt, and 0.5 tsp Ground Black Pepper. Simmer for 8-10 minutes until the mixture thickens and the flavors meld together into a rich, tangy sauce.
Step 2: Assemble the Sandwiches
Lay out the 8 slices Sourdough Bread on a clean surface. Place 1 slice of Cheddar Cheese Slices on each of 4 slices of bread. Spoon a generous portion of the warm sloppy joe filling over the cheese on each, dividing it evenly.
Top each with another slice of Cheddar Cheese Slices and the remaining sourdough bread slices, pressing down gently to compact. This double layer of cheese ensures maximum gooeyness in every bite.
Step 3: Grill to Golden Perfection
Heat a clean skillet or griddle over medium heat. Spread 1 tbsp Unsalted Butter on one side of each assembled sandwich. Place the sandwiches butter-side down in the skillet and cook for 3-4 minutes until the bread is golden brown and crisp.
Carefully flip the sandwiches, add the remaining 2 tbsp Unsalted Butter to the skillet, and cook for another 3-4 minutes until the second side is equally golden brown and the cheese is fully melted. Press down lightly with a spatula to ensure even contact with the pan.
Remove from the skillet and let rest for 1-2 minutes before serving to allow the cheese to set slightly, preventing it from oozing out when cut.
Pro Tips For Making Sloppy Joe Grilled Cheese Sandwich
- Brown the Beef First: Cook the ground beef until deeply browned, not just gray—this builds flavor that ketchup and tomato paste can’t fake. I learned this the hard way after too many bland batches.
- Drain the Fat: After browning the beef, drain all but about 1 tablespoon of fat before adding onions and garlic. Skipping this makes the filling greasy and the sandwich soggy.
- Sauté Onions Longer: Let the yellow onions cook down for at least 5 minutes until soft and sweet—they’ll melt into the sloppy joe mix instead of staying crunchy and harsh.
- Toast the Bread: Grill the bread in butter until golden before adding the filling—this keeps the sandwich from turning into a mushy mess, even with all that saucy meat.
Essential Equipment for This Recipe
Essential Skillet
A heavy-bottomed 12-inch cast iron skillet is my go-to for both the filling and sandwiches. It distributes heat evenly and develops that perfect crust. I swear by my Lodge—it’s been in my kitchen for over a decade. 🔥
Wooden Spoon
Use a high-quality wooden spoon to break up the beef when browning. It won’t scratch your skillet and gives you better control than a metal utensil. I keep mine from OXO handy for all stovetop cooking.
Chef’s Knife
A sharp 8-inch chef’s knife makes quick work of dicing onions and mincing garlic. I recommend Wüsthof or Victorinox for home cooks. A dull knife is more dangerous than a sharp one.
Griddle Option
For making multiple sandwiches at once, a large flat griddle is ideal. My Blackstone griddle gives me 360 square inches of cooking space. This lets me cook all four sandwiches simultaneously.
Spatula Matters
Use a thin, flexible metal spatula for flipping sandwiches. It slides easily under the bread and helps press down for even browning. My Mercer Culinary spatula has never let me down.
Mixing Bowls
A set of nested stainless steel mixing bowls keeps your prep organized. I use mine for holding diced onions, measuring ingredients, or even resting cooked sandwiches. Winco makes a great budget-friendly set.
Nutrition Facts

Trained in classic French technique but raised on slow-cooked ribs and spicy rubs, she blends culinary skill with smoke and soul.
- Recipe for Boneless Pork Chops in Cast Iron Skillet: Sear and Baste to Juicy Perfection - October 3, 2026
- Recipe for Boneless Cross Rib Roast: Slow-Roasted Beef with Herb Crust - October 3, 2026
- Hamburgers in Sauce Recipe Crock Pot: Slow-Cooked Savory Delight - October 3, 2026