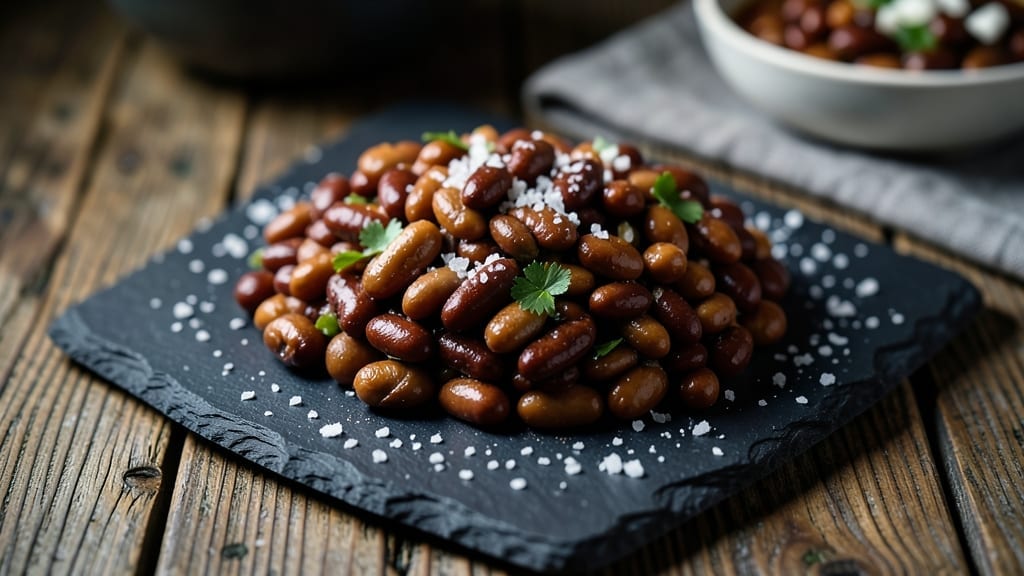
Creating smoked beans from scratch transforms humble legumes into a rich, smoky side dish that pairs perfectly with grilled meats or stands alone as a hearty vegan meal. The key lies in replicating that deep, wood-fired flavor without needing a smoker—just a few pantry staples and patience.
I first perfected this technique during a coastal road trip when I realized how French reduction methods could elevate smoked dishes, and it’s become a staple in my kitchen ever since.
This method starts with simple preparation—soaking beans overnight to soften them—before building layers of flavor through slow cooking and a homemade liquid smoke blend. The result is tender beans infused with a complex, smoky aroma that’s hard to resist.
What makes this recipe stand out is its versatility: it works as a side, in salads, or even as a dip, all while being completely plant-based and packed with protein.
The process is straightforward but requires attention to timing—simmering the beans until they’re perfectly tender while ensuring the smoke flavor penetrates deeply. The final touch? A finishing seasoning that balances smokiness with brightness, ensuring every bite is rich and satisfying.
Trust me, once you taste these, you’ll never buy canned smoked beans again.
Whether you’re serving a crowd or meal prepping for the week, this recipe delivers restaurant-quality results with minimal effort. The best part? You can adjust the smoke level to your preference, making it foolproof for beginners and customizable for seasoned cooks.
Let’s get started on creating beans that taste like they’ve been slow-smoked all day.
Ingredients for smoked beans recipe from scratch
Pantry staples meet smoky magic—just a few ingredients transform simple beans into a restaurant-worthy dish.
| Ingredient | Amount | Notes |
|---|---|---|
| Dried Navy Beans 🌱 | 1 ½ cups | Uncooked, soaked overnight |
| Water 💧 | 6 cups | For soaking and cooking |
| Vegetable Broth 🍲 | 4 cups | Low-sodium preferred |
| Onion 🧅 | 1 whole | Yellow or red, diced |
| Garlic Cloves 🧄 | 4 cloves | Peeled and minced |
| Smoked Paprika 🌶️ | 1 tbsp | For authentic smoky flavor |
| Liquid Smoke 🔥 | 1 tbsp | Adjust for desired smoke intensity |
| Tomato Paste 🍅 | 2 tbsp | For depth of flavor |
| Coconut Milk 🥥 | ½ cup | Full-fat for creaminess |
| Apple Cider Vinegar 🍎 | 1 tbsp | For brightness |
| Maple Syrup 🍁 | 1 tbsp | For subtle sweetness |
| Salt 🧂 | 1 ½ tsp | Kosher or sea salt |
| Black Pepper 🌶️ | ½ tsp | Freshly ground preferred |
| Fresh Thyme Leaves 🌿 | ¼ cup | Chopped, or 1 tsp dried |
| Extra-Virgin Olive Oil 🫒 | 2 tbsp | For richness |
[recipe_ingredient_scaler]
The beans are the star, so don’t skimp on quality. Navy beans hold their shape beautifully, but any firm white bean (like cannellini or great northern) works too. I always buy them from Whole Foods bulk bins—they’re cheaper and fresher than canned. The key is soaking them overnight: this cuts cooking time and makes them silky smooth. If you’re short on time, a quick 2-hour soak in hot water works, but overnight is best. For the smoked paprika, grab the Penzeys brand if you can—it’s got that authentic wood-fired depth. If you can’t find it, any high-quality smoked paprika will do, but avoid the cheap stuff that tastes like sawdust.
No liquid smoke? Double the smoked paprika and add a splash of soy sauce for umami depth. Fresh thyme is ideal, but dried works at one-third the amount. The coconut milk adds richness—if you’re avoiding dairy, this is your secret weapon. For extra smokiness, char a whole onion in a dry pan before dicing and adding it to the pot. The apple cider vinegar brightens everything up, so don’t skip it. Want to make this ahead? The flavors actually improve after 24 hours in the fridge—let it sit overnight if you can. The beans will soak up all that smoky goodness like sponges.
These beans keep for 5 days in the fridge, but they’re even better the next day once all the flavors meld. Portion into containers for easy lunches—just reheat with a splash of water or broth. Freeze for up to 3 months by packing them tightly in airtight containers. Pro tip: save some of the cooking liquid to use as a broth base later—it’s packed with flavor. If you make a big batch, freeze half right away. Trust me, you’ll want leftovers.
Why You’ll Love This Recipe
- No-Fuss Smoking: Honestly, the overnight soak does all the heavy lifting. I dump the beans in the fridge the night before, wake up to drain and rinse, and boom—just add broth and spices. That 1 tbsp of liquid smoke? It’s the secret to that smoky depth without needing a smoker. I’ve tried rushing it, but the beans just don’t get that tender, creamy texture.
- Creamy, Smoky Surprise: The coconut milk and smoked paprika together? Chef’s kiss. It’s like you’re getting that campfire vibe but with a velvety mouthfeel. The apple cider vinegar and maple syrup balance it all out—sweet, tangy, and rich all at once. My picky eater actually asked for seconds after tasting this. (Yes, even on a Tuesday night.)
- Leftover Legend: I make this once a week and live off it. Toss them over rice, mix into tacos, or spread on toast with avocado. The flavors get better the next day, so I always double the batch. My roommates even started asking for the recipe. Five days in the fridge? More like five meals.
- Budget Hero: Dried navy beans are cheaper than a coffee out, and this recipe feeds four for less than a fast-food meal. The smoked paprika and liquid smoke might look fancy, but a little goes a long way. I’ve spent under $10 total for this whole pot. That’s a win.
Step-by-step instructions for smoked beans recipe from scratch
Here’s how to build deep, smoky flavor without a smoker—simple steps for restaurant-worthy results.
Soak and Prepare the Navy Beans
Place the 1½ cups dried navy beans in a large bowl and cover them with 6 cups water. Let them soak overnight in the refrigerator—this ensures they cook evenly and reduces cooking time. The next morning, drain and rinse the beans thoroughly under cold water to remove any skin that might have loosened during soaking.
In a large pot, combine the soaked beans with 4 cups vegetable broth and bring to a boil over high heat. Once boiling, immediately reduce heat to medium-low and add 1 tbsp smoked paprika and 1 tbsp liquid smoke. Stir gently to distribute the spices evenly. The broth should bubble gently—this prevents the beans from sticking to the bottom of the pot. Let them simmer uncovered for 45 minutes, stirring occasionally to prevent scorching.
Build the Smoky Base
After the initial simmer, add the 1 diced onion and 4 minced garlic cloves to the pot. Cook for 10 minutes until the onion softens and becomes translucent. Stir in the 2 tbsp tomato paste and cook for another 5 minutes, stirring frequently to prevent burning. The tomato paste will deepen the flavor and give the beans a rich, slightly sweet undertone.
Here’s where the magic happens: add the 1 tbsp apple cider vinegar and 1 tbsp maple syrup. The vinegar brightens the dish while the maple syrup adds subtle sweetness that balances the smokiness. Stir well and let the mixture simmer for 10 more minutes, allowing the flavors to meld together. You’ll notice the aroma becoming more complex and inviting—this is your cue that the base is developing properly.
Finish with Creaminess and Seasoning
Stir in the ½ cup coconut milk, 1½ tsp salt, and ½ tsp black pepper. The coconut milk adds a velvety texture that contrasts beautifully with the smoky depth. Simmer the beans for another 20 minutes, stirring occasionally, until they’re tender but still hold their shape. You’ll know they’re done when a bean easily crushes between two spoons with gentle pressure.
Finally, fold in the ¼ cup fresh thyme leaves and 2 tbsp extra-virgin olive oil. The thyme adds an earthy aroma that complements the smoky notes, while the olive oil enriches the dish with a silky finish. Taste and adjust the seasoning if needed—you might want to add a pinch more salt or a splash of vinegar to balance the flavors. Let the beans sit off the heat for 5 minutes to allow the flavors to fully develop.
Pro Tips For Making Smoked Beans Recipe From Scratch
- Boil Hard, Then Simmer Gently: That first boil should be aggressive—get the broth to a rolling boil before dropping the heat. I learned this the hard way: a lazy boil means unevenly cooked beans, and some will stay rock-hard while others turn mushy. Once boiling, medium-low heat is non-negotiable; any higher, and you’ll burn the tomato paste before the onions soften.
- Dice Onions Like You Mean It: Tiny onion pieces disappear too fast and burn before adding sweetness. Aim for ¼-inch dice—big enough to stay visible but small enough to melt into the broth. Pro move: Sauté them in a splash of olive oil first if you’re impatient, but don’t skip the 10 minutes of simmering in the beans—they’ll develop deeper flavor that way.
- Don’t Rush the Tomato Paste: Stirring tomato paste into cold beans? That’s a flavor crime. Let the onions simmer for those full 10 minutes until they’re translucent and just starting to caramelize before adding the paste. Cook it another 5 minutes, stirring like your life depends on it—burnt paste tastes like sad, bitter regret.
- Liquid Smoke Adjustment Matters: Start with the full 1 tbsp, taste, then decide: Do you want campfire intensity or a whisper of smoke? Add it after the beans have simmered 15 minutes—they’ll absorb it better. Too much? A splash of vinegar cuts the harshness. Too little? You’ll wonder why your beans taste like they’re missing something.
Make-ahead tips for leftovers
Batch Prep Strategy
I always make a double batch of these beans when I’m prepping for the week—just double the 1.5 cups dried navy beans and scale all ingredients proportionally. Use two large quart-sized freezer bags or airtight glass containers to store portions.
The beans actually taste better the next day, so I’ll often make them on Sunday and enjoy them all week. This is my secret to always having a smoky side ready for last-minute guests. 💫
Freezer-Friendly Packaging
For long-term storage, pack the beans tightly in freezer bags with a little of the cooking liquid to prevent freezer burn. I like to use the Glad Press ‘n Seal brand—they’re sturdy and leak-proof. Label each bag with the date so you can track freshness.
These beans stay great for up to 3 months in the freezer, and they reheat beautifully when thawed. Just add a splash of water or broth when warming.
Flavor Boosting Tricks
If you’re prepping ahead, I recommend adding the thyme leaves and olive oil just before serving to keep them fresh. The thyme can lose its potency after a few days, so I hold off on that step until reheating.
For extra richness, stir in a spoonful of nutritional yeast when reheating—it adds a cheesy, umami depth that pairs perfectly with the smoky flavor. 🌟
Reheating Like a Pro
Stovetop is my favorite way to reheat these beans—simmer them gently with a splash of vegetable broth or water for 5-7 minutes until heated through. Microwaving works too, but I always cover the dish with a damp paper towel to prevent drying.
If the beans look dry after reheating, just add a bit more liquid and let them simmer for another minute. The key is to keep the texture creamy, not mushy.
Meal Prep Timeline
Plan to make these beans on a Sunday morning so they have time to develop flavor overnight. Store them in the fridge until ready to serve, and reheat portions as needed throughout the week.
If you’re short on time, you can make them on a Friday and freeze half—just thaw overnight in the fridge before reheating. This way, you always have a delicious, smoky side ready to go. 🍽️
Nutrition facts
Frequently asked questions
Why does soaking beans overnight make a difference?
Soaking dried navy beans overnight significantly reduces cooking time and ensures even tenderness. It softens the skins and helps break down complex carbs, making them absorb flavors more effectively. Plus, it cuts the total cooking time by nearly half—no more waiting hours for beans to soften!
Can I use dried beans other than navy beans?
While navy beans hold their shape beautifully, firm white beans like cannellini or great northern work just as well. Just adjust cooking time slightly—check for tenderness after 40-50 minutes of simmering instead of 45 minutes. The smoky flavor profile remains delicious regardless of bean type!
What if I don’t have liquid smoke?
No problem! Double the 1 tbsp smoked paprika and add 1 teaspoon soy sauce for umami depth. For extra smokiness, char a whole onion in a dry pan before dicing and adding it to the pot—it’ll infuse the beans with a subtle wood-fired aroma. The beans will still taste amazing!
How do I know when the beans are perfectly tender?
Test for doneness by gently squeezing a bean between two spoons—it should yield slightly but still hold its shape. If it crumbles too easily, it’s overcooked. The beans should be creamy but not mushy, with a slight resistance when pressed. Patience here ensures perfect texture!

Trained in classic French technique but raised on slow-cooked ribs and spicy rubs, she blends culinary skill with smoke and soul.
- Smoked Brisket Recipe: Low and Slow to Fall-Apart Tenderness - November 2, 2026
- Smoked Turkey Breast Recipe: Juicy Pink Center With Crispy Skin Every Time - November 2, 2026
- Leftover Smoked Pulled Pork Chili Recipe: Rustic Flavor Revival in One Pot - November 2, 2026