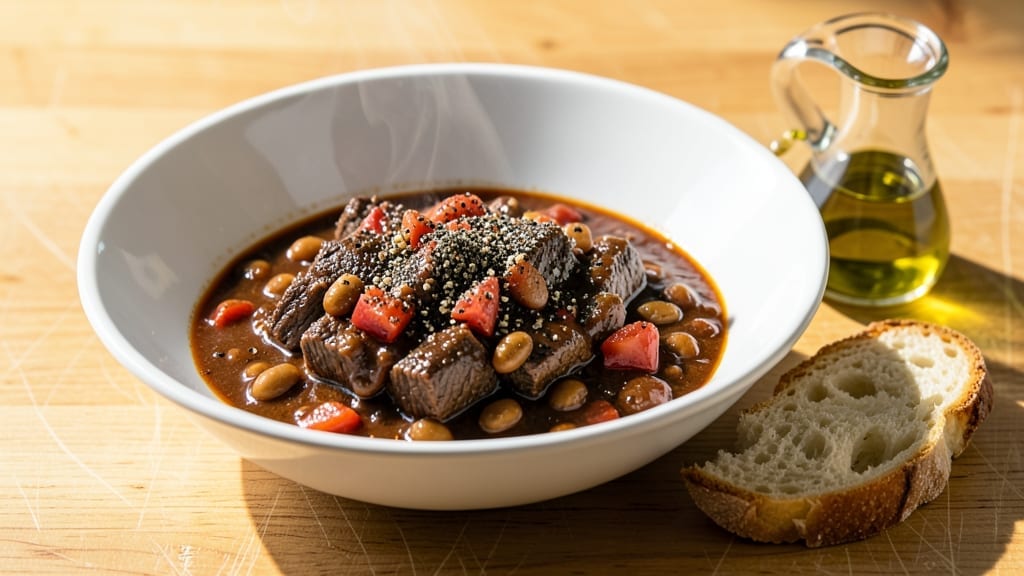
This smoked chuck roast chili transforms tough beef into melt-in-your-mouth tenderness while infusing every bite with deep, wood-fired flavor.
The key lies in slow-smoking the roast first—whether you use a smoker, grill, or even a cast-iron skillet—to lock in that irresistible smokiness before it simmers all day with beans, tomatoes, and spices.
I remember the first time I made this after a long weekend at my family’s backyard cookout, where the smell of hickory smoke filled the air and turned a simple chili into something unforgettable.
The beauty of this recipe is its foolproof balance of techniques: browning the meat creates a rich foundation, while slow simmering develops deep, complex flavors without overpowering the natural taste of the beef.
With just pantry staples and a few hours of hands-off cooking, you’ll end up with a pot of chili that’s hearty enough for a crowd but simple enough for a weeknight dinner. The secret?
Low-and-slow cooking—no rushing, just letting the flavors meld together until the chili is thick, rich, and packed with smoky depth.
By the time you’re ready to serve, you’ll have a restaurant-quality chili with tender beef that practically falls apart, beans that soak up all the flavor, and a sauce that’s just the right balance of smoky, spicy, and savory.
Top it with cheese, sour cream, or fresh green onions, and you’ve got a meal that’s perfect for game day, family dinners, or feeding a crowd. The best part? Leftovers taste even better the next day, making this a game-changer for meal prep.
Whether you’re using a pre-smoked roast or smoking it yourself, this chili adapts to your schedule—just adjust the cooking time to fit your day. Serve it with cornbread, over rice, or as a standalone meal, and you’ll have everyone asking for seconds.
Let’s get started on this deep, smoky masterpiece that’s worth every minute of simmering.
Ingredients for smoked chuck roast chili
Smoked beef, beans, and spices create this restaurant-quality chili that simmers all day.
| Ingredient | Amount | Notes |
|---|---|---|
| Smoked Chuck Roast 🥩 | 3 lb | Pre-smoked or smoked yourself |
| Canned Black Beans 🌱 | 2 cans | Drained and rinsed, 15 oz each |
| Canned Kidney Beans 🌱 | 2 cans | Drained and rinsed, 15 oz each |
| Canned Diced Tomatoes 🍅 | 2 cans | Fire-roasted preferred, 14.5 oz each |
| Tomato Paste 🍅 | ½ cup | Squeeze tube for precision |
| Chicken Broth 💧 | 4 cups | Low-sodium preferred |
| Chili Powder 🌶️ | 3 tbsp | Smoked variety enhances smokiness |
| Ground Cumin 🌿 | 2 tbsp | Toasted for deeper flavor |
| Garlic Powder 🧄 | 1 ½ tbsp | Not garlic salt |
| Onion Powder 🧅 | 1 ½ tbsp | Fresh ground preferred |
| Dried Oregano 🍃 | 1 tbsp | Mexican oregano if available |
| Salt 🧂 | 1 ½ tsp | Kosher or sea salt |
| Black Pepper 🌶️ | 1 tsp | Freshly ground preferred |
| Brown Sugar 🍯 | 2 tbsp | For sweetness balance |
| Cayenne Pepper 🔥 | ½ tsp | Adjust for heat preference |
[recipe_ingredient_scaler]
The smoked chuck roast is your star—pre-smoked works, but if you’re doing it yourself, hickory wood chips give that authentic backyard cookout flavor. I always buy mine from Costco when I’m prepping for a crowd, but even the store-brand pre-smoked roast works fine. Look for good marbling if you’re buying a whole roast—it’ll stay juicy during the long simmer. Costco’s 3-pound roasts are my go-to for family dinners, but any size works as long as you adjust cooking time accordingly.
No pre-smoked roast? Use a cast-iron skillet to smoke it yourself—just add a few hickory wood chips to the pan while heating. Short on fire-roasted tomatoes? Regular diced tomatoes + 1 tbsp smoked paprika gets you close. Want more depth? Add 1 tbsp liquid smoke at the end. The brown sugar balances the smokiness—skip it if you prefer a sweeter chili, but trust me on this one. For heat, red pepper flakes at half the amount works too.
This chili tastes even better the next day—honestly, it’s worth making extra. Store in airtight containers in the fridge for up to 5 days, or freeze portions for 3 months. I portion mine into containers so lunches are sorted for the week. The beans will keep for 3-4 days in the fridge if you make a big batch. Just reheat on the stove with a splash of water to loosen it up.
Why You’ll Love This Recipe
- No-Fuss Feast: That searing step? Just 4-5 minutes per side, and you’ve got a deep, caramelized crust without hours of prep. The rest is hands-off simmering while you do other things—like watching TV or pretending to organize your spice rack.
- Smoky, Sweet, Soulful: The smoked chuck roast doesn’t just add flavor—it infuses it, like a campfire’s whisper in every bite. That tomato paste and brown sugar? They balance the heat from the cayenne and cumin, making it rich but never overpowering. Trust me, the first spoonful will make you pause.
- Weeknight Hero: I make this on nights when I’m too tired to think, but I still want something hearty. It’s the kind of dish that scales up effortlessly—double the ingredients, same steps—so you can feed a crowd or just a grumpy roommate who forgot to eat lunch. Leftovers? Even better the next day.
- Budget’s Best Kept Secret: A 3 lb smoked chuck roast and a few cans of beans? That’s a fraction of the cost of pre-made chili, but the depth of flavor? Chef’s kiss. And if you freeze portions, you’ve got a meal ready in seconds for those chaotic mornings when you’re already running late.
Step-by-step instructions for smoked chuck roast chili
Here’s how to transform that smoky chuck roast into a rich, hearty chili that gets better with every hour on the stove.
Sear the Smoked Chuck Roast for Deep Flavor
Heat a large Dutch oven over medium-high heat. Add the 3 lb smoked chuck roast and sear on all sides for 4-5 minutes per side until deeply browned. This step develops a rich crust that carries the smoky flavor throughout the chili. I like to press the roast gently with a spoon to help it brown evenly.
While the roast sears, you’ll notice the smoky aroma intensify—that’s your first taste of what’s to come. Once browned, remove the roast and set it aside. Don’t drain the Dutch oven yet; those browned bits are flavor gold we’ll use later.
Build the Chili Base with Aromatics and Spices
In the same Dutch oven, add ½ cup tomato paste and stir to coat the bottom, scraping up those browned bits. Cook for 1 minute until it darkens slightly. This creates the flavor foundation for your chili.
Add 2 cans canned diced tomatoes, 4 cups chicken broth, 3 tbsp chili powder, 2 tbsp ground cumin, 1½ tbsp garlic powder, 1½ tbsp onion powder, 1 tbsp dried oregano, 1½ tsp salt, 1 tsp black pepper, and 2 tbsp brown sugar. Stir everything together until the spices dissolve completely. Here’s where the magic happens—the spices bloom and infuse the liquid with their aromatic oils.
Simmer the Chili Until Tender
Return the smoked chuck roast to the Dutch oven, adding it back to the simmering base. Bring everything to a gentle boil, then reduce heat to low. Cover and let it simmer for 2 hours, stirring occasionally. This long cook time is crucial—it breaks down the tough muscle fibers in the chuck roast, transforming it into fork-tender meat.
After 2 hours, use tongs to remove the roast and shred it directly in the pot. You’ll see the meat pull apart easily—this is your signal it’s perfectly tender. Discard any large fat pieces but leave the meaty bits. Return the shredded meat to the pot.
Add Beans and Finish the Chili
Stir in 2 cans canned black beans and 2 cans canned kidney beans, along with ½ tsp cayenne pepper. The beans will soak up all that rich chili flavor. Simmer uncovered for another 30-45 minutes to let the flavors meld together and the chili thicken slightly. You’ll notice the aroma deepen as the spices and smoky meat flavors combine.
Taste and adjust seasoning if needed—you might want to add a pinch more salt or a splash of broth if it’s too thick. The chili should be rich, smoky, and perfectly balanced between sweet, spicy, and savory notes. Serve hot with your favorite toppings like shredded cheese, sour cream, or fresh cilantro.
Pro Tips For Making Smoked Chuck Roast Chili
- Sear Until It Smokes: That 4-5 minutes per side isn’t just about browning—you want the chuck roast to release its own smoky aroma right in your Dutch oven. If your kitchen smells like a BBQ joint after this step, you’re doing it right. Skip the rush, and let the meat develop that deep crust that’ll carry through the whole pot.
- Toast Your Cumin First: I learned this the hard way—adding raw ground cumin straight to the pot means you’re missing out on its nutty depth. Dry-toast the 2 tbsp in your Dutch oven over medium heat for 30 seconds before adding the tomato paste. That quick burst of heat wakes up the spices and makes the whole chili taste richer.
- Don’t Skip the Tomato Paste Burn: Those 60 seconds of cooking the ½ cup tomato paste until it darkens might feel like overkill, but they’re non-negotiable. This isn’t just about flavor—it’s about building a glossy, thick base that won’t turn watery later. If you rush it, your chili will taste flat, no matter how long you simmer.
- Add Beans Last, Not First: Tossing in the black and kidney beans too early turns them mushy and waterlogged. Wait until the meat is shredded and the chili’s had its 2-hour simmer—then stir them in for the final 30-45 minutes. They’ll soak up flavor like sponges while staying firm, not falling apart. Trust the process, even if it feels counterintuitive.
Serving suggestions for leftovers
Game Day Spread
This chili is a crowd-pleaser that pairs perfectly with classic game day sides.
I always serve it with homemade cornbread—just mix 1 cup cornmeal, 1 cup flour, 1 tbsp baking powder, 1 tbsp sugar, 1 tsp salt, and 1½ cups buttermilk—and bake at 375°F for 20 minutes. The buttery crumb soaks up every smoky bite.
For a lighter option, serve over cauliflower rice or with a side of charred corn on the cob for extra texture. 🏈
Breakfast-Style Twist
Transform this into a hearty breakfast with fried eggs and crispy hash browns. Top each bowl with a fried egg and sprinkle with crumbled cotija cheese and fresh cilantro. The smoky chili and runny yolk create a perfect balance of textures—this is my go-to for lazy weekends.
I like to use a cast-iron skillet for the eggs to keep things warm. 🍳
Toppings Bar
Set out toppings so everyone can customize their bowl. My essentials include shredded cheddar cheese, sour cream, diced white onions, fresh cilantro, and hot sauce (I recommend Frank’s RedHot).
For extra indulgence, add crumbled bacon or pickled jalapeños. Let guests layer their own flavors—it’s half the fun of serving chili. 🌶️
Bread Basket Essentials
No chili dinner is complete without warm bread. I keep a basket of garlic bread (toasted baguette with garlic butter and parmesan) and soft tortillas on hand. The garlic bread cuts through the smokiness, while tortillas make perfect scooping tools for kids or casual eaters.
For a rustic touch, serve with crusty sourdough and olive oil for dipping. 🍞
Dessert Pairings
End the meal with something sweet to balance the chili’s richness. A vanilla bean ice cream with caramel drizzle is my go-to—it’s surprisingly satisfying after a hearty bowl. For a lighter option, try fresh fruit like watermelon or peaches with a sprinkle of flaky sea salt.
The contrast of sweet and savory feels like a full meal. 🍦
Nutrition facts
Frequently asked questions
Why does the recipe call for searing the pre-smoked chuck roast?
Searing the pre-smoked roast creates a rich, flavorful crust that locks in the smoky taste throughout the chili. This step also deepens the meat’s natural flavors and enhances the overall depth of the dish. Even if it’s already smoked, the sear adds that extra layer of complexity!
Can I use a different type of bean in this recipe?
While black and kidney beans work beautifully, you can experiment with other varieties like pinto or navy beans. Just ensure they’re drained and rinsed. The key is to use beans that absorb the smoky, spicy flavors well—so stick to hearty, sturdy beans for the best results.
How do I adjust the heat level if I prefer less spice?
Start by reducing the ½ tsp cayenne pepper to ¼ tsp or skip it entirely. For a milder kick, omit the cayenne and rely on the natural chili powder and spices. You can also add a pinch of sugar or a splash of broth to balance the heat if needed.
What if my chili is too thick after simmering?
No problem! Simply stir in ¼ to ½ cup of chicken broth or water to thin it out. Taste as you go—you want a smooth, pourable consistency without diluting the flavors. The chili will thicken slightly as it cools, so don’t overdo it.
Can I make this chili ahead of time?
This chili tastes even better the next day. Store it in an airtight container in the fridge for up to 5 days, or freeze portions for 3 months. Just reheat on the stove with a splash of water to loosen it up. Leftovers are perfect for meal prep!

Trained in classic French technique but raised on slow-cooked ribs and spicy rubs, she blends culinary skill with smoke and soul.
- Smoked Brisket Recipe: Low and Slow to Fall-Apart Tenderness - November 2, 2026
- Smoked Turkey Breast Recipe: Juicy Pink Center With Crispy Skin Every Time - November 2, 2026
- Leftover Smoked Pulled Pork Chili Recipe: Rustic Flavor Revival in One Pot - November 2, 2026