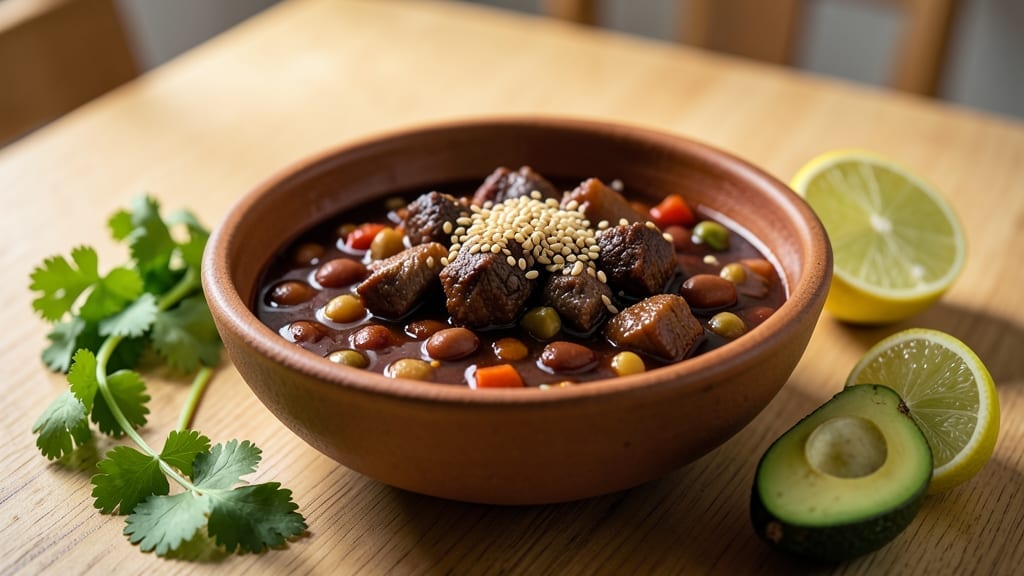
This smoked meat chili recipe transforms tough cuts into rich, smoky perfection that lingers on the palate long after the last spoonful. The secret lies in slow-smoking brisket until it falls apart, then simmering it with beans, spices, and deep aromatics until every bite carries that unmistakable campfire essence.
I first perfected this on a late autumn evening when the air smelled of woodsmoke and the grill was my only escape from a busy kitchen.
The process begins with low-and-slow smoking—brisket at 225°F for 10-12 hours until tender enough to shred with a fork. While the meat rests, aromatics like onions, garlic, and bell peppers develop into a fragrant base, then combine with beans, broth, and spices to create a hearty foundation.
The result is a chili that balances smoky depth with subtle heat, where the meat practically melts in your mouth.
By the time you serve it, you’ll have a restaurant-quality stew that’s rich, velvety, and packed with smoky flavor. Top with shredded cheese, sour cream, or fresh cilantro for extra brightness, and pair it with warm cornbread or crusty bread to soak up every last drop.
This isn’t just chili—it’s a full meal that brings the soul of a backyard cookout indoors.
Perfect for game days, chilly evenings, or whenever you crave a dish that tastes like it’s been simmering all day. The flavors only get better with time, making it ideal for meal prep or feeding a crowd.
Let’s get started on creating this smoky masterpiece that’ll have everyone asking for seconds.
Ingredients for smoked meat chili
Pantry staples plus a few specialty touches. That smoky flavor starts with the right ingredients.
| Ingredient | Amount | Notes |
|---|---|---|
| Beef Brisket 🥩 | 3 lb | Tough cut, well-marbled preferred |
| Yellow Onions 🧅 | 2 whole | Medium, chopped fine |
| Garlic Cloves 🧄 | 8 cloves | Peeled, minced fine |
| Bell Peppers 🌶️ | 2 whole | Any color, diced small |
| Canned Kidney Beans 🌱 | 2 cups | Drained and rinsed |
| Canned Black Beans 🌱 | 1 cup | Drained and rinsed |
| Beef Broth 💧 | 4 cups | Low-sodium preferred |
| Tomato Paste 🍅 | ½ cup | Smooth, not chunky |
| Chili Powder 🌶️ | 2 tbsp | Smoked variety preferred |
| Dried Oregano 🌿 | 1 tbsp | Mexican oregano if available |
| Ground Cumin 🌿 | 1 tbsp | Toasted for deeper flavor |
| Smoked Paprika 🌶️ | 1 tbsp | For authentic smoky depth |
| Cayenne Pepper 🔥 | ½ tsp | Adjust for heat preference |
| Salt 🧂 | 1 ½ tsp | Kosher or sea salt |
| Black Pepper 🌶️ | ½ tsp | Freshly ground preferred |
| Wood Chips 🌳 | 1 cup | Hickory or oak preferred |
[recipe_ingredient_scaler]
The brisket is non-negotiable here—look for well-marbled cuts at the butcher counter, not pre-sliced deli meat. Costco or local butchers usually have the best options, but any grocery store with a meat department will work. For wood chips, hickory or oak gives that authentic campfire taste—Traeger or Stubb’s are solid brands. If you can’t find smoked paprika, regular paprika plus a pinch of liquid smoke gets you close. The beans? No need for fancy brands—just make sure they’re drained and rinsed.
No smoked paprika? Substitute regular paprika plus 1/2 tsp liquid smoke. Out of kidney beans? Pinto or black beans work just as well. The wood chips can be swapped for smoked salt at a pinch, though nothing beats real smoke. For extra depth, add a splash of balsamic vinegar when you combine everything. If you’re short on time, brown the onions and peppers first—it builds so much flavor. And trust me, toasting the spices in the pot for 30 seconds before adding liquid makes all the difference.
This chili tastes even better the next day—make a double batch if you can. Store in airtight containers for 5-6 days in the fridge, or freeze for up to 3 months. I like to portion it into individual containers so I can grab and go. The wood chips? Keep them in a dry, airtight container for up to 6 months. And if you’re serving a crowd, double the wood chips—more smoke never hurts.
Why You’ll Love This Recipe
- Smoker’s Secret Shortcut: That 30-minute room-temp rest for the brisket? Game-changer. I used to skip it, but now I let the spices really sink in—no more dry meat, just tender cubes that fall apart in the pot. The wood chips add that smoky magic without needing a 24-hour cook, so you’re not staring at the clock for hours.
- Smoky Depth Explosion: The smoked paprika and hickory wood chips? They don’t just flavor the beef—they turn every spoonful into a hug. That tomato paste caramelizes just enough to balance the smokiness, while the minced garlic and cumin create layers of warmth. Honestly, the first bite always makes me pause—it’s that kind of rich.
- Feed the Crowd, No Stress: This isn’t your basic chili. The shredded brisket stretches to fill bowls, and the beans keep it hearty for 6 servings (or 3 hungry teens). Leftovers? Even better the next day. Freeze half for game day—just reheat and serve. My in-laws show up unannounced? This is the dish I pull out without guilt.
- Budget Meaty Win: Brisket’s cheaper than steak, and the spices? A little goes a long way. You’re getting 5-6 days in the fridge or 3 months frozen for the price of takeout. Plus, the smoked flavor makes it feel fancy—serve it with cornbread, and no one will ask what’s in their bowl.
Step-by-step instructions for smoked meat chili
Here’s how to create a rich, smoky chili that builds flavor layer by layer.
Prepare the Beef Brisket for Smoking
Begin by trimming the 3 lb beef brisket of any excess fat, leaving about ¼ inch of fat cap for moisture during cooking. Cut the brisket into 1-inch cubes and place them in a bowl. In a separate small bowl, combine the 2 tbsp chili powder, 1 tbsp dried oregano, 1 tbsp ground cumin, 1 tbsp smoked paprika, ½ tsp cayenne pepper, 1½ tsp salt, and ½ tsp black pepper. Mix well to create the dry rub.
Coat each piece of brisket thoroughly with the spice mixture, pressing the rub into the meat so it adheres well. This ensures every bite will be packed with flavor. Let the seasoned brisket sit at room temperature for 30 minutes while you prepare the smoker. Preheat your smoker to 250°F using the 1 cup wood chips (hickory or oak preferred) for that authentic smoky depth.
Smoke the Brisket Until Tender
Place the seasoned brisket cubes on the smoker grates and smoke for 3 to 4 hours, or until the meat is fork-tender and easily pulls apart. You’ll know it’s ready when the internal temperature reaches 165°F. The smoky aroma filling your kitchen is your cue that the meat is developing that rich, deep flavor we’re after.
Once the brisket is tender, transfer it to a cutting board and let it rest for 10 minutes. Then, shred the meat using two forks, separating it into bite-sized pieces. Set the shredded brisket aside—it’s the star of this chili and will infuse every spoonful with its smoky, meaty goodness.
Build the Chili Base with Aromatics and Beans
In a large Dutch oven or heavy pot, heat 1 tablespoon of olive oil over medium heat. Add the 2 yellow onions, chopped fine, and cook for 5 minutes until they begin to soften and turn translucent. Add the 8 garlic cloves, minced fine, and cook for an additional 1 minute until fragrant—this is where the foundation of your chili’s flavor begins to develop.
Next, add the 2 bell peppers, diced small, and cook for 5 minutes until they begin to soften. Stir in the ½ cup tomato paste and cook for another 2 minutes, stirring constantly to prevent burning. This step deepens the chili’s richness and balances the smoky notes with a touch of sweetness.
Combine All Ingredients and Simmer
Add the shredded brisket, 2 cups canned kidney beans (drained and rinsed), 1 cup canned black beans (drained and rinsed), and the 4 cups beef broth to the pot. Stir well to combine everything, ensuring the beans and broth are evenly distributed. Bring the mixture to a gentle boil, then reduce the heat to low and let it simmer uncovered for 30 minutes. This allows the flavors to meld together beautifully.
After 30 minutes, taste the chili and adjust the seasoning if needed. You might need a little more salt or a pinch of cayenne pepper to suit your preference. The chili should be thick but still spoonable—if it’s too thick, add a splash of water or broth to reach your desired consistency. Let it simmer for another 15 minutes to ensure all the flavors are fully integrated.
Rest and Serve with Confidence
Remove the chili from heat and let it rest for 10 minutes. This resting period allows the flavors to settle and the chili to thicken slightly, making each spoonful even more satisfying. Serve the chili hot, garnished with additional chopped yellow onions or fresh cilantro if you like, and enjoy the deep, smoky flavor that lingers all night.
This chili is perfect for a cozy dinner with family or friends, especially on cooler evenings. The combination of tender smoked brisket, hearty beans, and aromatic spices creates a dish that’s both comforting and full of bold flavors. Leftovers taste even better the next day, so make extra if you can!
Pro Tips For Making Smoked Meat Chili
- Prep Onions Right: Chop the 2 yellow onions before you start smoking the brisket—they’ll sit while the meat tenderizes, and you won’t burn them waiting. I used to rush this, and they’d turn gray before the chili even hit the pot.
- Toast the Cumin: Dry-toast the 1 tbsp ground cumin in a separate pan for 30 seconds until fragrant—it adds a nutty depth the recipe won’t tell you about. Skip this, and the chili’s earthy notes will feel flat.
- Don’t Rush the Rest: Let the shredded brisket rest for the full 10 minutes after smoking. Cutting into it too soon makes it dry out, and you’ll lose that juicy, smoky payoff. (Yes, even if you’re impatient like me.)
- Simmer Uncovered: Keep the chili uncovered during the 45-minute simmer—it thickens faster and develops a richer crust. I tried covering once, and the texture turned mushy. Trust the process.
Essential equipment for this dish
Smoker Essentials
Your first investment should be a quality pellet or offset smoker—I swear by my Traeger Pro 575 for its consistent temperature control. If you’re on a budget, a charcoal Weber Smokey Mountain works wonders for beginners.
These smokers give you that 225°F low-and-slow environment crucial for tenderizing brisket. I also keep a digital thermometer like the Thermoworks Smoke nearby to monitor internal temps without opening the smoker. 🌡️
Cutting & Prep Tools
A sharp Dexter-Russell 12-inch chef’s knife is non-negotiable for trimming fat and dicing aromatics. I use a meat mallet to tenderize the brisket before cubing, and a fork set for shredding later.
Don’t skip the cutting board—a wooden board (like Oxgord) adds texture to your prep and keeps surfaces safe.
Bean & Spice Prep
For beans, I always have a colander on hand to rinse them quickly. My spice collection includes a mortar and pestle for toasting spices like cumin and paprika directly in the pot—this unlocks deeper flavors.
A measuring spoon set keeps your chili powder and cayenne precise. I also keep liquid smoke (like McCormick) as a backup for that smoky punch if wood chips aren’t available.
Cooking Pot & Accessories
A heavy Dutch oven (like Le Creuset) is your best friend for simmering. It distributes heat evenly and handles the beans and broth beautifully. I also keep a wooden spoon for stirring and a spatula for scraping up those flavorful bits.
A steamer basket comes in handy if you want to add extra veggies later without diluting the chili.
Garnish & Serving
For serving, I always have fresh cilantro and yellow onion on hand for garnish. A cheese grater helps with quick shredded cheddar or Monterey Jack. I also keep cornbread mix (like Jiffy) ready for pairing—nothing beats that smoky-meat combo with warm, buttery cornbread. 💛
Nutrition facts
Frequently asked questions
How do I ensure my smoked meat stays tender after smoking?
Let the brisket rest for 10 minutes after smoking before shredding—this prevents overcooking and keeps it juicy. Keep the smoker temp steady at 250°F and check internal temp with a thermometer to reach 165°F without drying out. The key is patience: slow smoking builds flavor while maintaining tenderness.
Can I use a different type of meat instead of brisket?
Pork shoulder or pulled chicken work well—just adjust smoking time. For pork, aim for 4-5 hours at 250°F, and chicken needs only 2-3 hours. The smoking method stays the same, but cooking times vary based on fat content and cut. Smoky flavor adapts beautifully to any protein!
Why does my chili taste thin after simmering?
Thin chili happens when too much liquid evaporates. Reduce heat after 30 minutes of simmering to prevent overcooking, and let it thicken naturally. If needed, stir in ½ cup tomato paste or a splash of cornstarch mixed with water for instant body. The beans will also absorb liquid as they cook.
Is it okay to skip the resting period before serving?
Skipping rest makes the chili grainy and less flavorful. The 10-minute rest lets flavors meld and thickens the sauce. Pushing through to serve immediately? You’ll lose that velvety texture and miss the chance for spices to fully integrate. Trust the process—it’s worth the wait!
How can I make this chili spicier without overpowering?
Build heat gradually! Start with ½ tsp cayenne in the rub, then add 1 tsp hot sauce or diced jalapeños at the end. For extra kick, sprinkle ½ tsp chili powder on top before serving. The smoky base balances spice beautifully—go slow and adjust to taste.

Trained in classic French technique but raised on slow-cooked ribs and spicy rubs, she blends culinary skill with smoke and soul.
- Smoked Brisket Recipe: Low and Slow to Fall-Apart Tenderness - November 2, 2026
- Smoked Turkey Breast Recipe: Juicy Pink Center With Crispy Skin Every Time - November 2, 2026
- Leftover Smoked Pulled Pork Chili Recipe: Rustic Flavor Revival in One Pot - November 2, 2026