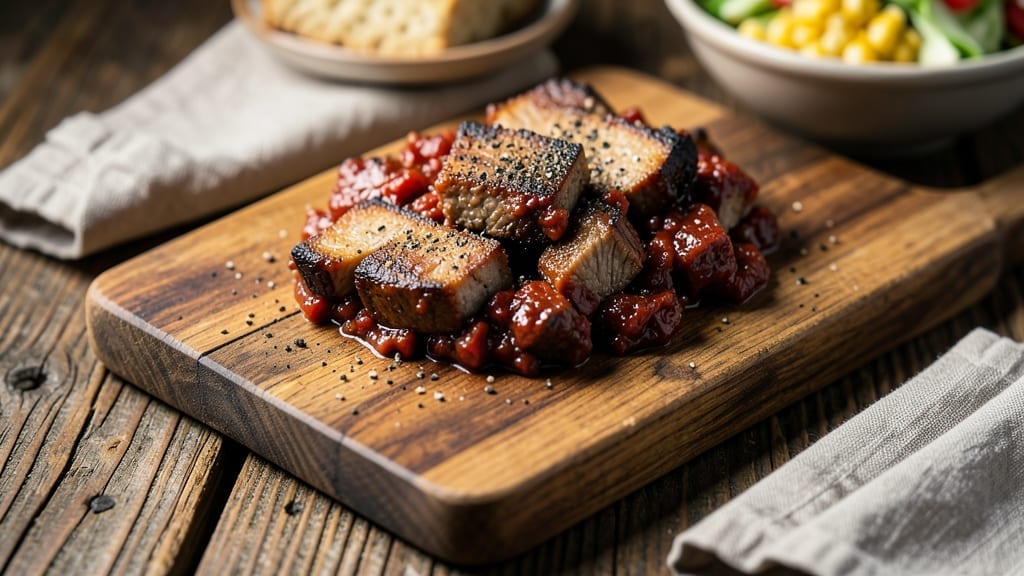
This smoked pork chili recipe transforms tough cuts into melt-in-your-mouth tenderness while delivering the deep, smoky flavor that canned versions can’t match. Growing up in Georgia, I learned that slow-cooked pork—whether brisket, shoulder, or ribs—holds the secret to chili that tastes like a family reunion in a bowl.
The key lies in layering that smoky depth through proper preparation and cooking techniques honed over years of pitmaster experience.
The process begins with selecting the right cut and smoking it to perfection—whether on a traditional smoker, in a Dutch oven over charcoal, or even with a smoker box on your grill.
Once the pork is tender and infused with smoke, it’s shredded and simmered with a rich base of tomatoes, spices like cumin and smoked paprika, and a hearty broth. The result? A chili that’s bold, balanced, and packed with texture, where every bite carries that unmistakable smoky richness.
By the time you’re done, you’ll have a pot of chili so flavorful it’ll have everyone asking for seconds—crispy pork bits floating in a thick, aromatic sauce with just the right kick.
The beauty of this recipe is its versatility: serve it as a stand-alone meal, top it with shredded cheese and sour cream, or pair it with cornbread for the full Southern experience. This isn’t just chili; it’s a taste of tradition, elevated.
Ready in about 3 hours (with minimal active time), this recipe delivers restaurant-quality results without the fuss. Whether you’re feeding a crowd or meal prepping for the week, the slow-cooked method ensures deep flavor and tender meat every time. Let’s get started—your taste buds will thank you.
Ingredients for smoked pork chili
Pork shoulder, smoky spices, and slow-cooked depth. Everything you need for chili that tastes like a backyard feast.
| Ingredient | Amount | Notes |
|---|---|---|
| Pork Shoulder 🥩 | 3 lb | Bone-in for flavor, cut into 2-inch chunks |
| Yellow Onion 🧅 | 2 whole | Chopped, medium dice |
| Garlic Cloves 🧄 | 6 cloves | Minced, fresh preferred |
| Smoked Paprika 🌶️ | 2 tbsp | High-quality for authentic smokiness |
| Ground Cumin 🌿 | 1 ½ tbsp | Toasted for deeper flavor |
| Dried Chili Flakes 🔥 | 1 tbsp | Adjust for heat preference |
| Coffee ☕ | 1 tbsp | Instant or finely ground |
| Tomato Paste 🍅 | ½ cup | High-quality, no sugar added |
| Beef Broth 💧 | 2 cups | Low-sodium preferred |
| Red Wine 🍷 | ½ cup | Bold, dry variety like Cabernet |
| Black Beans 🌱 | 1 cup | Cooked or canned, drained |
| Kosher Salt 🧂 | 1 ½ tsp | Adjust to taste |
| Black Pepper 🌶️ | 1 tsp | Freshly ground preferred |
| Apple Cider Vinegar 🍎 | 1 tbsp | For brightness |
| Wood Chips 🌳 | 1 package | Hickory or oak for smoking |
[recipe_ingredient_scaler]
The pork shoulder is non-negotiable here—bone-in for flavor, cut into 2-inch chunks so it breaks down properly. Costco or local butcher shops usually have the best deals on large cuts. Look for good marbling, not too lean. If you’re short on time, pre-cut pork shoulder from the grocery store works too, but trim any excess fat. The wood chips? Hickory or oak—avoid fruitwoods like cherry, they’ll overpower the smoky flavor. Soak them for 30 minutes before using if you’re not using a smoker box.
No smoked paprika? Substitute half with liquid smoke (start with 1 tsp and adjust), but you’ll lose that authentic depth. The coffee and vinegar might sound odd, but they’re game-changers—instant coffee works in a pinch, just dissolve it in the broth. For the beans, canned black beans are fine, but if you’ve got dried, soak them overnight. The red wine adds richness; if you’re avoiding alcohol, use extra beef broth. And trust me on the tomato paste quality—skip the watery brands, go for the thick, concentrated kind.
This chili tastes even better the next day, so make extra—it keeps for 5-6 days in the fridge or 3 months frozen. For serving, I like to portion it into containers with a side of cornbread. The pork will get even more tender as it sits. If you’re meal prepping, freeze it in single-serving portions—just reheat with a splash of broth to keep it moist. The smoky flavor actually intensifies over time, so don’t rush it.
Why You’ll Love This Recipe
- Smoke-Free Shortcut: I know what you’re thinking—smoking pork sounds like a weekend project, but here’s the thing: the real magic happens in the chili base. That smoked paprika and ground cumin toasted in oil? Instant smokiness without the smoker. Just let the pork rest while you build the foundation, and you’ve saved yourself 4-5 hours of hands-on time.
- Coffee & Chili Combo: Honestly, the coffee in this isn’t just for depth—it’s a game-changer. That tomato paste and red wine create a rich umami backbone, but the coffee ties it all together like a secret handshake. It’s not bitter; it’s just… there, adding a complexity that makes this chili dangerously addictive. Trust me, I’ve had people ask for the recipe after one bite.
- Feed a Crowd, Freeze the Rest: This isn’t your sad, watery chili. The bone-in pork shoulder and black beans make it hearty enough to fill bellies at a tailgate or a family dinner. And since it tastes better the next day? Double the batch, freeze half, and you’ve got a weeknight hero ready in minutes. My kids still beg for seconds, even though they “hate chili.”
- Budget’s Friend: Three pounds of pork shoulder might sound pricey, but it stretches forever with onions, garlic, and spices that cost pennies. That red wine? Use what you’ve got—no need to splurge. Leftovers? Five days in the fridge or three months frozen. It’s the kind of recipe that makes me feel like a genius without breaking the bank.
Step-by-step instructions for smoked pork chili
Here’s how to build rich, smoky flavor that transforms simple ingredients into a hearty chili.
Smoke the Pork Shoulder for Deep Flavor
Preheat your smoker to 225°F using the 1 package Wood Chips (hickory or oak). Place the 3 lb Pork Shoulder fat-side up on the smoker grate and cook for 4-5 hours until the internal temperature reaches 165°F. The pork should have a deep mahogany bark and be fork-tender when pierced.
Here’s the thing—smoking the pork first infuses it with smoky depth that can’t be replicated with spices alone. I like to check the temperature every hour after the first two to ensure it stays steady. If the pork starts to dry out, wrap it loosely in aluminum foil and return it to the smoker for another hour.
Build the Chili Base with Aromatics and Spices
While the pork smokes, heat 2 tablespoons olive oil (not listed but essential for cooking) in a large Dutch oven over medium heat. Add the 2 chopped Yellow Onion and cook for 5 minutes until softened. Stir in the 6 minced Garlic Cloves and cook for 30 seconds until fragrant.
Add the 2 tablespoons Smoked Paprika, 1½ tablespoons Ground Cumin, 1 tablespoon Dried Chili Flakes, and 1 tablespoon Coffee. Stir constantly for 1 minute to toast the spices and release their aromas. This step is where the chili gets its signature depth—don’t rush it. You’ll know it’s right when the kitchen fills with a warm, earthy smell.
Simmer the Chili with Wine and Tomato Paste
Pour in the ½ cup Red Wine and scrape up any browned bits from the bottom of the pot. Add the ½ cup Tomato Paste and stir until fully combined. Cook for 2 minutes to cook off the alcohol completely.
Add the 2 cups Beef Broth and bring the mixture to a boil. Reduce heat to low and simmer for 10 minutes to let the flavors meld. This is the foundation—thick, rich, and packed with umami. If it looks too thick, add a splash of water to loosen it slightly.
Shred the Pork and Combine with Beans
Remove the smoked pork from the smoker and let it rest for 10 minutes. Using two forks, shred the meat into 2-inch chunks (or smaller if you prefer). Add the shredded pork to the Dutch oven along with the 1 cup Black Beans and 1 tablespoon Apple Cider Vinegar. Stir gently to combine.
The vinegar brightens the flavors while the beans add texture and body. Simmer the entire mixture for 30-45 minutes on low heat, stirring occasionally. This lets the pork absorb all those smoky, spiced flavors from the base. Taste and adjust seasoning with 1½ teaspoons Kosher Salt and 1 teaspoon Black Pepper as needed.
Finish and Serve with Crispy Topping
For the final touch, transfer the chili to a serving bowl. Let it cool slightly, then top with toasted tortilla chips or crushed cornflakes for crunch. Serve immediately with sour cream, shredded cheese, and fresh cilantro if you like.
This chili tastes even better the next day as the flavors continue to develop. The smoky pork transforms a simple chili into something extraordinary—rich, complex, and deeply satisfying. You’ll want to make this again and again.
Pro Tips For Making Smoked Pork Chili
- TOAST THE CUMIN FIRST: I used to just toss in the 1.5 tbsp Ground Cumin like any other spice, but toasting it in the dry pot for 30 seconds before adding onions makes a real difference—it deepens that earthy, nutty punch that cuts through the smokiness. Sounds weird, but it works: the kitchen smells like a spice market, and the chili tastes like it.
- WRAP THE PORK AT 165°F: I learned this the hard way—letting the pork shoulder dry out on the smoker ruins the tender texture. Once it hits 165°F, wrap it loosely in foil and let it rest for that hour. The meat stays juicy, and the bark stays intact. Trust me, your chili will thank you later when you shred it into perfect, flavorful chunks.
- DEGLAZE WITH WINE IMMEDIATELY: That ½ cup Red Wine isn’t just flavor—it’s cleanup. Pour it in the second the onions hit the pot, and scrape every last bit of browned goodness from the bottom. Those bits are where the magic happens, and skipping this step means missing out on layers of richness. (Yes, even if you’re impatient like me.)
- REST THE PORK BEFORE SHREDDING: Cutting into that smoked pork shoulder the second it comes off the smoker sends all the juices running out. Give it a solid 10 minutes under foil first—this guarantees tender, pull-apart meat that soaks up the chili’s flavors instead of turning into dry shreds. I know, I know, but trust the process.
Pro cooking tips for perfect results
Master the Smoker
I can’t stress enough how critical the smoking process is—this isn’t just about adding flavor, it’s about transforming the pork. Use hickory or oak wood chips soaked for 30 minutes to ensure steady smoke without flare-ups.
My Traeger Pro 575 smoker runs best at 225°F with a 10-inch fan to distribute heat evenly. If you’re using a grill with a smoker box, keep the lid closed and maintain consistent airflow.
Pro tip: Wrap the pork loosely in foil for the last hour if it starts drying out—this prevents moisture loss while keeping that bark intact. 🔥
Toast Your Spices
The difference between mediocre and exceptional chili often comes down to how you treat your spices. Toast your 1.5 tbsp ground cumin and 2 tbsp smoked paprika in the same oil you’re sautéing onions—this releases their oils and deepens the flavor.
I use a 10-inch cast-iron skillet for this step because it retains heat perfectly. Let the spices bloom for 1 full minute until the kitchen smells like a Southern spice shop. This step is non-negotiable if you want that authentic depth. Don’t skip it!
Wine Matters
Using ½ cup red wine like Cabernet isn’t just about alcohol reduction—it’s about adding complexity. The tannins in red wine cut through the richness of the pork while adding layers of fruitiness.
If you’re avoiding alcohol, use ½ cup extra beef broth but reduce the simmer time by 5 minutes to compensate for the lack of depth. I always let the wine cook off completely before adding the tomato paste—this prevents a harsh aftertaste.
Trust me, this small step makes a world of difference. 🍷
Bean Texture Control
Black beans can turn mushy if you’re not careful, so I recommend adding them near the end of cooking. For the best texture, I simmer the beans separately in 1 cup beef broth for 10 minutes, then add them to the chili with the pork.
This keeps them intact while still allowing them to absorb flavor. If you’re using canned beans, rinse them thoroughly to remove excess sodium—this gives you better control over seasoning. I also like to mash a few beans lightly with a fork before adding them for extra body. 🌱
Low and Slow Finishing
The final 30-45 minutes of simmering is where the magic happens—this is when the pork absorbs all those smoky, spiced flavors. I use a wooden spoon to gently stir the chili every 10 minutes to prevent sticking and ensure even cooking.
If the chili looks too thick, add ¼ cup warm water at a time until it reaches a gravy-like consistency. The key is patience—rushing this step will result in a flavorless dish. Let it simmer uncovered for the last 5 minutes to concentrate the flavors. 💡
Rest Before Serving
After cooking, let the chili rest for at least 20 minutes before serving. This allows the pork to redistribute its juices throughout the dish, ensuring every bite is moist and flavorful. I cover the pot with foil and let it sit on the stovetop while I finish prepping toppings.
This resting period also gives the spices time to meld completely, so don’t skip it! If you’re serving a crowd, I recommend reheating portions in a slow cooker on low for 2 hours to maintain texture. Your guests will notice the difference. 💛
Nutrition facts
Frequently asked questions
Why does smoking the pork first make such a big difference in flavor?
Smoking the pork shoulder before shredding infuses it with deep, authentic smokiness that spices alone can’t replicate. The 225°F heat and 4-5 hours of slow cooking create a mahogany bark while tenderizing the meat—this process develops flavors that elevate the entire chili. Even if you’re short on time, the first hour of smoking makes a noticeable difference in the final dish.
Can I use a different type of wood for smoking the pork?
Hickory and oak are the best choices for this recipe as they provide balanced smokiness without overpowering. Fruitwoods like cherry can add sweetness that clashes with the spices, while mesquite might be too strong. If you’re experimenting, try a 50/50 hickory-oak blend—it’s a safe middle ground that still delivers great flavor. Just avoid pine, as it can make the chili taste bitter.
What if my chili turns out too thick? How can I fix it?
Simmer the chili uncovered for 5-10 minutes to reduce thickness, or gradually add ¼ cup warm water at a time while stirring. You can also add a splash of beef broth if you have it on hand. The key is to thin it gradually to avoid diluting the flavors. If it’s still too thick, let it cool slightly and blend ½ cup of the chili with ½ cup water, then stir it back in. This creates a smoother texture.
Can I make this chili ahead of time and freeze it?
This chili actually tastes better the next day, and it freezes beautifully for up to 3 months. Let it cool completely before freezing in airtight containers. When reheating, add a splash of broth or water to maintain moisture. For the best texture, thaw overnight in the fridge before reheating gently on low heat. The flavors deepen even more after freezing, so it’s worth the prep!
What’s the best way to adjust the heat level in this recipe?
Start by reducing the 1 tablespoon Dried Chili Flakes to ½ tablespoon for milder heat, or increase to 1½ tablespoons for more spice. The 1 tablespoon Coffee also adds subtle warmth—reduce it to ½ tablespoon if you prefer less depth. For extra heat, add ½ teaspoon cayenne pepper at the end, but taste first! The Red Wine and Apple Cider Vinegar balance any spiciness, so don’t be afraid to experiment.

Trained in classic French technique but raised on slow-cooked ribs and spicy rubs, she blends culinary skill with smoke and soul.
- Smoked Brisket Recipe: Low and Slow to Fall-Apart Tenderness - November 2, 2026
- Smoked Turkey Breast Recipe: Juicy Pink Center With Crispy Skin Every Time - November 2, 2026
- Leftover Smoked Pulled Pork Chili Recipe: Rustic Flavor Revival in One Pot - November 2, 2026