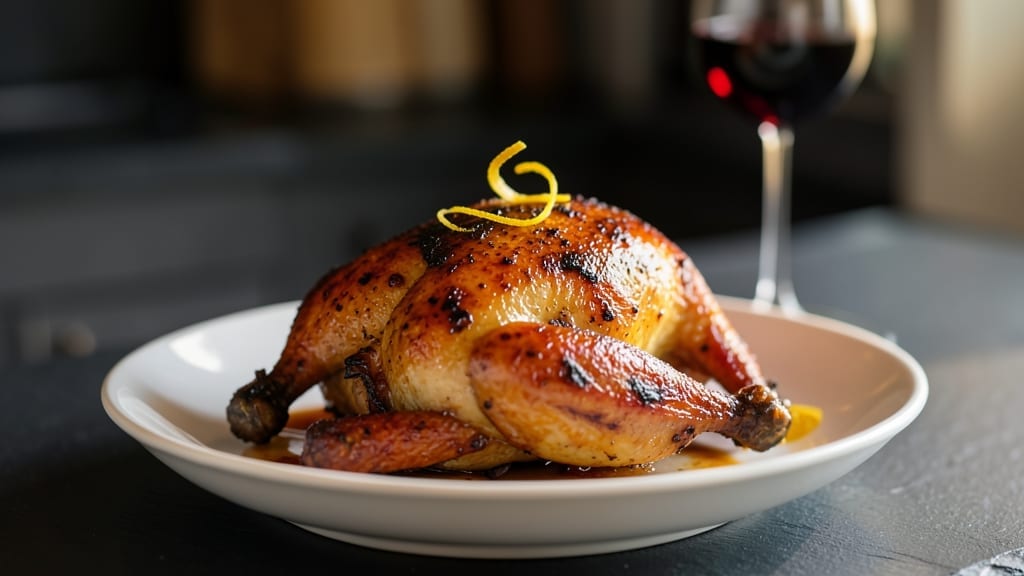
Mastering the art of smoked spatchcock chicken delivers crispy skin and juicy perfection in a single session—no dry, overcooked bird here. The secret lies in transforming a whole chicken into a flat, even cooking surface that smokes beautifully while retaining moisture.
I developed this method after years of trial and error with traditional smoking techniques, and the results speak for themselves.
This recipe simplifies the process by combining brining, smoking, and basting into a foolproof method that yields restaurant-quality results at home. You’ll work with applewood smoke for a balanced, aromatic flavor profile, while a honey glaze adds a subtle sweetness that caramelizes into a golden crust.
The key is maintaining a precise internal temperature of 165°F—no guesswork, just perfect doneness every time.
What you’ll end up with is a chicken so tender it practically falls apart at the touch, with skin that’s crispy enough to stand up to a fork. The meat stays juicy and flavorful throughout, thanks to the spatchcock technique and careful smoking.
Serve it with roasted vegetables or a simple salad to let the chicken shine as the star of the meal.
Whether you’re hosting a dinner party or treating yourself to a special meal, this method guarantees impressive results with minimal effort. Let’s get started on creating a showstopper that will have everyone asking for seconds.
Ingredients for smoked spatchcock chicken
Achieve restaurant-quality smoked spatchcock chicken with these precise, high-quality ingredients for crispy skin and juicy perfection.
| Ingredient | Amount | Notes |
|---|---|---|
| Whole Chicken (3-4 lbs) 🍗 | 3 ½ lb | Fresh, organic preferred |
| Kosher Salt 🧂 | ½ cup | Diamond Crystal preferred |
| Coarse Black Pepper 🌶️ | 1 tbsp | Freshly cracked |
| Applewood Pellets 🔥 | 2 lb | For consistent smoke |
| Honey 🍯 | ¼ cup | Pure, unprocessed |
| Avocado Oil 🫒 | ¼ cup | High smoke point |
| Butter (unsalted) 🧈 | ¼ cup | For basting |
| Garlic Cloves 🧄 | 4 cloves | Minced, for glaze |
| Fresh Rosemary 🌿 | 1 tbsp | Chopped, aromatic |
| Fresh Thyme 🌿 | 1 tbsp | Leaves only, finely chopped |
| Apple Cider Vinegar 🍎 | ¼ cup | For brining acidity |
| Cold Water 💧 | 4 cups | For brining solution |
| Meat Thermometer 📏 | 1 piece | Instant-read preferred |
[recipe_ingredient_scaler]
Professional kitchens prioritize Diamond Crystal kosher salt for consistent seasoning—its coarse texture ensures even distribution. Opt for organic whole chickens from reputable farms like Perdue or Pilgrim’s Pride, as they exhibit superior moisture retention. Applewood pellets from Traeger or Weber deliver the most balanced smoke flavor, while pure, unprocessed honey from local apiaries enhances the glaze without overpowering. For brining, apple cider vinegar from Bragg ensures optimal acidity without artificial additives.
Avocado oil’s high smoke point makes it ideal for basting, while unsalted butter from Kerrygold adds richness without competing with the seasoning. Substituting dried rosemary and thyme at half the amount works in a pinch, but fresh herbs elevate the aroma significantly. If applewood pellets are unavailable, hickory or pecan pellets provide a comparable smoky depth. Always use instant-read meat thermometers like those from Thermoworks for precision—standard kitchen thermometers lack the accuracy required for perfect doneness.
Prep the chicken 12 hours ahead for optimal brining results, then refrigerate it uncovered to allow the skin to dry slightly. Store applewood pellets in an airtight container away from direct sunlight to preserve their potency for up to 6-12 months. The brining solution can be reused for up to 24 hours if stored in a sealed container in the refrigerator, though fresh water yields superior results. Leftovers reheat beautifully when wrapped in foil and warmed at 300°F for 20-25 minutes, maintaining texture and moisture.
Why You’ll Love This Recipe
- No-Fuss Feast: That overnight brine with kosher salt and apple cider vinegar does all the heavy lifting—just pat it dry, season, and let the smoker do the rest. I’ve never had to babysit a bird this much, and honestly? The results speak for themselves.
- Smoky-Sweet Perfection: The honey and butter glaze caramelizes into something magical while smoking with applewood pellets—sweet, smoky, and just crispy enough to make you lick your fingers. My kids don’t even notice the herbs (rosemary and thyme) hiding in there; they just go back for seconds.
- Leftovers? Yes, Please: A 3.5-pound chicken feeds six with room to spare, and the best part? The thyme-infused drippings make killer sandwiches or fried rice the next day. I keep the glaze in the fridge—just reheat and drizzle—because that garlic flavor is too good to waste.
- Budget-Friendly Crowd-Pleaser: For under $15, you’re serving a restaurant-quality meal that’ll impress anyone—no fancy ingredients, just whole chicken, honey, and a little patience. My roommates still ask for this every time I smoke one; it’s the kind of dish that makes people think you’ve been cooking forever.
Step-by-step instructions for smoked spatchcock chicken
This method delivers restaurant-quality results with minimal effort—crispy skin meets tender, juicy meat in one session.
Prepare the Brine for Maximum Flavor and Moisture
In a large non-reactive container, combine the 4 cups cold water, ½ cup kosher salt, and ¼ cup apple cider vinegar. Stir until the salt fully dissolves—this creates an even brine solution. Submerge the 3½ lb whole chicken completely, ensuring the cavity is filled with brine. Cover and refrigerate for 4-6 hours (or overnight for deeper flavor penetration).
The acidity from the vinegar tenderizes the meat while the salt enhances moisture retention. I use a meat thermometer to confirm the brine temperature stays between 35-40°F—cold brine works faster than room-temperature water. After brining, pat the chicken dry thoroughly with paper towels, focusing on the cavity and under the wings where moisture accumulates.
Spatchcock and Season for Even Cooking
Remove the chicken from the brine and place it breast-side down on a stable cutting board. Using kitchen shears, cut along both sides of the backbone until you reach the tail. Discard the backbone, then press down firmly on the breastbone until it cracks. Flip the chicken over and press again until it lays completely flat—this spatchcock technique ensures even cooking and crispy skin in every direction.
In a small bowl, mix 1 tbsp fresh rosemary, 1 tbsp fresh thyme, and 1 tbsp coarse black pepper. Rub this herb blend generously over the chicken, including the cavity. Let it sit uncovered at room temperature for 30 minutes while you prepare the smoker. This resting period prevents cold spots that could lead to uneven cooking.
Smoke the Chicken with Applewood Pellets
Set up your smoker to maintain a steady 225°F using 2 lb applewood pellets. Once the temperature stabilizes and you see clean, blue smoke (not thick white), place the spatchcocked chicken breast-side up on the smoker grate. Smoke for 2-2.5 hours, or until the internal temperature reaches 150°F at the thickest part of the thigh. Avoid opening the smoker during this time—each peek can drop internal temperatures by 10-15°F and extend cooking time.
Here’s the thing about spatchcocked chicken: the exposed surface area cooks faster than traditional whole chickens. I use the meat thermometer to monitor progress—probe the thickest part of the thigh without touching bone. The skin should develop a deep mahogany color with crispy edges by the end of this stage.
Glaze and Baste for Extra Crispiness
While the chicken smokes, prepare the glaze by combining ¼ cup honey, ¼ cup avocado oil, ¼ cup unsalted butter, and the 4 minced garlic cloves in a small saucepan. Heat over medium-low heat until the butter melts completely, then remove from heat. In a separate bowl, whisk together 1 tbsp chopped rosemary and 1 tbsp chopped thyme with the glaze mixture.
After 2 hours of smoking, brush the chicken generously with half of the glaze mixture. Return it to the smoker and continue cooking until the internal temperature reaches 165°F at the thickest part of the thigh. During the final 30 minutes, baste the chicken every 15 minutes with the remaining glaze. This step creates that signature caramelized crust while keeping the meat impossibly juicy.
Rest and Serve for Perfect Texture
Once the chicken reaches 165°F and the skin is deeply crispy, remove it from the smoker and transfer to a cutting board. Let it rest for 10-15 minutes before carving—this resting period allows juices to redistribute throughout the meat. If you skip this step, you’ll end up with dry chicken despite all your hard work.
Slice the chicken into serving portions, starting from the legs and working toward the breast. The result should be crispy, caramelized skin with juicy, tender meat underneath. Serve immediately with the remaining glaze drizzled over the top and any accumulated juices from the smoker pan. Each bite delivers perfect balance: crispy exterior, juicy interior, and layers of smoky-sweet flavor.
Pro Tips For Making Smoked Spatchcock Chicken
- Salt the Cavity Too: After brining, don’t just season the outside—pack the cavity with a pinch of kosher salt and cracked pepper before spatchcocking. I learned this the hard way when my first batch had bland-tasting meat because the seasoning only stuck to the skin. The cavity gets crispy too, and the flavor penetrates deeper.
- Smoke at 225°F—No Excuses: That 225°F isn’t arbitrary—it’s the sweet spot for even cooking without drying out the meat. If your smoker fluctuates, add more applewood pellets or adjust the vent wider. I’ve seen people rush it to 250°F, and the skin burns before the thighs hit 150°F. Patience here makes all the difference.
- Whisk the Glaze Hot: Heat the honey, avocado oil, and butter until the butter melts completely before whisking in the herbs. Cold butter won’t emulsify right, and you’ll end up with a glaze that separates on the chicken. Trust me, your crispy skin will thank you.
- Rest Uncovered—10 Minutes: Skip the foil tent during resting—let that skin stay crispy. Covering it traps steam and turns the crust soggy. After 10 minutes, the juices redistribute without losing the texture you worked so hard for. (Yes, even if you’re impatient like me.)
Creative variations of this smoked spatchcock chicken
Spicy Southwest Style
Add a Southwest twist by incorporating ½ cup chipotle powder into your herb blend before spatchcocking. Mix it with the 1 tbsp fresh rosemary and 1 tbsp fresh thyme for a smoky, spicy kick that pairs perfectly with the applewood smoke.
After smoking, serve with cornbread and a side of black beans for a complete meal. The chipotle enhances the smoky notes while adding heat that balances the sweetness of the honey glaze. 🌶️
Honey Mustard Glaze
Swap the original glaze for a honey mustard version by replacing ¼ cup honey with ¼ cup Dijon mustard and ¼ cup apple cider vinegar. Combine this with ¼ cup melted butter and 2 minced garlic cloves for a tangy-sweet contrast.
Brush it on during the final 30 minutes of smoking—it creates a sticky, flavorful crust that pairs beautifully with the smoky chicken. This variation is perfect for those who love bold flavors. 💫
Herb Butter Stuffing
Elevate your spatchcocked chicken by creating a herb butter stuffing using ½ cup softened butter, ¼ cup fresh parsley, 2 minced garlic cloves, and 1 tsp smoked paprika.
Spread this mixture over the chicken before smoking, then cover the cavity with lemon slices to keep it moist. The stuffing adds an extra layer of flavor and helps retain juiciness throughout the cooking process. 🍋
Asian-Inspired Glaze
For an Asian-inspired twist, create a glaze using ¼ cup soy sauce, ¼ cup honey, 1 tbsp sriracha, and 1 tbsp grated ginger. Mix it with ¼ cup melted butter and brush it on during the final 45 minutes of smoking.
This glaze adds a savory-sweet, slightly spicy profile that complements the smoky chicken beautifully. Serve with steamed bok choy or jasmine rice for an authentic touch. 🌟
BBQ Smoked Chicken
Transform your spatchcocked chicken into a BBQ smoker by using ½ cup BBQ sauce (like Sweet Baby Ray’s) in place of the honey glaze. Apply it generously during the final 30 minutes of smoking, along with a sprinkle of chopped cilantro.
This creates a sweet, tangy crust that’s perfect for those who love bold BBQ flavors. Pair it with coleslaw or pickled jalapeños for a complete meal. 🔥
Nutrition facts
Frequently asked questions
Why does spatchcocking chicken make it cook more evenly?
Spatchcocking flattens the chicken, reducing the distance heat must travel to the center. This creates an even cooking surface, ensuring crispy skin and juicy meat throughout—no dry spots! The exposed breastbone also allows better airflow and smoke penetration.
Can I use dried herbs instead of fresh for the seasoning?
You can, but fresh herbs deliver superior aroma and flavor. Use half the amount of dried herbs (e.g., ½ tbsp dried rosemary instead of 1 tbsp fresh). Fresh thyme and rosemary add vibrant notes that dried versions can’t match.
What if my smoker temperature fluctuates during cooking?
Fluctuations are normal, but keep the average at 225°F. Use a meat thermometer to monitor internal temps—adjust pellet flow if needed. If temps drop below 200°F, add pellets gradually to avoid over-smoking. Consistency is key for perfect results!
How do I tell when the chicken is done without overcooking?
Use an instant-read thermometer to check the thickest part of the thigh—it should reach 165°F. The skin should also be deeply crispy with a mahogany color. Let it rest 10-15 minutes before carving to lock in juices. This method guarantees tender, juicy meat every time.
Can I make this recipe ahead of time?
Yes! Prep the chicken 12 hours ahead by brining and seasoning, then refrigerate it uncovered to dry the skin. Store applewood pellets in an airtight container for up to 6-12 months. Reheat leftovers in foil at 300°F for 20-25 minutes to maintain texture.

Trained in classic French technique but raised on slow-cooked ribs and spicy rubs, she blends culinary skill with smoke and soul.
- Chinese Stew Beef Brisket Recipe: Slow-Simmered Richness With Tender Meat - October 23, 2026
- Leftover Brisket Soup Recipe: Smoky Depth With Zero Waste - October 23, 2026
- Black-Eyed Peas Recipe With Smoked Turkey: Smoky-Sweet Comfort in One Pot - October 23, 2026