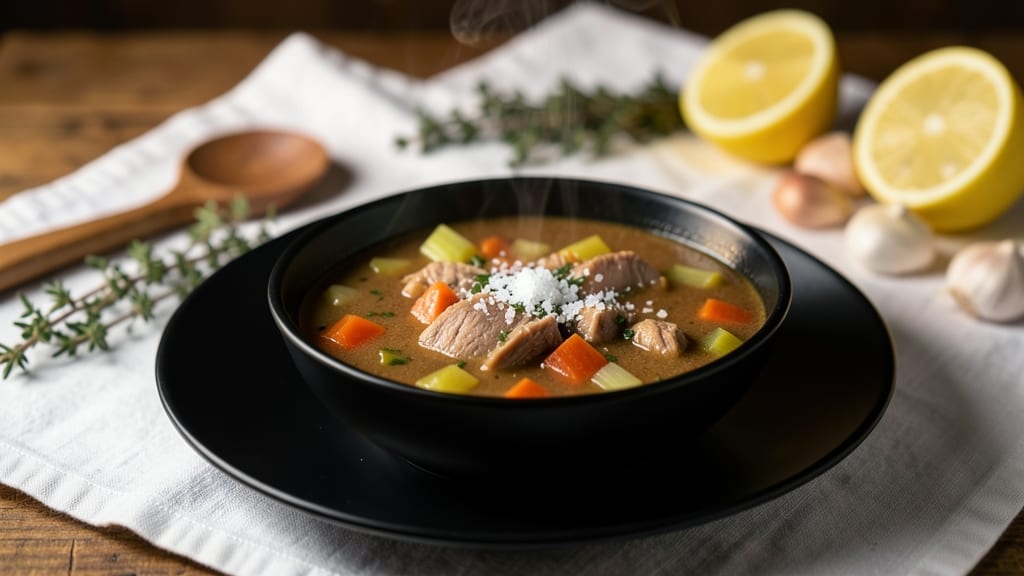
This smoked turkey soup recipe transforms leftover holiday turkey into a rich, velvety broth packed with smoky depth—no waste, just flavor. 💛 The secret lies in slow-simmering turkey bones with aromatics until the broth becomes so intensely flavorful, every spoonful feels like a hug on a cold day.
I perfected this method after years of experimenting with smoked turkey leftovers, and it’s become a staple in my kitchen.
The process starts with searing turkey bones to deepen the flavor, then simmering them with onions, carrots, and celery for hours until the broth reduces to a perfect consistency. Adding smoked turkey pieces later ensures they stay tender while absorbing all that savory goodness.
This isn’t just soup—it’s a hearty, restaurant-quality meal that’s foolproof and ready in under two hours.
By the end, you’ll have a bowl of golden, aromatic soup with tender turkey pieces floating in a rich, smoky broth that’s impossible to resist. The aroma alone will draw everyone to the table, and the first bite delivers that perfect balance of savory, smoky, and slightly sweet flavors.
Serve with crusty bread to soak up every last drop of that delicious broth.
This recipe works beautifully as a comforting weeknight dinner or a showstopper for gatherings. The leftovers reheat just as well, making it ideal for meal prep. Let’s get cooking—your taste buds (and your turkey bones) will thank you.
Ingredients for smoked turkey soup
Leftover turkey transformed into velvety, smoky broth—just a few pantry staples needed.
| Ingredient | Amount | Notes |
|---|---|---|
| Smoked Turkey Bones 🦃 | 2 lb | With meat attached, cut into chunks |
| Yellow Onions 🧅 | 3 whole | Thinly sliced, for depth |
| Carrots 🥕 | 3 cups | Peeled, chopped into 1-inch pieces |
| Celery Stalks 🌿 | 3 cups | Chopped, for balanced flavor |
| Garlic Cloves 🧄 | 6 cloves | Mince or lightly crush |
| Smoked Turkey Meat 🍗 | 2 cups | Shredded or diced, from leftovers |
| Smoked Paprika 🌶️ | 1 tbsp | For authentic smoky depth |
| Dried Thyme 🌿 | 1 tsp | Or 1 tbsp fresh thyme |
| Salt 🧂 | 1 tsp | Kosher or sea salt |
| Black Pepper 🌶️ | ½ tsp | Freshly ground preferred |
| Vegetable Broth 💧 | 8 cups | Low-sodium for control |
| Apple Cider Vinegar 🍎 | 1 tbsp | Brightens the broth |
| Worcestershire Sauce 🍲 | 1 tbsp | For umami depth |
| Crusty Bread 🍞 | 2 slices | For serving, toasted |
| Olive Oil 🫒 | 2 tbsp | For searing bones |
[recipe_ingredient_scaler]
The bones are your secret weapon. Look for smoked turkey bones from your holiday turkey—skin and meat still attached for maximum flavor. Costco often has them in bulk after the holidays, or ask your butcher to save them for you. If you can’t find smoked bones, regular turkey bones work with an extra 20 minutes of searing for color. The key is to sear them well before simmering—this is where all the magic happens. I always grab a meat thermometer to hit 165°F for safety, but the real flavor comes from the deep browned bits.
No smoked turkey meat? Shredded rotisserie chicken works in a pinch, but it won’t have that same smoky punch. Dried thyme at half the amount of fresh is fine, but I always grab fresh if I can—it’s worth the extra cost. The apple cider vinegar might seem odd, but it brightens the broth and balances the richness. If you’re avoiding it, lemon juice at 1 tbsp is a great swap. Worcestershire sauce is non-negotiable for that umami kick—Lea & Perrins is my go-to, but any quality brand works. The carrots and celery should be roughly chopped—no need to be precise, just get them in the pot.
This broth tastes even better the next day. Store in airtight containers for up to 5 days in the fridge, or freeze for 3 months. I always make extra because it’s impossible to resist. The crusty bread? Toast it first to make it extra crispy for dipping. If you’re meal prepping, portion the soup into containers and freeze the bread separately—reheat soup with a splash of broth to restore creaminess. The smoked flavor gets deeper over time, so don’t skip the second day!
Why You’ll Love This Recipe
- One-Pot Wonder: I love that this soup lives in one Dutch oven the whole time—no extra pans, no cleanup chaos. The searing step alone locks in all that smoky flavor from the turkey bones, and by the time you add the aromatics and broth, you’re basically done. Honestly, the only real effort is resisting the urge to stir every two minutes while it simmers.
- Smoky, Tangy Perfection: The combination of smoked turkey bones, smoked paprika, and apple cider vinegar gives this soup a depth that’s hard to beat. That first spoonful hits you with the rich, caramelized taste from the seared bones, then the garlic and thyme round it out with warmth—it’s the kind of flavor that makes you forget you’re eating soup. The Worcestershire sauce adds that little umami punch that makes it unforgettable.
- Feeds a Crowd (or Your Cravings): This recipe is basically a meal in a bowl, so it’s perfect for feeding a family or hosting a casual gathering. I’ve made it for game day and lazy Sunday dinners, and it always disappears fast. Even better? It tastes even better the next day, so you can prep it ahead and have leftovers ready to go. My kids fight over seconds, and that’s saying something.
- Budget-Friendly Leftovers: Using smoked turkey bones and leftover smoked turkey meat means you’re stretching your ingredients without sacrificing flavor. The broth and veggies are affordable staples, and the spices add just enough punch to make it feel special. Plus, storing it in the fridge for up to five days (or freezing for months) means you’ll always have a comforting meal on hand—no waste, just satisfaction.
Step-by-step instructions for smoked turkey soup
Here’s how to create a deeply flavorful soup that captures all that smoky goodness in every spoonful.
🔥 Step 1: Sear the Turkey Bones for Maximum Flavor
Heat a large Dutch oven over medium-high heat and add the 2 tablespoons olive oil. Arrange the 2 lb smoked turkey bones in a single layer, cut-side down. Let them sear undisturbed for 8-10 minutes until they develop a deep golden-brown crust.
This step is where all the magic happens—the searing caramelizes the proteins and releases collagen from the bones, which will later break down into rich gelatin as the soup simmers. Flip the bones occasionally and continue searing for another 5-7 minutes until they’re evenly browned. Here’s the thing—don’t rush this. You want that deep, toasty flavor that forms during the sear.
👨🍳 Step 2: Build the Flavor Base with Aromatics
Remove the seared bones and set them aside. In the same Dutch oven, add the 3 yellow onions, 3 cups carrots, and 3 cups celery stalks. Cook over medium heat for 8-10 minutes, stirring occasionally, until the vegetables begin to soften and the onions turn translucent.
Add the 6 garlic cloves (minced or lightly crushed) and cook for another 1 minute until fragrant. Here’s where it gets good—sprinkle in the 1 tablespoon smoked paprika and 1 teaspoon dried thyme, stirring constantly for 30 seconds to toast the spices and release their aromas. This creates that authentic smoky depth that makes this soup special.
🍳 Step 3: Simmer the Broth with Seasonings
Pour in the 8 cups vegetable broth, scraping up any browned bits from the bottom of the pot with a wooden spoon. Return the seared turkey bones to the pot, along with the 1 tablespoon apple cider vinegar and 1 tablespoon Worcestershire sauce. Bring the mixture to a gentle boil, then reduce heat to low and add the 1 teaspoon salt and ½ teaspoon black pepper.
Cover the pot and let it simmer gently for 1 hour to 1 hour 15 minutes, skimming off any foam or impurities that rise to the surface. You’ll know it’s ready when the broth takes on a rich, amber color and the bones are tender enough to easily pull apart with tongs. The longer it simmers, the more gelatin will be released from the bones, creating that silky texture we all love in a good soup.
🥘 Step 4: Incorporate the Smoked Turkey Meat
Using tongs, carefully remove the turkey bones from the broth and place them on a plate. Strain the broth through a fine-mesh sieve into a clean pot, pressing on the solids to extract as much flavor as possible. Discard the solids. Return the broth to the heat and add the 2 cups smoked turkey meat, stirring gently to combine.
Simmer the soup for another 5-7 minutes to heat through completely. Taste and adjust seasoning if needed—this is where you can really fine-tune the flavor. The soup should be rich and savory with a deep smoky undertone. If it’s too thick, add a splash of water or more broth to reach your desired consistency. Here’s the moment that matters: the balance of smoky, savory, and slightly tangy flavors should sing together.
🍽️ Step 5: Serve with Crusty Bread
Ladle the hot soup into bowls and serve immediately with the 2 slices crusty bread, lightly toasted. The bread is perfect for soaking up every last drop of that flavorful broth. I like to serve this soup with a sprinkle of fresh parsley or a drizzle of hot sauce for those who like a little extra kick.
Each spoonful should deliver that perfect combination of tender turkey, rich broth, and smoky depth. The crusty bread adds a wonderful textural contrast that makes the whole experience even better. Don’t be afraid to make extra—this soup tastes even better the next day as the flavors continue to meld together.
Pro Tips For Making Smoked Turkey Soup
- Don’t Skip the Bone Sear: I learned this the hard way—rushing the 8-10 minutes of searing on the turkey bones means missing out on that deep, caramelized flavor that turns your soup from good to unforgettable. High heat for those first 8 minutes is non-negotiable; the bones need time to develop that golden crust before you even think about flipping them.
- Mince That Garlic Small: The recipe says “mince or lightly crush,” but I’ve found that actually mincing the 6 garlic cloves—so fine they’re almost a paste—lets the flavor dissolve into the broth instead of floating as chunks. Trust me, your soup will taste richer, even if it means a little extra elbow grease.
- Skim Like a Pro: That foam rising during the 1-hour simmer isn’t just bubbles—it’s impurities and fat that’ll make your broth cloudy. Use a fine-mesh skimmer or a ladle to pull it off every 10 minutes, especially in the first 30 minutes. Your broth will stay crystal-clear and silky, not greasy.
- Toast the Spices Fast: When you add the smoked paprika and thyme in Step 2, stir constantly for those 30 seconds—no distractions. This isn’t the time to walk away; you’re toasting the spices to wake up their flavors, not just sprinkling them in. The difference is like night and day in that smoky depth.
Storing and reheating this smoked turkey soup
Fridge Storage Secrets
Let your soup cool to room temperature for no more than 1 hour before transferring it to glass Pyrex containers—I swear by these for their durability and even reheating. Store in your fridge at 40°F or below, where it’ll keep beautifully for up to 5 days.
The flavors actually deepen overnight, so I always make extra knowing it’ll taste even better the next day. 🥣
Freezing Like a Pro
For longer storage, freeze your soup in flat freezer bags (quart size works best). Leave 1 inch of headspace to prevent cracks from ice expansion, and squeeze out all air before sealing. Label with the date—it’ll stay delicious for up to 3 months.
When ready to enjoy, thaw overnight in the fridge for the most even texture. I always freeze portions I know I’ll use within a month. ❄️
Reheating Without Ruining It
On the stovetop, pour soup into a heavy-bottomed pot and add ¼ cup water or broth to prevent sticking. Heat over medium-low for 10-15 minutes, stirring occasionally. This gentle method preserves the silky texture and rich flavors. Taste before serving—soup often needs a pinch of salt after reheating. 🔥
Microwave Rescue
For quick lunches, microwave individual portions covered with a damp paper towel. Heat on 70% power for 2-3 minutes, then stir and continue in 1-minute intervals until reaching 165°F. Add a splash of water if it looks dry.
This method works best for smaller portions and keeps the broth from separating. I use it when I’m craving soup but short on time. 💫
Reviving Leftovers
If your soup looks dull after reheating, boost it with a splash of hot water or broth to restore creaminess. Stir in a spoonful of heavy cream or coconut milk for extra richness.
I also like to add fresh herbs like parsley or thyme at the end—it brings back that fresh-from-the-pot vibe. The smoked turkey pieces will stay tender if you handle them gently. 🌿
Bread Perfection
Toast your crusty bread right before serving to keep it crisp. I use a cast-iron skillet for that perfect golden crust. Store bread separately in an airtight container to keep it fresh.
When reheating soup, toast the bread fresh—it’s the best way to enjoy that perfect crunch with every spoonful. This little touch makes the whole meal feel special. 🍞
Nutrition facts
Frequently asked questions
Can I use regular turkey bones instead of smoked turkey bones?
Yes, but you’ll need to add extra flavor! Regular turkey bones won’t have that smoky depth, so sear them for 20-25 minutes to develop a deep brown crust. Add an extra ½ teaspoon smoked paprika to the broth for a similar smoky kick. The longer searing time helps compensate for the lack of pre-smoked flavor.
Why does my broth look cloudy after simmering?
Cloudy broth is normal and actually delicious! It happens when collagen from the bones breaks down into gelatin, creating that silky texture. For extra clarity, strain the broth through a fine-mesh sieve twice after simmering. If you prefer it cloudy, just stir it back in—it means your soup is rich and flavorful! The gelatin will thicken the broth naturally over time.
How do I adjust the seasoning if my soup tastes bland?
Start with a pinch of salt and black pepper while the soup simmers. For extra depth, stir in 1-2 tablespoons of Worcestershire sauce or a splash of apple cider vinegar to brighten the flavors. If it still needs umami, add a dash of soy sauce or a sprinkle of smoked paprika. Taste as you go—seasoning is key to balancing the rich, smoky broth.
Can I make this soup ahead of time and freeze it?
Freeze the soup in airtight containers or flat freezer bags, leaving 1 inch of headspace. It keeps well for up to 3 months. When ready to eat, thaw overnight in the fridge and reheat gently on the stove with a splash of broth to restore creaminess. The flavors actually improve after freezing!

Trained in classic French technique but raised on slow-cooked ribs and spicy rubs, she blends culinary skill with smoke and soul.
- Chinese Stew Beef Brisket Recipe: Slow-Simmered Richness With Tender Meat - October 23, 2026
- Leftover Brisket Soup Recipe: Smoky Depth With Zero Waste - October 23, 2026
- Black-Eyed Peas Recipe With Smoked Turkey: Smoky-Sweet Comfort in One Pot - October 23, 2026