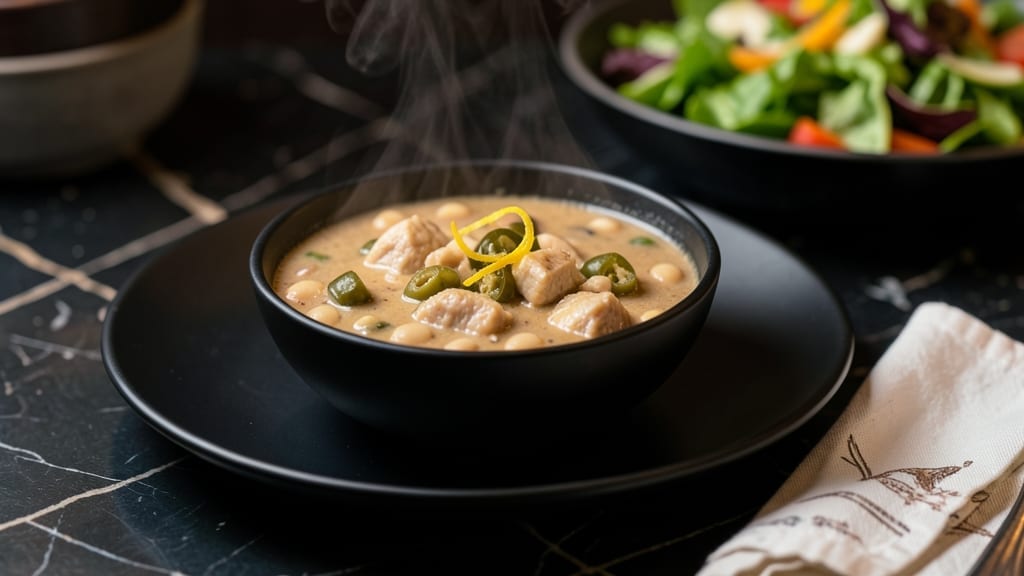
This smoked white chicken chili recipe delivers the ultimate blend of smoky depth and creamy comfort in every spoonful—perfect for chilly evenings when you crave hearty, restaurant-quality flavors without the fuss.
The secret lies in slow-smoking tender white chicken until it’s infused with rich, woodsy notes, then simmering it with white beans, tomatoes, and a blend of spices until everything melds into a velvety, satisfying stew.
The process begins with brining and smoking the chicken for that signature smoky aroma, then building the chili base with pantry staples like canned white beans, diced tomatoes, and a mix of cumin, chili powder, and garlic.
Simmering everything together transforms simple ingredients into a dish that’s both comforting and impressive—ideal for feeding a crowd or meal prepping for the week.
What you’ll end up with is a creamy, smoky chili with tender chicken, perfectly seasoned beans, and a broth so rich it practically melts in your mouth. Top it with your favorite fixings—cheddar cheese, sour cream, or fresh cilantro—and you’ve got a bowl of warmth that’s impossible to resist.
This recipe is designed to be foolproof, ensuring you’ll achieve professional results every time.
Serve it alongside cornbread or tortilla chips for the full experience, or enjoy it as-is for a satisfying, one-pot meal. Let’s get started on creating this creamy, smoky comfort that’ll become a staple in your kitchen.
Ingredients for smoked white chicken chili
Pantry staples meet smoky magic—just 15 ingredients for a chili that tastes like comfort.
| Ingredient | Amount | Notes |
|---|---|---|
| Boneless, Skinless Chicken Breast 🍗 | 3 lb | Cut into 1-inch pieces |
| Canned White Beans 🌾 | 2 cups | Drained, rinsed, 15 oz can |
| Fire-Roasted Diced Tomatoes 🍅 | 2 cups | 14.5 oz can, undrained |
| Chicken Broth 💧 | 4 cups | Low-sodium preferred |
| Heavy Cream 🥛 | 1 cup | Full-fat for creaminess |
| Yellow Onion 🧅 | 1 whole | Diced, medium size |
| Garlic Cloves 🧄 | 6 cloves | Minced, fresh preferred |
| Ground Cumin 🌿 | 1 tbsp | Toasted for depth |
| Chili Powder 🌶️ | 2 tbsp | Smoked variety preferred |
| Smoked Paprika 🌶️ | 1 tbsp | For authentic smokiness |
| Salt 🧂 | 1 ½ tsp | Kosher or sea salt |
| Black Pepper 🌶️ | ½ tsp | Freshly ground |
| Lemon Juice 🍋 | 1 tbsp | Freshly squeezed |
| Wood Chips (Hickory or Apple) 🌳 | 1 package | For smoking chicken |
| Olive Oil 🫒 | 2 tbsp | For searing chicken |
[recipe_ingredient_scaler]
The chicken is where the smoky flavor starts. Buy bone-in, skin-on pieces if possible—they stay juicier during smoking. Costco or Trader Joe’s usually have great quality at a good price. For the white beans, Great Northern or cannellini work perfectly—just drain and rinse well. The fire-roasted diced tomatoes add natural sweetness without extra sugar. I always grab the Muir Glen brand when I can—their tomatoes have great depth of flavor. Wood chips? Hickory gives classic smokiness, while apple adds a subtle sweetness that pairs beautifully with the creaminess of this chili.
No smoked paprika? Regular paprika plus a pinch of liquid smoke works in a pinch (start with ½ tsp). Substituting heavy cream? Half-and-half or coconut milk keeps it creamy but lighter. Short on chicken broth? Water plus a bouillon cube gets you close—just taste and adjust the salt. The onions and garlic can be prepped ahead and stored in the fridge for 3 days to save time. For the wood chips, if you can’t find hickory or apple, cherry works too—just soak them for 30 minutes before using. And if you’re feeling fancy, add a splash of bourbon when you’re building the chili for extra depth.
This chili tastes even better the next day—trust me, the flavors meld beautifully. Store leftovers in the fridge for 4-5 days or freeze for 3 months. I like to portion it into containers with a little extra broth on top to keep everything moist. The smoked chicken pieces reheat perfectly—just warm through gently on the stove. For meal prep, double the recipe and freeze half. The beans and tomatoes keep well too, so you can prep those ahead of time and just assemble when you’re ready to cook.
Why You’ll Love This Recipe
- Smoke-Savored Simplicity: Honestly, this recipe turns my smoker into a shortcut hero—just 45 minutes of hands-off work for that chef’s kiss smoky chicken. No fussing over marinades or long soaks; those hickory wood chips do all the heavy lifting while I prep the rest.
- Creamy, Smoky, Addictive: That first spoonful? The smoky chicken meets velvety cream and fire-roasted tomatoes—it’s like a hug in a bowl. The smoked paprika and cumin toasted in the pot? Game-changer. My kids ask for seconds, even though they swear they hate chili.
- Leftovers That Last: Four days in the fridge, three months frozen—this chili’s my secret weapon for busy weeks. Double the recipe, and you’ve got lunches sorted, date-night leftovers, or even a crowd-pleasing potluck dish. The flavors just get better with time.
- Budget-Friendly Luxury: Three pounds of chicken breast, a can of beans, and a carton of cream? This isn’t gourmet, but it tastes like it. I save money without sacrificing flavor—plus, the smoked chicken makes every bite feel special, even on a Tuesday.
Step-by-step instructions for smoked white chicken chili
Here’s the method for a rich, velvety chili that balances smoky depth with creamy comfort.
Smoke the Chicken for Maximum Flavor
Prepare your smoker by soaking the wood chips in water for 30 minutes before use. Set the temperature to 225°F and allow it to smoke for 15 minutes to establish a steady stream of flavor. Cut the 3 lb boneless, skinless chicken breast into 1-inch pieces and place them on the smoker grates. Smoke the chicken for 45-60 minutes, turning occasionally, until the internal temperature reaches 165°F and the edges begin to lightly brown.
Here’s the thing—smoking the chicken first infuses it with that authentic smokiness before it even hits the pot. The wood chips (hickory or apple) will impart a subtle sweetness that pairs beautifully with the creamy finish. Once the chicken reaches temperature, remove it from the smoker and let it rest for 5 minutes before shredding it with two forks. The resting period ensures the meat stays tender when handled.
Build the Chili Base with Aromatics
Heat the 2 tbsp olive oil in a large Dutch oven over medium heat. Add the diced yellow onion and cook for 5 minutes until softened and translucent. Stir in the 6 minced garlic cloves and cook for an additional 1 minute until fragrant—this is where the foundation of your flavor develops.
Next, add the 1 tbsp ground cumin, 2 tbsp chili powder, and 1 tbsp smoked paprika, stirring constantly for 30 seconds to toast the spices and release their essential oils. This step is crucial—it prevents the spices from settling at the bottom of the pot and ensures even distribution throughout the chili. Immediately pour in the 2 cups fire-roasted diced tomatoes (with juices) and the 4 cups chicken broth, scraping up any browned bits from the bottom of the pot. These bits, known as fond, are packed with flavor that will deepen as the chili simmers.
Simmer the Chili for Deep Flavor Development
Bring the mixture to a gentle boil, then reduce the heat to low and let it simmer uncovered for 30 minutes. This initial simmer allows the spices to meld and the tomatoes to break down, creating a rich, slightly thickened base. Stir occasionally to prevent sticking, but don’t over-stir—this can make the chili mushy.
After 30 minutes, add the 2 cups drained canned white beans and the shredded chicken. Stir gently to combine, then continue simmering for another 20 minutes. The beans will absorb some of the liquid, helping to thicken the chili naturally. Taste the mixture now—you should notice the smoky, spicy, and slightly sweet flavors coming together. If the chili is too thin at this point, reduce the heat slightly to allow it to thicken further as it cooks.
Finish with Cream and Brighten the Flavor
Reduce the heat to low and stir in the 1 cup heavy cream, 1 tbsp lemon juice, 1½ tsp salt, and ½ tsp black pepper. The cream will create that luxurious, velvety texture you’re after, while the lemon juice brightens the dish and cuts through the richness. Simmer for an additional 10 minutes, stirring occasionally, until the chili reaches your desired consistency. It should coat the back of a spoon but still be spoonable.
Here’s where it gets fun—taste and adjust the seasoning. You might need a pinch more salt or a dash of chili powder to balance the flavors. The goal is a chili that’s creamy yet not heavy, smoky yet not overpowering, and spicy yet not harsh. Once you’ve achieved that perfect harmony, remove the chili from heat and let it rest for 5 minutes before serving. This resting period allows the flavors to settle and the textures to meld, ensuring every spoonful is perfectly balanced.
Serve with Toppings for Extra Comfort
Ladle the chili into bowls and serve immediately, garnished with additional smoked paprika, a dollop of heavy cream, or a sprinkle of fresh cilantro if you like. The contrast of the warm, creamy chili with a cool, fresh topping elevates the dish to new heights. Real talk: the first bite should deliver a perfect balance of smoky, creamy, and slightly spicy flavors that make you want to savor every spoonful.
This chili tastes even better the next day as the flavors continue to develop, so it’s perfect for meal prep. Store any leftovers in an airtight container in the refrigerator for up to 4 days or freeze for up to 3 months. When reheating, do so over low heat to prevent the cream from separating or the chili from becoming watery.
Pro Tips For Making Smoked White Chicken Chili
- Toast Your Spices: That 30-second stir of cumin, chili powder, and smoked paprika isn’t just for show—it’s what makes the difference between flat spices and deep, aromatic flavor. Use medium heat and keep moving until you smell that toasty, almost nutty aroma. I used to skip this, and my chili always tasted like it needed more kick—turns out, the spices just weren’t doing their job.
- Don’t Rush the Smoke: Smoking the chicken at 225°F for 45-60 minutes might feel slow, but this is where the magic happens. If you’re impatient and crank the heat, you’ll end up with dry, stringy chicken instead of tender, smoky meat. Trust the process—those wood chips need time to work their flavor into the chicken.
- Save the Tomato Juice: Draining the fire-roasted diced tomatoes? Don’t. Those juices are packed with concentrated flavor, and skipping them means a thinner, less rich chili. Just crush a few tomatoes with your hands to break them down a bit before adding them to the pot—it’ll thicken the base naturally.
- Rest the Chicken: After smoking, give those chicken pieces a solid 5 minutes to rest before shredding. I learned this the hard way—skipping the rest means the meat turns to mush when you fork it apart. Five minutes is all it takes to keep everything tender and intact.
Serving suggestions for this smoked white chicken chili
Bowl Presentation
Start with a generous scoop of chili into your favorite bowl—ceramic or stoneware works best to keep it warm. I love using 1.5-quart ceramic bowls from World Market because they hold heat well and look rustic.
Top with a swirl of heavy cream for that luxurious finish, then sprinkle with fresh cilantro and a pinch of smoked paprika for color and depth. The cream adds a velvety contrast to the smoky, spicy base. 💫
Topping Variations
For extra richness, add sharp cheddar cheese or crumbled cotija to each bowl. I also love a dollop of sour cream or Greek yogurt for tanginess. If you’re feeling bold, add crushed tortilla chips for crunch—just a few per bowl keeps it balanced.
These toppings elevate the dish from comforting to show-stopping. 🍽️
Side Dish Pairings
A warm slice of cornbread soaks up the creamy chili perfectly. I recommend Pillsbury biscuit mix for a quick, foolproof option, or homemade cornbread with 1 cup cornmeal and 1 cup buttermilk.
For a lighter option, serve with crispy tortilla chips or a simple green salad with lime vinaigrette. The contrast of textures makes every bite more satisfying.
Beverage Matches
A cold Mexican lager like Modelo Especial cuts through the creaminess beautifully. The crisp, refreshing notes balance the smoky, spicy flavors. For a non-alcoholic option, try sparkling limeade with a splash of agave syrup—the bubbles cleanse your palate between bites.
Avoid heavy beers or sweet cocktails that might overpower the dish. 🍺
Garnish Upgrades
Add a final touch with avocado slices for creaminess or pickled jalapeños for heat. I also love fresh cilantro and lime zest for brightness. A drizzle of hot honey adds a subtle sweetness that surprises and delights. These garnishes transform a simple bowl into a restaurant-worthy meal. ✨
Make-Ahead Tips
Prep toppings in advance and store them separately. Keep cheese, sour cream, and cilantro in airtight containers in the fridge for up to 3 days. Reheat the chili gently on the stove, then assemble bowls fresh when serving.
This way, you can focus on enjoying the meal rather than cooking it. 💡
Nutrition facts
Frequently asked questions
Why smoke the chicken before adding it to the chili?
Smoking the chicken first infuses it with deep, woodsy flavor that enhances the entire dish. The 225°F temperature and 45-60 minutes of smoking create that signature smokiness before the chicken even hits the pot. This step ensures every bite carries that rich, aromatic depth, making the chili taste more complex and restaurant-quality.
Can I skip smoking the chicken and just add it raw to the chili?
While you can, the flavor won’t be the same! Smoking adds that authentic smokiness that balances the creamy texture. If you’re short on time, try pan-searing the chicken pieces with 2 tbsp olive oil over medium-high heat for 5-6 minutes per side until golden—it won’t be as smoky but still adds depth. The smoked flavor is worth the effort though!
How do I adjust the spice level if I prefer it milder?
Start by reducing the 2 tbsp chili powder to 1 tbsp if your dish is already spicy. You can also remove a few chicken pieces before serving as a “spice buffer.” For extra creaminess without heat, stir in an extra ¼ cup heavy cream at the end. Always taste as you go—small adjustments make the biggest difference!
What’s the best way to reheat leftovers without making the chili watery?
Gently warm the chili on low heat in a pot, stirring occasionally. Avoid high heat—it can break down the beans and separate the cream. If it looks too thin, let it simmer uncovered for 5-10 minutes to thicken naturally. Never microwave directly; it disrupts the texture. Reheat only what you plan to eat immediately.
Can I make this chili ahead of time for meal prep?
This chili tastes even better the next day as flavors meld. Store leftovers in an airtight container in the fridge for 4-5 days or freeze for 3 months. For best results, reheat gently on the stove and add a splash of chicken broth if needed to restore creaminess. Prep toppings separately to keep them fresh!

Trained in classic French technique but raised on slow-cooked ribs and spicy rubs, she blends culinary skill with smoke and soul.
- Smoked Brisket Recipe: Low and Slow to Fall-Apart Tenderness - November 2, 2026
- Smoked Turkey Breast Recipe: Juicy Pink Center With Crispy Skin Every Time - November 2, 2026
- Leftover Smoked Pulled Pork Chili Recipe: Rustic Flavor Revival in One Pot - November 2, 2026