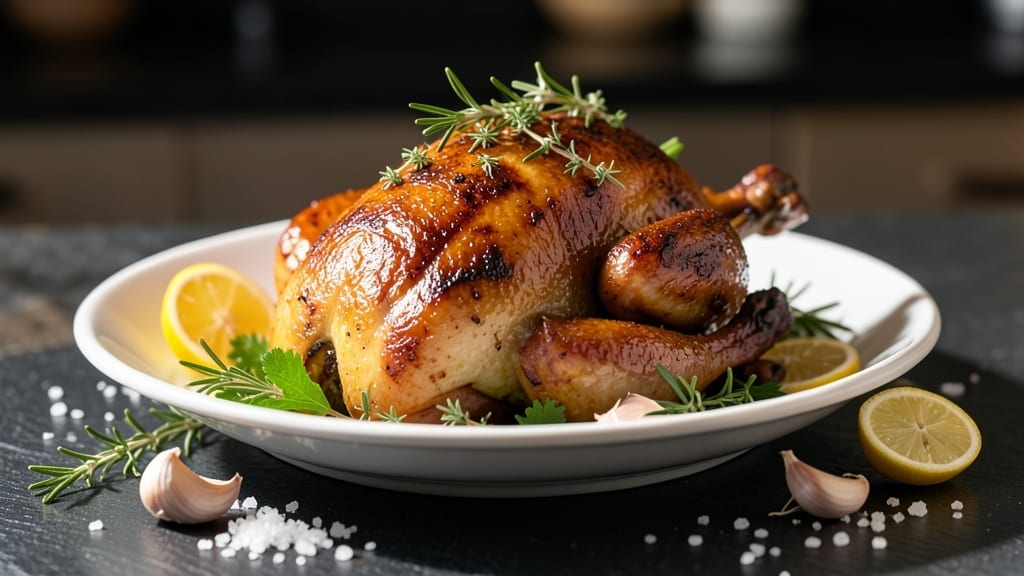
Mastering a smoked whole chicken with crispy skin and juicy meat is the ultimate Sunday dinner project—one I perfected after years of test-kitchen trials and family feedback.
The secret lies in low-and-slow smoking paired with precise temperature control, transforming a simple bird into a showstopping centerpiece that smells like home the moment it crosses your threshold.
This recipe builds on my grandmother’s Sunday roast technique, adapted for the smoker—where patience replaces oven heat. You’ll start with a dry-brine overnight (non-negotiable for moisture), then smoke at 275°F until the internal temp hits 165°F, basting with melted butter in the final hour for that golden, crackling skin.
The result? Meat so tender it falls off the bone, with crisp edges that make every bite worth the wait.
What makes this recipe foolproof is the two-stage approach: first, the slow smoke to render fat and develop deep flavor; second, the high-heat finish to crisp the skin.
No fancy equipment needed—just time, a reliable smoker (or even a grill with a water pan), and a meat thermometer to avoid guesswork. This is the kind of meal that turns weeknight dinners into special occasions.
Serve with pan juices drizzled over roasted potatoes and a simple green salad—because the chicken deserves company that doesn’t compete. Let’s get smoking.
Ingredients for smoked whole chicken
Twelve ingredients transform a simple bird into a showstopping centerpiece with crispy skin and juicy meat.
| Ingredient | Amount | Notes |
|---|---|---|
| Whole Chicken (4-5 lbs) 🍗 | 4 ½ lb | Fresh, skin-on, bone-in preferred |
| Kosher Salt 🧂 | ½ cup | Diamond Crystal preferred |
| Ground Black Pepper 🌶️ | 2 tbsp | Freshly ground for best flavor |
| Unsalted Butter 🧈 | ½ cup | Full-fat, melted for basting |
| Garlic Cloves 🧄 | 4 cloves | Fresh, minced for brine |
| Fresh Rosemary 🌿 | 2 tbsp | Stems removed, chopped |
| Fresh Thyme 🍃 | 1 tbsp | Leaves only, chopped |
| Apple Cider Vinegar 🍎 | ¼ cup | For dry brine acidity |
| Butterfly Pepper 🌶️ | 1 tsp | Optional for heat |
| Wood Chips (Hickory or Apple) 🔥 | 1 cup | Soaked 2+ hours before smoking |
| Poultry Seasoning 🌿 | 1 tbsp | Homemade or quality jarred |
| Water 💧 | 1 cup | For water pan |
[recipe_ingredient_scaler]
The chicken is the star, so start with a 4-5 lb bird—any smaller and it dries out, bigger and the smoke takes too long. I always grab organic from my local butcher for the best texture and flavor, but the grocery store stuff works fine if you’re in a hurry. The Diamond Crystal kosher salt is non-negotiable for even seasoning—regular table salt clumps and ruins the skin. For the dry brine, apple cider vinegar is key—it tenderizes and keeps the skin crisp. Don’t skip it, even if it seems counterintuitive.
No fresh herbs? Dried rosemary and thyme at half the amount work, but the flavor isn’t the same. Want extra heat? Add cayenne to the butter for basting instead of butterfly pepper. The wood chips matter—hickory for bold flavor, apple for sweetness. Soak them in water for at least 2 hours, or they’ll burn before they smoke. For the poultry seasoning, make your own with sage, thyme, and black pepper—store-bought blends are fine, but homemade is better. The butter should be full-fat and unsalted—no shortcuts here.
This recipe is all about patience. Dry brine overnight in the fridge—don’t rush it. Smoke at 275°F for 3-4 hours, then crank it up to 400°F for 30 minutes to crisp the skin. The water pan keeps the cavity moist, but don’t overdo it—change the water halfway if it evaporates. The chicken keeps beautifully for 3-4 days in the fridge, or freeze for up to 3 months. Reheat gently in the oven to keep it juicy—microwaving makes it dry.
Why You’ll Love This Recipe
- No-Fuss Feast: Honestly, this recipe is my secret weapon for when I want to feed a crowd without the stress. Just pat the chicken dry, slather it with that dry brine, and let it do its thing while you prep the sides—no constant babysitting required.
- Smoky, Garlicky Bliss: That crispy skin paired with the garlic butter? Chef’s kiss. The dry brine with fresh rosemary and thyme infuses the meat so deeply, and the apple cider vinegar keeps it from drying out. Every bite is smoky, herby, and just the right amount of salty.
- Leftovers That Shine: I always make extra because this chicken tastes even better the next day. Slice it up for sandwiches, shred it into tacos, or toss it into a grain bowl—it’s the kind of meal that gets repurposed without losing a single ounce of flavor. Plus, it freezes like a dream for future lazy nights.
- Budget-Friendly Crowd-Pleaser: For under $15, you’re getting a whole chicken that’ll feed six people with leftovers to spare. The ingredients are simple, but the result? A showstopper dish that feels fancy without the price tag. My kids even ask for seconds (yes, even on a Tuesday night).
Step-by-step instructions for smoked whole chicken
Here’s how to transform a simple bird into a smoky, crisp-skinned masterpiece that’ll impress anyone.
Prepare the Dry Brine for Maximum Flavor and Crisp
Start by mixing the ½ cup kosher salt, 2 tbsp ground black pepper, 1 tbsp poultry seasoning, 1 tsp butterfly pepper, 2 tbsp chopped fresh rosemary, and 1 tbsp chopped fresh thyme in a bowl. This dry brine blend is what will create that legendary crispy skin and infuse the meat with deep flavor.
Pat the 4½ lb whole chicken completely dry with paper towels—this is critical for crispy skin. Then, rub the dry brine mixture all over the chicken, including inside the cavity. Press the seasoning firmly into the skin so it adheres well. Here’s the thing—don’t skip this step. The salt needs time to penetrate the meat and break down proteins for that perfect texture.
Place the seasoned chicken on a wire rack set over a baking sheet (this allows air to circulate underneath) and refrigerate uncovered for 12-24 hours. This dry brining process is what separates good smoked chicken from exceptional. The longer you brine, the more flavorful and crispy the skin will be. If you’re short on time, aim for at least 6 hours—just don’t skip it entirely.
Set Up Your Smoker for Perfect Results
While the chicken brines, prepare your smoker. Soak the 1 cup wood chips (hickory or apple) in 1 cup water for at least 2 hours before smoking. This ensures they produce steady, flavorful smoke without burning. Drain the wood chips before adding them to your smoker.
Preheat your smoker to 225°F using the soaked wood chips. Place a water pan in the smoker—this helps maintain moisture and prevents the chicken from drying out. You’ll know you’re ready when you see clean, blue smoke (not thick white smoke) coming from the smoker. This is your signal that the temperature is stable and ready for the chicken.
Real talk: Don’t rush this setup. A smoker that’s not properly preheated will give you uneven cooking and poor smoke flavor. Let it stabilize for at least 30 minutes before adding the chicken. Also, keep the lid closed as much as possible—every time you open it, you lose heat and extend cook time.
Smoke the Chicken to Juicy Perfection
Once the smoker is ready, place the brined chicken on the smoker grate, breast-side up. This positioning allows the fat to render down and baste the meat as it cooks. Close the lid and let it smoke undisturbed for 3-4 hours. Here’s the moment that matters: you’re looking for an internal temperature of 165°F in the thickest part of the thigh (not touching bone).
I like to use a leave-in meat thermometer for this—it gives you real-time readings without opening the smoker. If you don’t have one, you’ll need to use a probe thermometer and be gentle when inserting it. The skin should be deep golden brown with a crisp texture, and the juices should run clear when you pierce the thigh with a knife.
Don’t be tempted to open the smoker to check on the chicken. Every time you peek, you’re adding 15-20 minutes to your cook time. Trust your thermometer and the visual cues. The smoke will do the rest of the work, infusing that beautiful flavor into every inch of the meat.
Rest and Serve for Maximum Juiciness
Once the chicken reaches 165°F, remove it from the smoker and transfer it to a cutting board. Here’s where patience pays off: tent the chicken loosely with foil and let it rest for at least 20 minutes. This resting period allows the juices to redistribute throughout the meat, ensuring every slice is moist and flavorful.
While the chicken rests, use the ½ cup unsalted butter and 4 minced garlic cloves to make a quick basting sauce. Melt the butter in a small saucepan over low heat, then stir in the garlic until fragrant (about 1 minute). You can brush this butter mixture over the chicken just before serving for extra richness.
After resting, carve the chicken into serving pieces, being careful to keep the meat attached to the bones for easier handling. The skin should be crispy enough to hold its shape, and the meat should be juicy with a beautiful pink smoke ring just beneath the surface. Serve immediately with the garlic butter drizzled on top and any pan juices reduced slightly for a quick pan sauce.
Pro Tips For Making Smoked Whole Chicken
- Salt the Skin First: Rub the dry brine into the skin before the cavity—this is where the magic happens. I used to just sprinkle it inside and wondered why my skin never got that shatteringly crisp texture. Press those herbs and salt hard into the drumsticks and thighs, especially where the skin’s thickest.
- Soak Wood Chips Right: That 2+ hour soak isn’t optional—it’s what keeps your 1 cup wood chips from burning and filling your chicken with acrid smoke instead of sweet, clean flavor. Drain them well before adding to the smoker, or you’ll end up with a wet mess that won’t light properly.
- Breast Up, Lid Closed: Place the chicken breast-side up so the fat renders down and bastes the meat as it smokes. And for the love of crisp skin, resist opening the lid after the first 30 minutes—every peek adds 15-20 minutes to your cook time. Trust the thermometer, not your eyes.
- Rest or Regret: That 20-minute rest under foil isn’t just a suggestion—it’s the difference between juicy perfection and dry disappointment. I learned this after slicing into a chicken that looked done but tasted like sawdust. Tent it loosely, let it breathe, and then baste with that garlic butter right before serving.
Essential equipment for perfect results
Budget-Friendly Basics
You don’t need a fancy setup to smoke a whole chicken—just a few essentials. Start with a reliable smoker, whether it’s a pellet grill like the Traeger Pro Series 22 or a simple offset smoker.
If you’re on a budget, a charcoal grill with a water pan works perfectly. I’ve even used a Weber Smokey Mountain Cooker for years—it’s durable and affordable.
Must-Have Tools
A meat thermometer is non-negotiable—ThermoWorks Smoke is my go-to for accuracy. You’ll also need a wire rack (I use a stainless steel one) to elevate the chicken for even cooking. For the dry brine, a large bowl and paper towels are all you need to prep the bird properly.
Wood Chips Matter
Invest in quality wood chips—hickory for bold flavor or apple for sweetness. I always buy Traeger brand chips because they burn evenly and produce consistent smoke. Soak them in water for 2+ hours before smoking to prevent burning. A simple mesh bag keeps them contained in the smoker.
Water Pan Hack
A heat-safe glass baking dish or even a stainless steel bowl works as a water pan to maintain moisture. Fill it with 1 cup water and place it in the smoker to prevent the chicken from drying out. Change the water halfway through cooking if it evaporates completely.
Pro Upgrades
For crispier skin, I use a Lodge cast iron skillet to finish the chicken under the broiler for 5 minutes after smoking. If you want to track temps without opening the smoker, a leave-in probe thermometer like Meater+ is a game-changer. Both upgrades are optional but elevate the result.
Nutrition facts
Frequently asked questions
Why is dry brining the chicken so important?
Dry brining is what gives your smoked chicken that legendary crispy skin and deep flavor. The salt breaks down proteins over 12-24 hours, creating a perfect barrier that renders fat while keeping the meat juicy. Skipping this step means you’ll get a soggy, bland result instead of that golden, crackling perfection. Trust me—it’s worth the wait!
What if I don’t have a smoker? Can I still achieve this?
Use a charcoal grill with a water pan or even a large oven set to 275°F with foil draped underneath for indirect heat. The key is maintaining low-and-slow cooking until the internal temp hits 165°F. Just add a mesh bag of soaked wood chips to your grill for that smoky flavor.
How do I know when the chicken is fully cooked?
Use a meat thermometer to check the thickest part of the thigh (not touching bone)—it should read 165°F. The skin should also be deep golden brown and crispy, with juices running clear when you pierce it. Pro tip: If you don’t have a thermometer, cut into the thigh—if the meat is still pink, keep smoking!
Can I make this recipe ahead of time?
Yes! The chicken keeps beautifully for 3-4 days in the fridge or freezes well for up to 3 months. To reheat, place it on a wire rack in a 300°F oven for 20-30 minutes until warmed through. This prevents drying out—microwaving is a no-go!

Trained in classic French technique but raised on slow-cooked ribs and spicy rubs, she blends culinary skill with smoke and soul.
- Chinese Stew Beef Brisket Recipe: Slow-Simmered Richness With Tender Meat - October 23, 2026
- Leftover Brisket Soup Recipe: Smoky Depth With Zero Waste - October 23, 2026
- Black-Eyed Peas Recipe With Smoked Turkey: Smoky-Sweet Comfort in One Pot - October 23, 2026