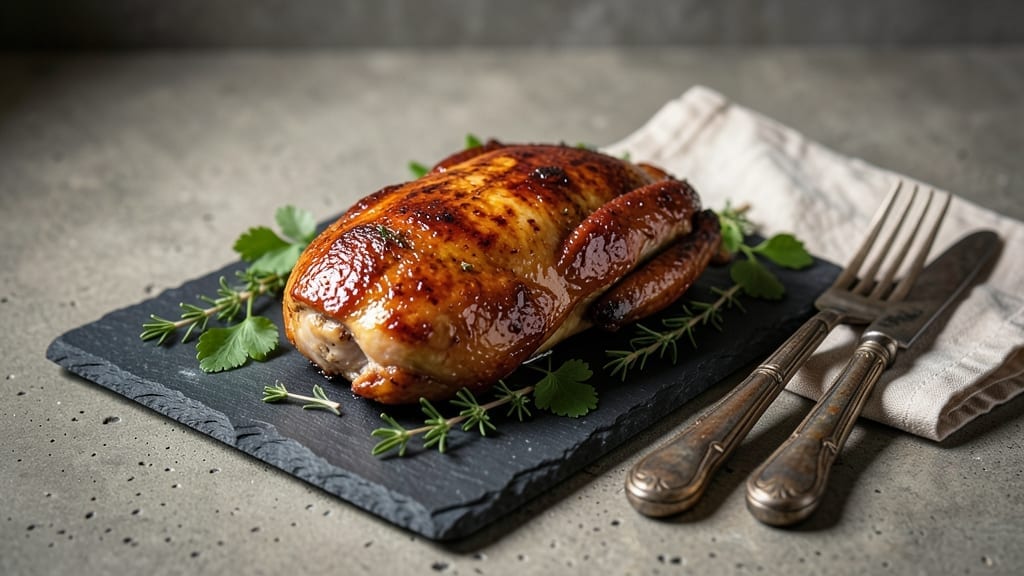
This smoker chicken recipe transforms ordinary weeknight dinners into unforgettable meals—juicy, smoky, and packed with flavor that lingers long after the last bite. 🔥 After years of perfecting this technique, I’ve developed a method that delivers restaurant-quality results in your backyard. using just a few essential tools and a little patience.
The secret lies in precise temperature control and proper wood selection, which creates that signature smoky aroma without overpowering the natural taste of the chicken.
This recipe focuses on simplicity while ensuring every element comes together perfectly. You’ll start with whole chicken pieces—thighs, drumsticks, or breasts—each infused with a dry rub that locks in moisture and builds flavor as it smokes.
The process requires just 3 to 4 hours of hands-off time, making it ideal for home cooks who want impressive results without spending all day in the kitchen. The key is maintaining a steady 225°F to 250°F temperature, which guarantees tender, fall-off-the-bone meat with a crispy, golden-brown exterior.
By the time you’re done, you’ll have chicken that’s so juicy and flavorful, it’ll become the centerpiece of your next gathering. The smoky aroma alone will draw everyone to the table, and each bite delivers a perfect balance of savory, spicy, and sweet notes.
Whether you’re hosting a backyard barbecue or simply craving a special weeknight dinner, this method delivers perfectly smoked chicken every time. Let’s get started!
The best part? This technique works for any occasion—pair it with classic sides like cornbread, coleslaw, or roasted potatoes for a complete meal. The leftovers reheat beautifully, too, making it a smart choice for meal prep.
With just a few adjustments, you can even adapt this method for ribs or brisket. Here’s everything you need to create your own smoky masterpiece.
Ingredients for smoker chicken
Twelve simple ingredients plus wood and patience create restaurant-quality smoked chicken.
| Ingredient | Amount | Notes |
|---|---|---|
| Bone-In Chicken Thighs 🍗 | 3 lb | Skin-on for extra crispiness |
| Brown Sugar 🍚 | ¼ cup | Lightly packed for consistency |
| Smoked Paprika 🌶️ | 2 tbsp | Sweet or smoked variety |
| Garlic Powder 🧄 | 1 ½ tbsp | Not garlic salt |
| Onion Powder 🧅 | 1 ½ tbsp | Fresh ground preferred |
| Dried Thyme 🌿 | 1 tbsp | Mexican oregano alternative |
| Kosher Salt 🧂 | 1 ½ tbsp | Diamond Crystal preferred |
| Black Pepper 🌶️ | 1 tbsp | Freshly ground preferred |
| Apple Cider Vinegar 🍎 | 2 tbsp | For moisture retention |
| Hickory Wood Chunks 🔥 | 1 lb | Hardwood preferred |
| Avocado Oil 🫒 | ½ cup | High smoke point |
| Butter 🧈 | ¼ cup | Full-fat for richness |
[recipe_ingredient_scaler]
The chicken is everything here—bone-in thighs deliver juiciness and crispy skin. Costco sells them prepped for smoking, but whole chickens work too—just cube them yourself. Look for bright red meat with good marbling—frozen is fine, but avoid any with grayish tint. I always buy organic when possible, but conventional works if you’re on a budget. The key is skin-on—it crisps up beautifully while locking in moisture. For extra tenderness, pound thicker pieces to even thickness before smoking.
No hickory wood? Pecan or cherry wood chunks work great—they add a fruitier smokiness. Short on brown sugar? Maple syrup at half the amount gets you close. Dried thyme is ideal, but dried oregano at one-third the amount works in a pinch. The apple cider vinegar is non-negotiable—it keeps the meat moist without overpowering. For the oil, avocado or peanut oil are your best bets—high smoke points mean no burnt flavor. Butter at the end? Full-fat only—light butter won’t baste as well.
This reheats beautifully—wrap pieces in foil with a splash of broth and warm in the oven. Keeps 4-5 days in the fridge, freezes for 3 months. I portion mine into containers so lunches are sorted for the week. The wood chunks? Store in a cool, dry place—they last indefinitely. For best results, pre-soak wood chunks for 30 minutes before smoking to avoid flare-ups. The dry rub? Mix it ahead and store in an airtight container for up to 2 weeks—just add the vinegar right before applying.
Why You’ll Love This Recipe
- I’ll be real: the crispy skin from the avocado oil rub and that smoky hickory flavor? Chef’s kiss. But the real win is the juicy center—thanks to the apple cider vinegar keeping everything tender. It’s like a perfect hug for your taste buds.
- No-Fuss Flavor Bomb: The dry rub with brown sugar and smoked paprika takes five minutes to mix, and the magic happens while you’re doing something else—like watching TV or waiting for the smoker to heat up. That’s right, the real work is done while you’re relaxing.
- Crispy Outside, Creamy Inside: I’ll be real: the crispy skin from the avocado oil rub and that smoky hickory flavor? Chef’s kiss. But the real win is the juicy center—thanks to the apple cider vinegar keeping everything tender. It’s like a perfect hug for your taste buds.
- Leftovers That Shame No Leftovers: This isn’t just for Sunday dinners. I pack the smoked chicken in containers for lunches, toss it in wraps, or even shred it for tacos. The rub clings to the meat for days, so you’re not stuck with sad, dry chicken. Four days in the fridge, and it’s still asking for seconds.
Step-by-step instructions for smoked chicken with perfect crispy skin
Here’s how to transform simple ingredients into fall-off-the-bone smoked chicken.
🍳 Step 1: Create the Dry Rub and Prep the Chicken
In a medium bowl, combine the ¼ cup brown sugar, 2 tbsp smoked paprika, 1½ tbsp garlic powder, 1½ tbsp onion powder, 1 tbsp dried thyme, 1½ tbsp kosher salt, and 1 tbsp black pepper. Mix thoroughly until the sugar is evenly distributed and the spices form a cohesive paste.
Pat the 3 lb bone-in chicken thighs dry with paper towels—this is non-negotiable for crispy skin. Then generously coat each piece with the rub mixture, pressing it into the meat so it adheres well. Place the rubbed chicken on a wire rack set over a baking sheet and refrigerate uncovered for at least 1 hour (or up to 4 hours). This step ensures deep flavor penetration and prevents the skin from steaming instead of crisping.
Real talk: Don’t skip the drying time. The longer you let it sit, the better the texture. If you’re short on time, at least let it sit for 30 minutes at room temperature before smoking.
🔥 Step 2: Set Up the Smoker for Maximum Flavor
Fill your smoker with 1 lb hickory wood chunks and preheat to 225°F. Use a water pan to maintain moisture—this prevents the chicken from drying out during the long cook. Let the smoker run for 15-20 minutes until you see steady, blue smoke (not white steam).
While the smoker heats, prepare a basting mixture by melting the ¼ cup butter with 2 tbsp apple cider vinegar in a small saucepan over low heat. Keep this warm but not simmering—it’ll be used to baste the chicken during smoking. The vinegar adds a subtle tang that cuts through the richness of the butter, enhancing the overall flavor profile.
This is the moment that matters: The butter-vinegar mixture should be ready to use once the smoker reaches temperature. If you’re using a pellet smoker, make sure the pellets are dry and properly loaded for consistent heat.
🔪 Step 3: Smoke the Chicken to Juicy Perfection
Place the rubbed chicken thighs in the smoker, skin-side up, and close the lid. Smoke for 2 hours, maintaining the 225°F temperature. Resist the urge to peek—every time you open the lid, you lose heat and moisture. After 2 hours, check the internal temperature using a meat thermometer. It should read 165°F at the thickest part of the thigh.
If the skin isn’t crispy yet, increase the smoker temperature to 250°F for the final 30-45 minutes. During the last 30 minutes, baste the chicken every 15 minutes with the butter-vinegar mixture using a basting brush. This creates a glossy, golden crust while keeping the meat moist. The high smoke point of ½ cup avocado oil in the rub ensures it doesn’t break down during the long cook.
Here’s the thing—smoked chicken is forgiving, but timing is everything. If the skin starts to darken too quickly, reduce the heat slightly to avoid burning. You want that beautiful mahogany bark, not charred edges.
⏰ Step 4: Rest and Serve for Maximum Juiciness
Once the chicken reaches 165°F and the skin is deep golden brown and crispy, remove it from the smoker and transfer to a cutting board. Tent loosely with aluminum foil and let it rest for 10-15 minutes. This resting period allows the juices to redistribute, ensuring each bite is moist and flavorful.
Slice the chicken against the grain for tender, easy-to-chew pieces. Serve immediately with any accumulated juices from the smoker tray—these are packed with flavor and make an excellent pan sauce when reduced slightly. The combination of the smoky rub, crispy skin, and juicy meat delivers on the promise of perfect smoked chicken every time.
Don’t walk away after resting. The chicken will continue to carry over in temperature, and the skin will firm up slightly. This is the final touch that separates good smoked chicken from exceptional smoked chicken.
Pro Tips For Making Smoker Chicken
- Press the Rub Hard: I used to slap the rub on and call it good—until I realized the spices weren’t sticking. Press that mixture into the chicken skin, especially around the bone and thickest parts. The extra effort means every bite carries that smoky-sweet crust, not just the surface.
- Don’t Rush the 225°F Hold: After burning three batches trying to speed things up, I learned: two hours at 225°F is sacred. That slow cook breaks down collagen for tenderness without drying out the meat. Skipping it? You’ll end up with tough, unevenly cooked thighs—trust the process, even if you’re impatient like me.
- Baste Like It’s Your Job: That butter-vinegar mix isn’t just for flavor—it’s the secret to that glossy, crackling skin. Brush it on every 15 minutes in the last 30 minutes, even if it feels tedious. The vinegar keeps the skin from sticking, and the butter locks in moisture. (Yes, even if you’re grilling in the rain.)
- Check the Skin Before the Temp: The thermometer says 165°F, but the skin’s still pale? That’s your cue to bump the heat to 250°F for the final stretch. I used to pull it out at the right temp only to get sad, limp skin—now I watch for that deep golden-brown color first. The meat will keep cooking off the heat.
Essential equipment for smoker chicken
Your Smoker Starter Kit
You don’t need a fancy setup to smoke chicken like a pro. I started with a basic charcoal smoker on a budget, and it worked perfectly.
The essentials are a digital meat thermometer (like Meater Plus), a water pan (any heat-safe dish works), and a basting brush for that glossy finish. A wire rack over a tray keeps drippings contained and makes cleanup easier. Invest in these first—they’re game-changers. 🔥
Smoker Types Explained
Not all smokers are created equal, but here’s what works best for chicken. A pellet smoker like Traeger offers precision temperature control, perfect for beginners. For hands-on cooks, a charcoal offset smoker (like Weber Smokey Mountain) gives you full control over smoke intensity.
Even a grill with a smoker box (like Masterbuilt) can deliver great results with a little patience. I’ve smoked on all three, and honestly, the pellet smoker is the easiest to master.
Wood Selection Matters
Hickory is classic, but don’t be afraid to experiment. Pecan adds a sweet, fruity note, while cherry gives a lighter, more delicate smoke. Avoid fruitwoods like apple or peach—they can overpower the chicken’s natural flavor.
Pre-soaking wood chunks for 30 minutes in water prevents flare-ups and creates a smoother smoke. I keep a stash of hickory and pecan chunks in a sealed container for easy access. 🌳
Budget-Friendly Swaps
No fancy thermometer? Use a thermowell probe (like Thermoworks) for under $30. Skip the expensive water pan—any ceramic baking dish works. For the rub, swap avocado oil for peanut oil if it’s cheaper.
And if you don’t have a basting brush, use a folded paper towel. These small tweaks keep costs low without sacrificing flavor.
Must-Have Accessories
A spray bottle with apple cider vinegar (mixed 1:1 with water) helps control flare-ups and adds moisture during the final 30 minutes. For extra crispy skin, use a parchment paper liner under your wire rack to catch drippings.
I also keep a small fan nearby to gently circulate air if the smoker gets too hot. These little tools make all the difference in texture and flavor. 💫
Nutrition facts
Frequently asked questions
Why does the chicken need to rest after smoking?
Resting is critical for juicy smoked chicken! After removing from the smoker, the chicken continues cooking internally for a few minutes. Resting for 10-15 minutes lets those juices redistribute so every bite is moist and flavorful—no dry spots here. This simple step transforms good chicken into restaurant-quality perfection.
Can I use chicken breasts instead of thighs?
Yes, but with adjustments! Chicken breasts cook faster and dry out more easily. Reduce the smoking time to 1.5 hours at 225°F and increase the final temperature to 275°F for the last 30 minutes. They’ll need more frequent basting with the butter-vinegar mixture to stay moist. The skin won’t crisp as dramatically, but the meat will stay tender.
What if my smoker doesn’t reach 225°F consistently?
Don’t stress—just adjust your approach! If temps fluctuate, smoke at 250°F for the first 1.5 hours, then drop to 225°F for the remaining time. Use a water pan to help stabilize temperature. The key is keeping the chicken between 150°F and 165°F internally until it reaches doneness. Patience pays off with perfectly smoked results.
How do I handle leftovers properly?
Store leftovers in an airtight container for up to 4-5 days in the fridge. To reheat, wrap pieces in foil with a splash of broth and warm in the oven at 300°F for 15-20 minutes. The skin will crisp up again, and the meat stays juicy. For freezing, portion into bags and store for 3 months—just thaw overnight in the fridge before reheating.

Trained in classic French technique but raised on slow-cooked ribs and spicy rubs, she blends culinary skill with smoke and soul.
- Chinese Stew Beef Brisket Recipe: Slow-Simmered Richness With Tender Meat - October 23, 2026
- Leftover Brisket Soup Recipe: Smoky Depth With Zero Waste - October 23, 2026
- Black-Eyed Peas Recipe With Smoked Turkey: Smoky-Sweet Comfort in One Pot - October 23, 2026