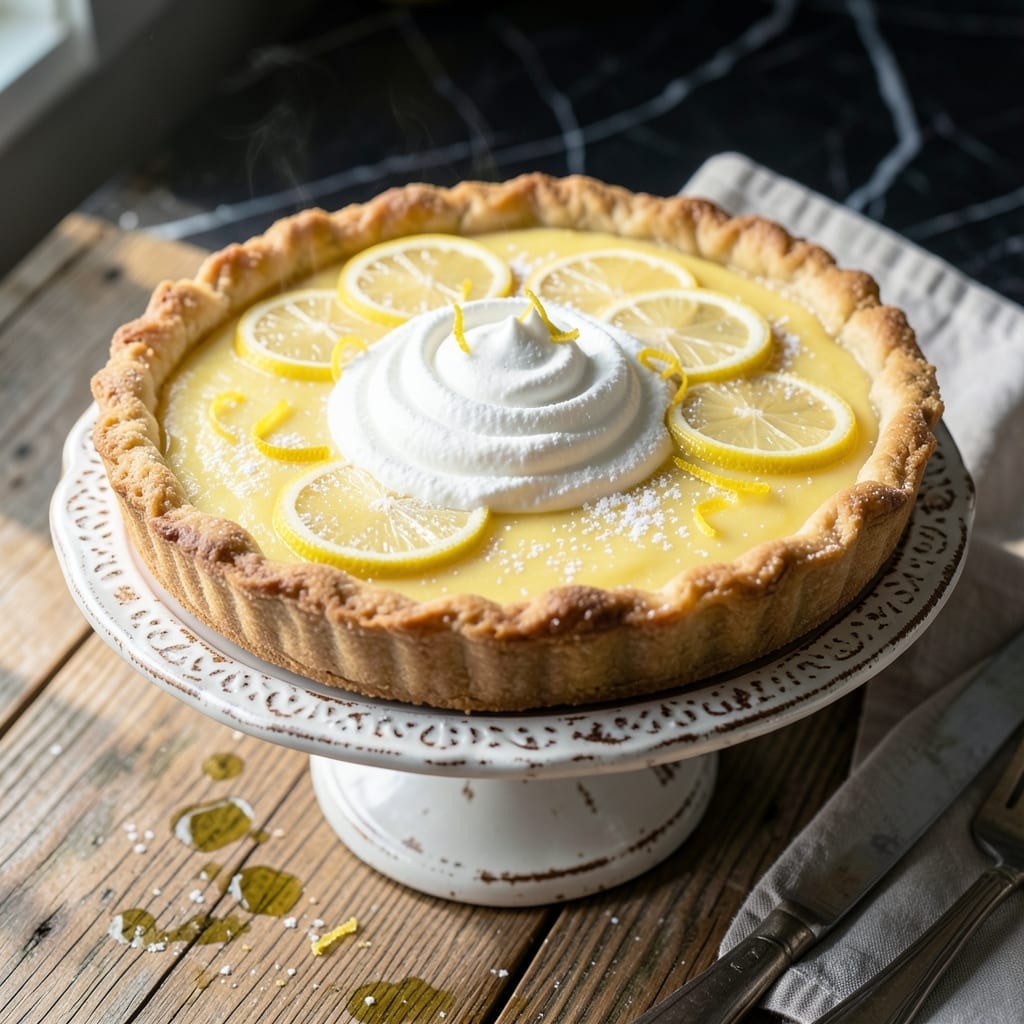
This pie captures the perfect balance of zesty lemon and creamy richness in every slice. I developed this version after testing multiple iterations to match that classic diner-style taste we all love.
The buttery crust provides a flaky foundation for the tangy filling, while the sour cream adds a subtle depth that mellows the citrus. It’s a dessert that feels nostalgic yet fresh, with a texture that’s smooth without being heavy.
Baking it until just set ensures the filling stays luscious, not dense. The contrast between the crisp crust and the velvety lemon layer makes it irresistible.
Serve it chilled for a refreshing finish to any meal. This is comfort food at its finest.
Ingredients for Sour Cream Lemon Pie Marie Callender’s
Buttery crust meets tangy lemon filling in this nostalgic dessert everyone remembers.
| Ingredient | Amount | Notes |
|---|---|---|
| All-Purpose Flour 🌾 | 2 cups | Plus extra for dusting |
| Granulated Sugar 🍚 | 1 ½ cups | Divided for crust and filling |
| Unsalted Butter 🧈 | 1 cup | Cold, cubed for crust |
| Salt 🧂 | ½ tsp | Divided for crust and filling |
| Ice Water 💧 | 6 tbsp | For pie crust dough |
| Large Eggs 🥚 | 3 whole | For filling structure |
| Sour Cream 🥛 | 1 cup | Full-fat for best texture |
| Fresh Lemon Juice 🍋 | ¾ cup | About 4-5 lemons |
| Lemon Zest 🍋 | 2 tbsp | From 2-3 lemons |
| Vanilla Extract 🌿 | 1 tsp | Pure for best flavor |
| Cornstarch 🌾 | 3 tbsp | For filling thickening |
[recipe_ingredient_scaler]
The crust needs to be flaky, so cold butter and minimal handling are key. I use Land O’Lakes for the butter—it has that classic flavor we all grew up with. The flour should be all-purpose; no need for anything fancy. If you’re short on time, a pre-made crust works (just don’t tell anyone), but homemade really makes this special.
No sour cream? Full-fat Greek yogurt will work in a pinch. Fresh lemon juice is a must—bottled just doesn’t cut it. If your lemons aren’t super juicy, grab an extra one. The cornstarch can be swapped for all-purpose flour at the same amount, but the filling might be slightly less smooth.
This pie keeps well in the fridge for up to 4 days. Store it covered once completely cooled. It actually tastes better the next day once the flavors meld. Freezing isn’t recommended—the texture changes too much.
Why You’ll Love This Recipe
- One Bowl Wonder: I mix the crust with just flour, butter, and ice water—no fancy tools, no mess.
- Tangy Sweetness: The sour cream and lemon filling hits that perfect balance between zesty and creamy.
- Potluck Star: I bring this to every gathering, and it’s always the first dessert to disappear.
- Budget Friendly: All-purpose flour and basic pantry staples keep my wallet happy and my kitchen stocked.
Step-by-Step Instructions for Sour Cream Lemon Pie
This method delivers a flaky crust and silky filling that tastes just like the classic.
Step 1: Prepare the Pie Crust Dough
In a food processor, pulse the 2 cups All-Purpose Flour, ¼ teaspoon Salt, and the 1 cup Unsalted Butter (cold and cubed) until the mixture resembles coarse crumbs with pea-sized butter pieces. This texture ensures a flaky crust.
With the processor running, slowly add the 6 tbsp Ice Water, one tablespoon at a time, until the dough just comes together. It should hold when pressed but not be sticky. Turn the dough out onto a lightly floured surface, shape into a disk, and refrigerate for 30 minutes.
Step 2: Blind Bake the Crust
Roll the chilled dough into a 12-inch circle on a floured surface. Transfer it to a 9-inch pie dish, press it into the bottom and up the sides, then trim and crimp the edges. Prick the bottom all over with a fork to prevent air bubbles.
Line the crust with parchment paper and fill with pie weights or dried beans. Bake at 375°F for 15 minutes, then remove the weights and parchment. Bake for another 8-10 minutes until the crust is light golden brown.
Step 3: Make the Lemon Filling
In a large bowl, whisk together the 3 whole Large Eggs, 1.5 cups Granulated Sugar, 3 tbsp Cornstarch, and the remaining ¼ teaspoon Salt until smooth. This ensures no lumps in your filling.
Stir in the 1 cup Sour Cream, 0.75 cup Fresh Lemon Juice, 2 tbsp Lemon Zest, and 1 tsp Vanilla Extract until fully combined. The mixture should be thick but pourable, with a vibrant yellow color from the lemon.
Step 4: Bake the Filling
Pour the filling into the pre-baked crust. Smooth the top with a spatula. Bake at 350°F for 30-35 minutes until the filling is set but still slightly jiggly in the center, like gelatin.
You’ll know it’s done when the edges are firm and the center has a subtle wobble. Overbaking will cause the filling to curdle, so start checking at 30 minutes.
Step 5: Chill and Serve
Let the pie cool at room temperature for 1 hour, then refrigerate for at least 4 hours (or overnight) to allow the filling to fully set. This chilling time is non-negotiable for clean slices.
Serve chilled with a dollop of whipped cream or a sprinkle of extra lemon zest. Each serving should have a crisp crust, creamy filling, and bright citrus flavor that lingers with every bite.
Pro Tips For Making Sour Cream Lemon Pie Marie Callender’S
- Chill the Dough: After mixing your flour, butter, and ice water, let the dough rest in the fridge for at least 30 minutes—I learned this the hard way when my crust shrank in the pan because the butter wasn’t cold enough.
- Use Ice-Cold Water: For flaky crust, the water must be ice-cold, not just cool. I keep a glass of it in the freezer while prepping so it’s ready when I need it.
- Don’t Overwork Butter: Cut the butter into the flour until it’s pea-sized, not powdery. After burning three batches, I finally figured out that overmixing makes the crust tough, not tender.
- Blind Bake First: Pre-bake your crust for 10 minutes at 375°F before adding the filling—it prevents the soggy bottom that ruined my first two pies.
Make-Ahead Tips for This Recipe
Prep the Crust Early
The pie crust can be made 1-2 days ahead and refrigerated, or frozen for up to 1 month. I roll mine out, fit it into the dish, and freeze it uncovered first, then wrap it tightly in plastic once solid. This prevents sogginess. 💡
Filling Prep Ahead
You can whisk together the filling ingredients the night before and store them in the fridge. Just give it a good stir before pouring into the crust. The cornstarch will settle, so mixing ensures even thickening.
Blind Bake in Advance
Bake and cool the crust completely up to 1 day ahead. Store it at room temperature in an airtight container, but avoid plastic wrap directly on the crust to prevent condensation. This saves time on baking day.
Full Assembly Option
Assemble the pie completely and refrigerate it unbaked for up to 24 hours. This is helpful if you need to free up oven space. Just add 5-10 minutes to the baking time since it will start cold.
Chilling Time Management
If you’re short on fridge space, let the pie cool at room temperature for 1 hour, then place it in a cooler with ice packs for 2-3 hours. The filling needs this time to set properly before slicing.
Serving Day Tips
Add whipped cream or garnishes right before serving. I like to make my whipped cream the morning of—just 1 cup heavy cream with 2 tbsp sugar and a splash of vanilla. It stays fresh in the fridge for 4-6 hours. ❄️
Nutrition Facts
Frequently Asked Questions
Can I use store-bought crust?
Yes, a pre-made 9-inch crust works in a pinch. Just blind bake it according to package directions before adding the filling. Homemade tastes better, but store-bought saves time.
Why does my filling curdle?
Overbaking is the main cause. Pull it from the oven when the center still has a slight wobble. Also, ensure all ingredients are at room temperature before mixing.
How do I know when it’s done?
The edges should be set, and the center should jiggle like gelatin. Bake at 350°F for 30-35 minutes, checking at 30 minutes.
Can I make this gluten-free?
Swap the all-purpose flour for a 1:1 gluten-free blend in both the crust and filling. The texture may differ slightly but will still be delicious.

Trained in classic French technique but raised on slow-cooked ribs and spicy rubs, she blends culinary skill with smoke and soul.
- Meat and Potato Recipe Ideas: Savory Pairings for Hearty Meals - October 3, 2026
- Recipe for Fried Prawns Batter: Ultra-Crispy Golden Shell - October 3, 2026
- Indian Lamb Curry Recipe Pressure Cooker: Fragrant Spices in a Fraction of the Time - October 3, 2026