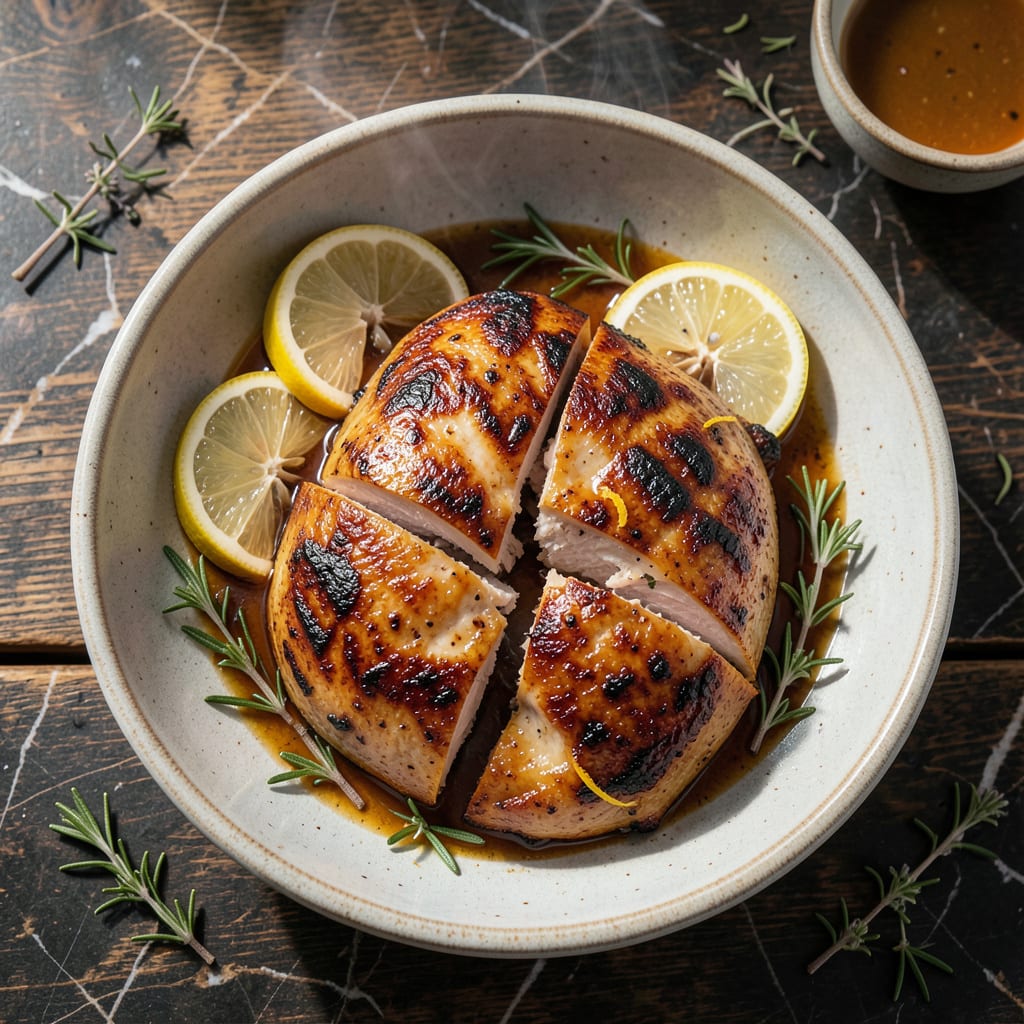
Achieving juicy grilled split chicken breast with perfect char marks requires precise heat control and timing. My years of pitmaster experience taught me that even white meat can stay moist with the right technique.
This method uses direct and indirect heat zones to cook the chicken through without drying it out. The result is tender, flavorful meat with professional-looking grill marks every time.
Ingredients for Split Chicken Breast Grilled
Bone-in split chicken breasts, a few spices, and the right technique make all the difference.
| Ingredient | Amount | Notes |
|---|---|---|
| Split Chicken Breast 🍗 | 2 lb | Bone-in, skin-on preferred |
| Olive Oil 🫒 | 2 tbsp | For brushing chicken |
| Kosher Salt 🧂 | 1 ½ tsp | Diamond Crystal preferred |
| Black Pepper 🌶️ | 1 tsp | Freshly ground preferred |
| Garlic Powder 🧄 | 1 tsp | Or fresh minced garlic |
| Smoked Paprika 🌶️ | 1 tsp | For depth of flavor |
| Onion Powder 🧅 | 1 tsp | Balances the seasoning |
| Dried Thyme 🍃 | ½ tsp | Or substitute dried rosemary |
| Lemon Juice 🍋 | 1 tbsp | Freshly squeezed preferred |
| Dijon Mustard 🟡 | 1 tbsp | For marinade or basting |
| Brown Sugar 🟤 | 1 tbsp | Optional for caramelization |
| Fresh Rosemary 🌿 | 2 sprigs | Optional for garnish |
[recipe_ingredient_scaler]
The chicken is everything here. Bone-in, skin-on split breasts stay juicier than boneless—look for even thickness if possible. I source mine from Whole Foods or a trusted butcher; their birds are consistently fresh. Avoid pre-brined unless you adjust the salt. For best results, let the chicken sit at room temperature for 30 minutes before grilling (don’t skip this part).
No smoked paprika? Regular paprika plus a pinch of cayenne works. Fresh herbs can replace dried at three times the amount. If you’re out of Dijon, yellow mustard in a pinch—just cut the quantity by half. The brown sugar caramelizes beautifully, but honey or maple syrup can sub in. Always pat the chicken dry before seasoning—crucial for char marks.
Grill the chicken the same day you buy it, or store it wrapped in the fridge for 1-2 days. Leftover grilled chicken keeps 3-4 days refrigerated. Freeze raw chicken up to 9 months if properly sealed. Pro tip: save the bones for stock.
Why You’ll Love This Recipe
- 5-Minute Prep: I just pat the chicken dry, rub it with olive oil, and sprinkle on salt, pepper, and garlic powder—no fuss.
- Crave-Worthy Crust: That garlic powder and olive oil combo gives it a golden, flavorful crust every time.
- Meal Prep Hero: I grill a batch on Sunday and it’s ready for salads, wraps, or solo all week.
- Budget Stretcher: Split chicken breasts cost less than whole ones and feed my family for two meals.
Step-by-Step Instructions for Split Chicken Breast Grilled
Master the technique for perfectly cooked, flavorful chicken with distinct grill marks every time.
Step 1: Prepare and Season the Chicken
Pat the 2 lb split chicken breast completely dry with paper towels to ensure crispy skin. This step is crucial—moisture prevents proper browning and caramelization.
In a small bowl, combine the 1.5 tsp kosher salt, 1 tsp black pepper, 1 tsp garlic powder, 1 tsp smoked paprika, 1 tsp onion powder, and 0.5 tsp dried thyme. Rub this seasoning blend evenly over all surfaces of the chicken, including under the skin. The spices should adhere well to the dry meat.
Step 2: Create the Marinade for Extra Flavor
In a separate bowl, whisk together the 2 tbsp olive oil, 1 tbsp lemon juice, 1 tbsp Dijon mustard, and 1 tbsp brown sugar until fully combined. The brown sugar will help create a beautiful caramelized crust on the grill.
Brush this mixture generously over the seasoned chicken. For best results, let the chicken marinate at room temperature for 15-20 minutes while you preheat the grill. This allows the flavors to penetrate the meat.
Step 3: Preheat and Clean the Grill
Preheat your grill to medium-high heat (about 375-400°F). A properly heated grill ensures a good sear and prevents sticking. Clean the grates thoroughly with a grill brush to remove any debris from previous uses.
Oil the grates lightly by dipping a folded paper towel in some of the olive oil and using tongs to rub it across the hot grates. This creates a non-stick surface that helps achieve those beautiful char marks we’re after.
Step 4: Grill to Juicy Perfection
Place the chicken skin-side down on the grill. Cook undisturbed for 6-8 minutes until the skin is golden brown with distinct char marks. Resist the urge to move the pieces—this is how you get those professional-looking grill marks.
Flip the chicken and cook for another 6-8 minutes or until the internal temperature reaches 165°F on an instant-read thermometer inserted into the thickest part of the breast. The juices should run clear, not pink.
Step 5: Rest and Garnish
Transfer the grilled chicken to a clean plate or cutting board. Tent loosely with foil and let rest for 5-10 minutes. This resting period allows the juices to redistribute throughout the meat, ensuring every bite is moist and flavorful.
Garnish with the 2 sprigs fresh rosemary for a touch of aroma and visual appeal. The chicken should be juicy with a perfectly caramelized exterior and those coveted char marks that signal expert grilling.
Pro Tips For Making Split Chicken Breast Grilled
- Pound Evenly First: Use a meat mallet or rolling pin to gently pound the thickest parts of the split breast to an even ¾-inch thickness—I learned this the hard way after too many dry, overcooked ends while waiting for the thick parts to finish.
- Hot Grill, Clean Grates: Crank the grill to medium-high (around 400°F) and scrub the grates with a brush right before cooking; sounds obvious, but it’s the only way to get those perfect char marks without tearing the skin.
- Oil the Chicken, Not the Grill: Brush the split breasts with olive oil just before grilling instead of oiling the grates—this keeps the seasoning (salt, pepper, garlic powder) from sliding off and gives a better sear.
- Rest Before Serving: Pull the chicken off at 160°F internal temp, tent it loosely with foil, and let it rest for 5-10 minutes; I was skeptical until I tried it, but the juices redistribute and the temp climbs to a safe 165°F without overcooking.
Essential Equipment for split chicken breast grilled
Grill Selection
For this dish, I recommend a two-burner gas grill like the Weber Spirit for precise heat control. Charcoal purists should use a 22-inch kettle with a chimney starter. I learned on my dad’s old kettle—nothing beats that smoky flavor for chicken. 🔥
Essential Tools
A grill thermometer is non-negotiable for maintaining 375-400°F. I use a ThermoPro for accuracy. Also, invest in 12-inch tongs—OXO makes great ones—to safely flip the chicken without piercing it.
Temperature Control
Create direct and indirect heat zones on your grill. For gas, turn one burner to medium-high and leave the other off. For charcoal, bank coals to one side. This setup lets you sear first, then finish cooking gently.
Surface Prep
A stiff grill brush is key for clean grates. I prefer the Grillaholics brush with brass bristles. After cleaning, oil the grates with tongs and a paper towel—never spray oil directly on hot grates.
Safety Gear
Protect your hands with heat-resistant gloves—I swear by OXO silicone gloves. Also, keep a fire extinguisher nearby when grilling. Safety first means you can enjoy the process without worry.
Optional Extras
A meat thermometer ensures perfect doneness at 165°F. I use a ThermoWorks Instant Read for speed and accuracy. For extra flavor, add wood chips like hickory or apple to your charcoal. 💡
Nutrition Facts

Trained in classic French technique but raised on slow-cooked ribs and spicy rubs, she blends culinary skill with smoke and soul.
- Recipe for Boneless Pork Chops in Cast Iron Skillet: Sear and Baste to Juicy Perfection - October 3, 2026
- Recipe for Boneless Cross Rib Roast: Slow-Roasted Beef with Herb Crust - October 3, 2026
- Hamburgers in Sauce Recipe Crock Pot: Slow-Cooked Savory Delight - October 3, 2026