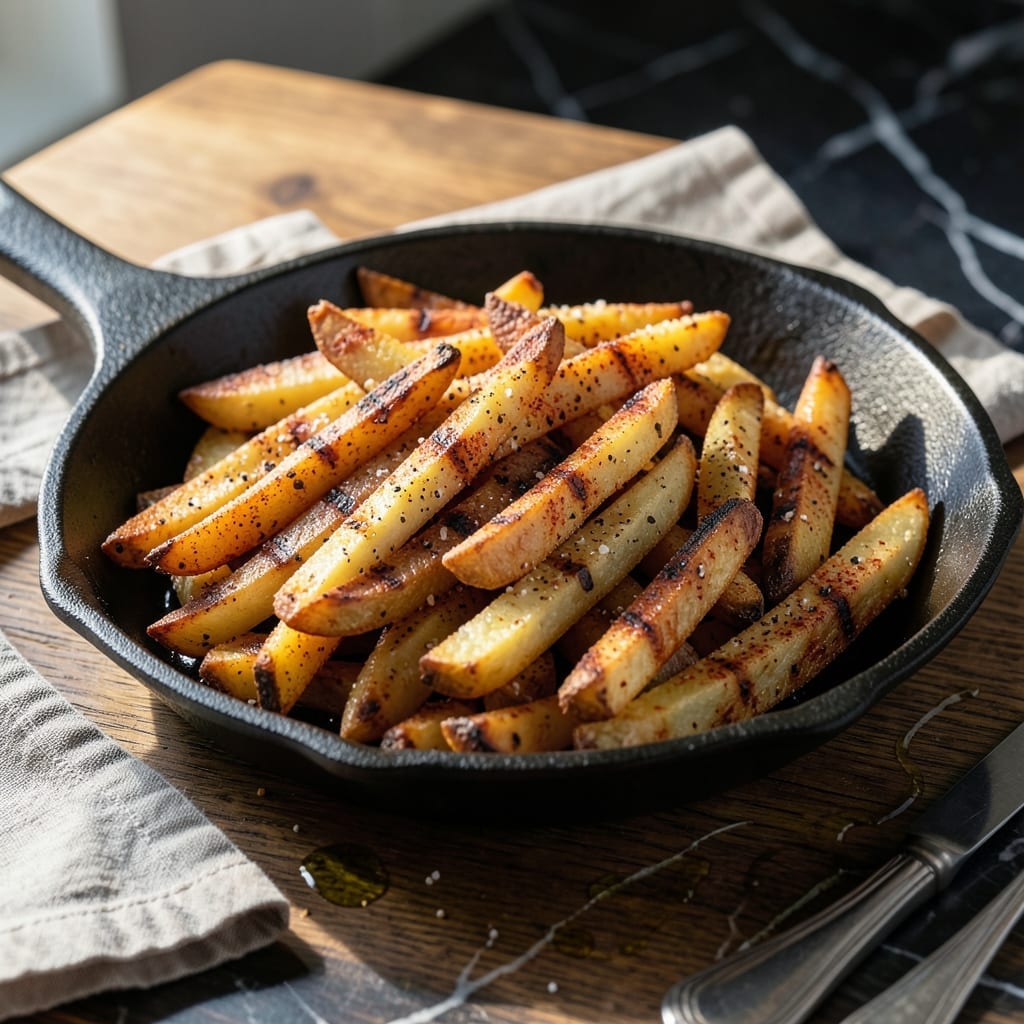
Grilling transforms humble potatoes into something extraordinary with smoky depth and crispy edges. This method leverages direct heat to create a char that oven frying simply cannot match.
I developed this technique after years of pitmaster experience, perfecting the balance between tender centers and golden, shatteringly crispy exteriors. The grill imparts a distinct flavor no indoor appliance can replicate.
Ingredients for Steak Fries on the Grill
Ten ingredients transform potatoes into smoky, crispy perfection on the grill.
| Ingredient | Amount | Notes |
|---|---|---|
| Russet Potatoes 🥔 | 2 lb | Large, scrubbed, unpeeled |
| Extra-Virgin Olive Oil 🫒 | 3 tbsp | Divided for coating and brushing |
| Kosher Salt 🧂 | 2 tsp | Diamond Crystal preferred for even coating |
| Freshly Ground Black Pepper 🌶️ | 1 tsp | Coarse grind for texture |
| Garlic Powder 🧄 | 1 tsp | Not garlic salt |
| Sweet Paprika 🌶️ | 1 tsp | For color and mild sweetness |
| Dried Rosemary 🍃 | ½ tsp | Crushed to release oils |
| Dried Thyme 🍃 | ½ tsp | For earthy depth |
| Onion Powder 🧅 | ½ tsp | Enhances savory notes |
| Cayenne Pepper 🔥 | ¼ tsp | Optional for heat |
[recipe_ingredient_scaler]
The potatoes are non-negotiable—Russet is the gold standard for steak fries due to high starch content and low moisture, which yields the crispest exterior. Whole Foods or any well-stocked grocery store will carry them year-round. Look for firm, smooth-skinned spuds with no green spots or sprouting eyes. Organic isn’t necessary here (the peel stays on), but avoid pre-cut versions—they oxidize and dry out too quickly.
No Russets? Yukon Golds work in a pinch (slightly waxier, less crisp). Skip the cayenne if heat isn’t your thing. For herb variations, fresh rosemary or thyme can replace dried at a 1:3 ratio—just chop finely and toss with the oil. Smoked paprika adds a deeper, almost bacon-like note if you want to lean into the grill’s natural smokiness.
Par-cooked potatoes can sit at room temperature for up to 2 hours before grilling. Leftovers (if any) reheat best in a 400°F oven for 10-15 minutes—microwaving makes them soggy. Store uncooked, seasoned potatoes in the fridge for up to 24 hours before grilling.
Why You’ll Love This Recipe
- Minimal Chopping Required: I just slice the russets into thick wedges, toss them with oil and seasonings, and they’re ready for the grill.
- Smoky Garlic Crust: The grill chars the edges while the garlic powder and olive oil create this ridiculous crispy, savory coating.
- Backyard BBQ Hero: I serve these with burgers, steaks, or even as a snack—honestly, they disappear faster than the main dish.
- Pocket-Friendly Feast: Russets are cheap, the seasonings are pantry staples, and one batch feeds my whole family with leftovers for lunch.
Step-by-Step Instructions for Steak Fries on the Grill
Master the technique for achieving perfectly charred and crispy fries with smoky depth right on your grill.
Step 1: Prepare and Season the Russet Potatoes
Begin by scrubbing the 2 lb Russet Potatoes thoroughly under cold water to remove any dirt, leaving the skins on for texture. Cut them into ½-inch thick sticks, ensuring uniform size for even cooking. This thickness guarantees the interior becomes tender while the exterior achieves that desired crispness.
In a large bowl, toss the cut potatoes with 2 tbsp Extra-Virgin Olive Oil, 2 tsp Kosher Salt, 1 tsp Freshly Ground Black Pepper, 1 tsp Garlic Powder, 1 tsp Sweet Paprika, 0.5 tsp Dried Rosemary, 0.5 tsp Dried Thyme, 0.5 tsp Onion Powder, and 0.25 tsp Cayenne Pepper. Coat them evenly, pressing the spices into the surface for maximum adhesion.
Step 2: Parcook the Fries for Ideal Texture
Preheat your grill to medium-high heat (around 400°F). While the grill heats, spread the seasoned potatoes on a baking sheet in a single layer. Parbake them in a 400°F oven for 15 minutes, flipping halfway through. This step ensures the fries cook through without burning on the grill.
You’ll know they’re ready for the grill when the edges start to soften but haven’t yet browned. This precooking step is critical—it shortens the grill time, allowing the exterior to crisp without drying out the interior.
Step 3: Grill for Smoky Char and Crispiness
Transfer the parcooked fries to the grill, arranging them in a single layer directly over the heat. Brush lightly with the remaining 1 tbsp Extra-Virgin Olive Oil to promote even browning. Grill for 4-5 minutes per side, or until the edges turn deep golden brown and develop visible char marks.
Avoid overcrowding the grill—this steams the fries instead of crisping them. Use tongs to flip them gently, ensuring each side gets direct exposure to the heat. The goal is a crisp exterior with a fluffy, tender center.
Step 4: Rest and Serve Immediately
Once the fries are crispy and charred to your liking, transfer them to a serving platter. Sprinkle with an extra pinch of Kosher Salt if desired, but taste first—the initial seasoning should be bold enough. Let them rest for 2 minutes to allow the starched exterior to set, ensuring they stay crisp.
Serve immediately while hot. The contrast of the smoky, crispy edges and the soft interior is what makes these fries exceptional. For best results, enjoy them fresh off the grill, as they lose crispness over time.
Pro Tips For Making Steak Fries On The Grill
- Parboil First: Soak cut russets in boiling water for 8-10 minutes before grilling—this softens the centers so they cook through without burning the outside.
- Dry Thoroughly: Pat the parboiled potatoes completely dry with a towel; any moisture will steam them instead of letting them crisp up on the grill.
- Skip the Overcrowding: I learned this the hard way—leave space between each fry on the grill grates so they brown properly instead of steaming in a pile.
- Double-Coat the Oil: Toss the dried potatoes in olive oil once before seasoning, then again right before grilling to guarantee that crispy, golden crust.
Storing and Reheating This Recipe
Refrigerator Storage
After cooling completely, place leftovers in an airtight container with a paper towel to absorb moisture. They’ll keep in the fridge at 40°F or below for up to 3 days. Honestly, they’re best fresh, but this preserves texture as much as possible. ❄️
Freezer Storage
For longer storage, spread cooled fries on a tray to freeze individually before transferring to a freezer-safe bag. They’ll last up to 2 months without significant texture loss. I recommend vacuum-sealing for the best results.
Oven Reheating
Preheat your oven to 400°F and spread fries on a baking sheet in a single layer. Reheat for 10-12 minutes, flipping halfway. This method restores crispiness better than any other. 🔥
Air Fryer Method
Arrange fries in a single layer in the air fryer basket and reheat at 380°F for 5-6 minutes, shaking once. The hot air circulation revives the smoky char beautifully.
Avoid Microwaving
Microwaving turns these fries soggy—it’s the one method I never recommend. If you’re in a rush, the air fryer or toaster oven will give you far better results with minimal effort.
Nutrition Facts
Frequently Asked Questions
Should I peel the potatoes first?
No, leave the skins on for extra texture and flavor. The peel crisps up beautifully on the grill and adds a rustic touch. Just
Can I use a different type of potato? Russets are ideal, but Yukon Golds work in a pinch. They’re slightly waxier, so they won’t get as crisp. Avoid red potatoes—they’re too moist and won’t hold their shape well.
How do I prevent them from sticking to the grill?
Make sure your grill grates are clean and well-oiled before adding the fries. Also, brush the parcooked fries with oil just before grilling. This creates a barrier to prevent sticking.
What if my grill doesn’t reach 400°F?
Preheat for at least 15 minutes to get as hot as possible. If needed, extend grilling time by 1-2 minutes per side for even charring. A hotter grill is always better for crispiness.

Trained in classic French technique but raised on slow-cooked ribs and spicy rubs, she blends culinary skill with smoke and soul.
- Recipe for Boneless Pork Chops in Cast Iron Skillet: Sear and Baste to Juicy Perfection - October 3, 2026
- Recipe for Boneless Cross Rib Roast: Slow-Roasted Beef with Herb Crust - October 3, 2026
- Hamburgers in Sauce Recipe Crock Pot: Slow-Cooked Savory Delight - October 3, 2026