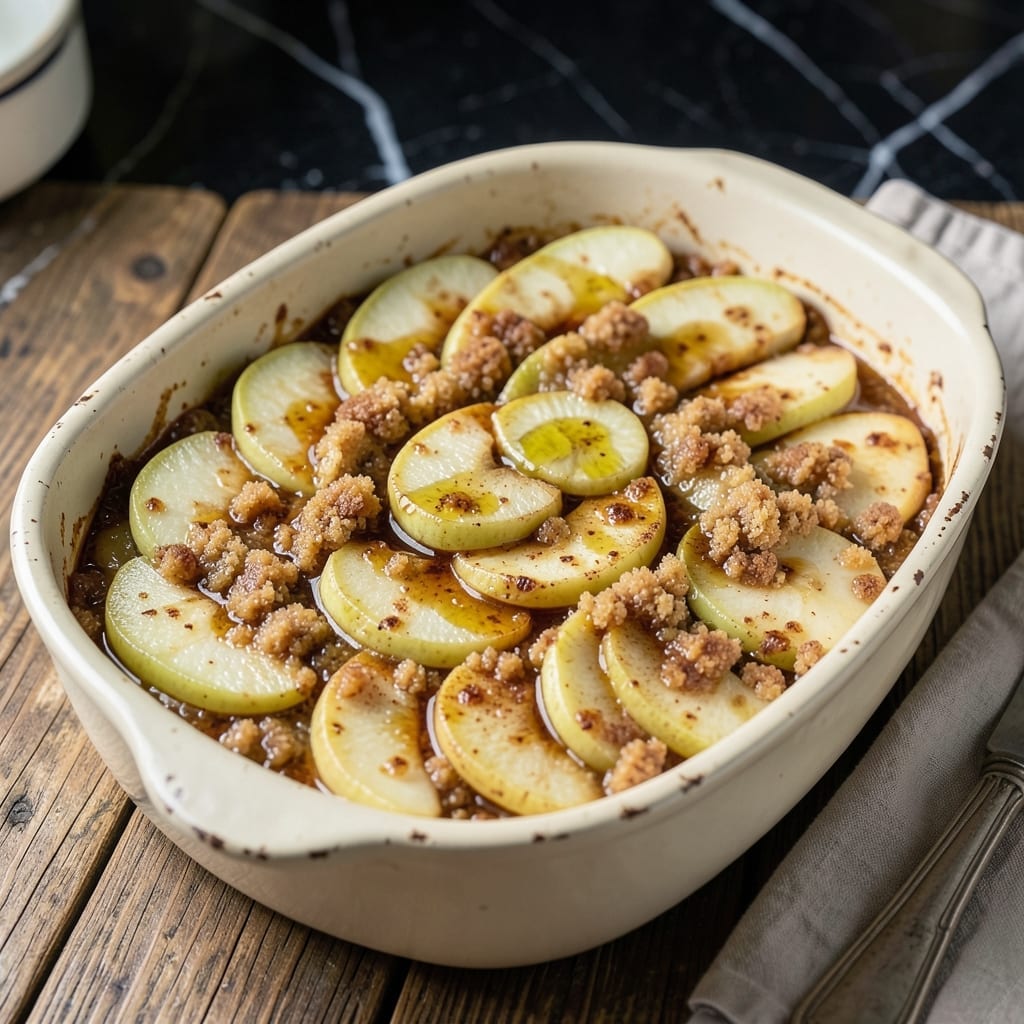
This copycat recipe recreates the nostalgic comfort of Stouffer’s classic dessert with warm cinnamon-spiced layers of tender apples.
I’ve perfected the balance of sweetness and spice to deliver that familiar, homey taste you remember from childhood dinners.
Ingredients for Stouffer’s Escalloped Apples Copycat
Pantry staples and fresh apples bring this nostalgic dessert to life with ease.
| Ingredient | Amount | Notes |
|---|---|---|
| Granny Smith Apples 🍏 | 6 whole | Peeled, cored, thinly sliced |
| All-Purpose Flour 🌾 | ½ cup | For thickening the sauce |
| Granulated Sugar 🍚 | ¾ cup | Adjust to taste preference |
| Brown Sugar 🍯 | ½ cup | Light or dark variety |
| Ground Cinnamon 🌿 | 2 tsp | Freshly ground preferred |
| Salt 🧂 | ¼ tsp | Balances the sweetness |
| Unsalted Butter 🧈 | ½ cup | Melted for sauce |
| Water 💧 | ½ cup | For sauce consistency |
| Vanilla Extract 🌿 | 1 tsp | Pure extract recommended |
| Lemon Juice 🍋 | 1 tbsp | Freshly squeezed for brightness |
| Old-Fashioned Rolled Oats 🌾 | ½ cup | For topping texture |
| Chopped Walnuts 🥜 | ¼ cup | Optional for crunch |
[recipe_ingredient_scaler]
The apples are key here—Granny Smith holds up best to baking (that tartness balances the sugar). Honeycrisp or Fuji work too if you want a sweeter bite. Grab them from Trader Joe’s or your local farmers market for peak freshness. The cinnamon should be freshly ground if possible; old spices lose their punch fast. For the oats, stick with old-fashioned rolled—they crisp up nicer than instant.
No Granny Smiths? Any firm baking apple will do (avoid Red Delicious—they turn mushy). Out of brown sugar? White sugar plus a splash of molasses mimics the flavor. Skip the walnuts? Pecans or almonds add the same crunch. If you’re avoiding gluten, swap the all-purpose flour for cornstarch or a gluten-free blend. The butter can’t be skipped, but vegan butter works in a pinch.
Leftovers keep 4-5 days in the fridge, though the topping softens over time. Reheat individual portions in the microwave for 30 seconds. This freezes beautifully for up to 3 months—just thaw overnight before reheating. Best served warm, straight from the oven.
Why You’ll Love This Recipe
- Minimal Chopping Required: I just slice the Granny Smith apples and toss them with the sugars and cinnamon—no fancy knife skills needed.
- That Cinnamon-Sugar Magic: The brown sugar caramelizes with the cinnamon, turning the apples into this warm, gooey, nostalgic bite.
- Feeds a Crowd: I double the batch for potlucks, and it disappears faster than the main dish.
- Leftovers? Even Better: Honestly, the flavors deepen overnight—cold or reheated, it’s still ridiculously good.
Step-by-Step Instructions for Stouffer’s Escalloped Apples
This method recreates that nostalgic texture and flavor with minimal effort.
Step 1: Prepare the Apples and Make the Sauce Base
Peel, core, and thinly slice all 6 whole Granny Smith Apples. Toss them immediately with 1 tbsp Lemon Juice to prevent browning. In a saucepan, melt the 0.5 cup Unsalted Butter over medium heat until foamy.
Whisk in the 0.5 cup All-Purpose Flour to create a smooth roux. Cook for 1-2 minutes until bubbly but not browned—this thickens the sauce without adding color. The mixture should look like wet sand when ready.
Step 2: Build the Sweet Cinnamon Sauce
Gradually whisk in the 0.5 cup Water, 0.75 cup Granulated Sugar, and 0.5 cup Brown Sugar. Stir constantly until the mixture thickens and becomes translucent, about 3-4 minutes.
Remove from heat and stir in the 2 tsp Ground Cinnamon, 0.25 tsp Salt, and 1 tsp Vanilla Extract. The sauce should coat the back of a spoon with a glossy sheen. Taste and adjust sweetness if needed.
Step 3: Layer Apples and Sauce for Baking
In a greased baking dish, layer half the apple slices in an even overlapping pattern. Pour half the sauce over them, spreading to cover completely. Repeat with the remaining apples and sauce, pressing down gently to eliminate air gaps.
The apples should be fully submerged in sauce—this prevents drying during baking. Cover the dish with foil to trap steam, which softens the apples perfectly without turning them mushy.
Step 4: Bake Until Bubbly and Tender
Bake at 375°F for 30 minutes covered, then uncover and bake for another 15-20 minutes until the top is golden brown and the sauce is bubbling at the edges.
Test doneness by piercing the apples with a knife—they should be tender but still hold shape. The sauce will thicken further as it cools, so don’t worry if it seems thin straight from the oven.
Step 5: Add the Oat-Walnut Topping and Finish
Combine the 0.5 cup Old-Fashioned Rolled Oats and 0.25 cup Chopped Walnuts in a bowl. Sprinkle this mixture evenly over the hot apples, pressing lightly so it adheres to the sauce.
Return to the oven for 5-7 minutes until the topping is toasted and fragrant. Let rest for 10 minutes before serving—the topping will crisp up as it cools, creating that signature contrast with the soft apples below.
Pro Tips For Making Stouffer’S Escalloped Apples Copycat
- Peel Evenly: Use a vegetable peeler and remove only the thinnest layer of skin from the Granny Smith apples—any thicker and you lose the firm texture that holds up during baking.
- Precook the Apples: Toss the sliced apples with a tablespoon of flour before baking; it absorbs excess juice so your escalloped apples don’t turn into applesauce.
- Skip Packed Brown Sugar: Measure the brown sugar loosely—packing it adds too much moisture and can make the topping gummy instead of crisp.
- Double the Cinnamon: I learned this the hard way—use 1½ teaspoons of cinnamon instead of 1; the spice mellows during baking and the extra half teaspoon actually changes the outcome.
Pro Cooking Tips for Perfect Results
Apple Selection Matters
I always use Granny Smith apples for their firm texture and tartness that balances the sweet sauce. If you prefer a softer, sweeter result, Honeycrisp or Fuji work well too. Slice them consistently at about ¼-inch thick for even cooking. 🍏
Perfect Roux Technique
Cook the butter-flour roux for exactly 1-2 minutes over medium heat until bubbly. This creates a silky sauce without browned bits. I use a whisk and keep the heat steady—too hot and it burns, too low and it won’t thicken properly.
Sauce Consistency Check
The sauce should coat the back of a spoon when ready. If it’s too thin, simmer for 1-2 extra minutes. If too thick, add 1-2 tbsp water. The vanilla extract adds depth, so don’t skip it even if it seems subtle.
Layering for Texture
Press down the apple layers gently to eliminate air gaps so every bite gets that perfect sauce coverage. Covering with foil for the first 30 minutes at 375°F steams the apples just enough without making them mushy.
Topping Timing
Add the oat-walnut topping only in the final 5-7 minutes of baking. This prevents it from burning while ensuring it gets crispy. I often toast the oats lightly beforehand for extra crunch. 🔥
Resting is Key
Let the dish rest for 10 minutes after baking. This allows the sauce to thicken and the topping to crisp up. Serving too soon results in a runny sauce and soft topping.
Nutrition Facts
Frequently Asked Questions
Can I use a different type of apple?
Yes! Granny Smith is ideal, but Honeycrisp or Fuji work too. Avoid soft varieties like Red Delicious as they turn mushy.
How do I make this gluten-free?
Swap the all-purpose flour for cornstarch or a gluten-free blend. Use the same amount and cook the roux as directed.
Why did my topping get soggy?
Add the topping only in the last 5-7 minutes of baking. Resting for 10 minutes after baking also helps it crisp up.
Can I prepare this ahead of time?
Assemble the dish, cover, and refrigerate for up to 24 hours. Bake as directed, adding 5-10 minutes to the covered time.

Trained in classic French technique but raised on slow-cooked ribs and spicy rubs, she blends culinary skill with smoke and soul.
- Recipe for Boneless Pork Chops in Cast Iron Skillet: Sear and Baste to Juicy Perfection - October 3, 2026
- Recipe for Boneless Cross Rib Roast: Slow-Roasted Beef with Herb Crust - October 3, 2026
- Hamburgers in Sauce Recipe Crock Pot: Slow-Cooked Savory Delight - October 3, 2026