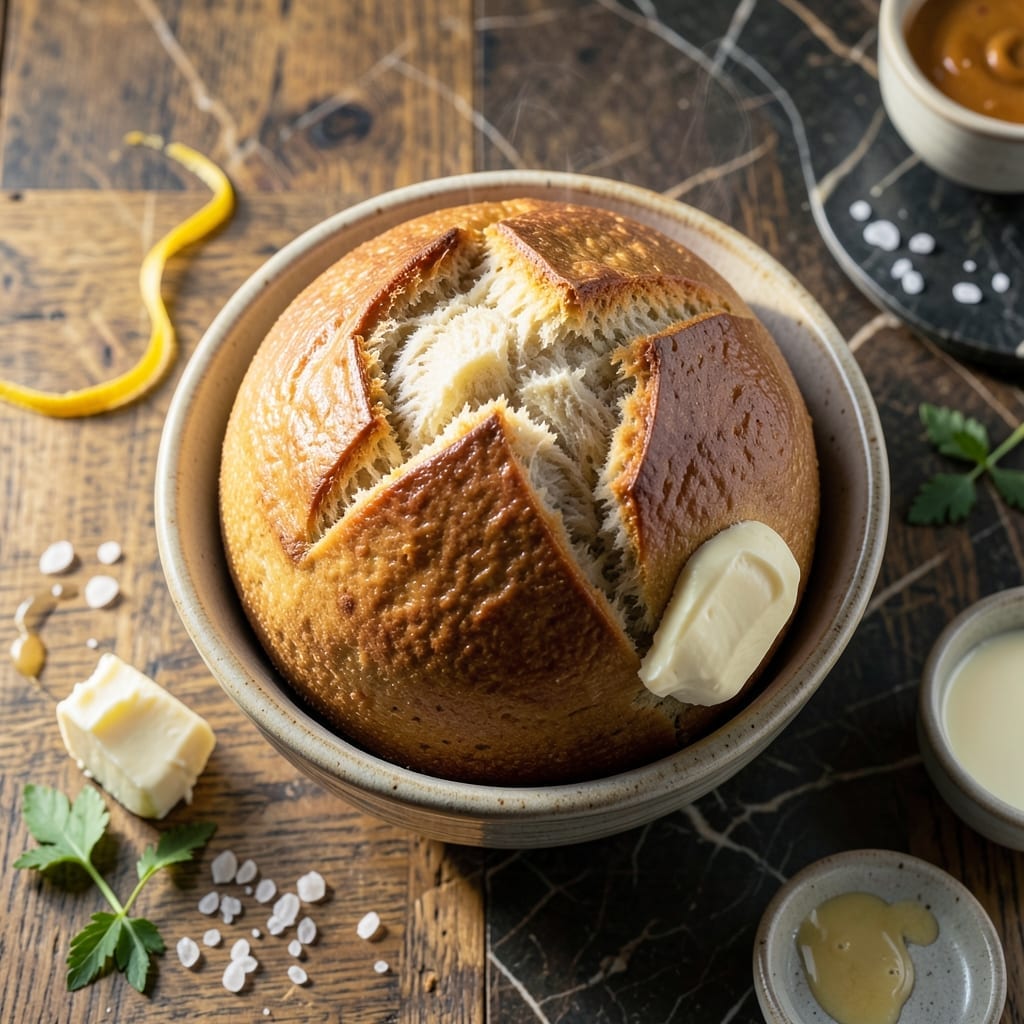
This sugar-free white bread delivers the same soft texture and golden crust as traditional loaves without the added sweetness.
Using simple ingredients and precise technique, you’ll achieve perfectly fluffy sandwich bread that’s ideal for any meal.
Ingredients for Sugar Free White Bread
These high-quality ingredients create a soft, fluffy loaf without added sugar.
| Ingredient | Amount | Notes |
|---|---|---|
| Bread Flour 🌾 | 4 cups | High-protein for structure |
| Active Dry Yeast 🍞 | 2 ¼ tsp | Or one 0.25 oz packet |
| Warm Water 💧 | 1 ¼ cups | 110-115°F for yeast activation |
| Unsalted Butter 🧈 | 2 tbsp | Melted and cooled |
| Whole Milk 🥛 | ¼ cup | Warmed to 110°F |
| Sea Salt 🧂 | 2 tsp | Fine grain preferred |
| Erythritol 🍚 | 1 tbsp | Optional sugar substitute |
| Vital Wheat Gluten 🌾 | 1 tbsp | Enhances texture and rise |
| Large Egg 🥚 | 1 whole | Room temperature |
| Olive Oil 🫒 | 1 tbsp | For greasing bowl |
[recipe_ingredient_scaler]
The bread flour is non-negotiable for this recipe. King Arthur or Bob’s Red Mill offer consistent protein levels (12-14%) that ensure proper gluten development. Yeast freshness is critical—check the expiration date and store unopened packets in the freezer. Warm the milk and water to exactly 110-115°F (use a thermometer) to avoid killing the yeast or preventing activation.
No erythritol on hand? Monk fruit sweetener at equal volume works equally well. For a dairy-free version, substitute the milk with unsweetened almond milk and butter with coconut oil. Vital wheat gluten can be omitted, but your loaf may be slightly less tall and fluffy. The egg provides richness—flax egg (1 tbsp ground flax + 3 tbsp water) makes a suitable vegan replacement.
Store yeast in an airtight container in the refrigerator for up to 1 year. Baked bread keeps fresh at room temperature in a sealed bag for 3-4 days, or freeze slices for up to 3 months. Always cool completely before slicing to prevent gumminess.
Why You’ll Love This Recipe
- One Bowl Wonder: I just dump the bread flour, yeast, warm water, butter, and milk in one bowl, mix, and let it rise—no fancy steps.
- Buttery Richness: The unsalted butter and whole milk give it that soft, rich taste even without sugar.
- Sandwich Savior: Honestly, it’s my go-to for fresh lunches all week, and the kids never complain.
- Budget Friendly: A loaf costs pennies compared to store-bought, and I know exactly what’s in it.
Step-by-Step Instructions for Sugar Free White Bread
Master the technique for achieving a light, airy loaf with the perfect crumb structure.
Step 1: Activate the Yeast and Prepare Wet Ingredients
In a small bowl, combine the 2.25 tsp Active Dry Yeast with the 1.25 cups Warm Water at 110-115°F. Let it sit for 5-7 minutes until foamy—this confirms your yeast is active and ready to work. The water should look cloudy with a bubbly layer on top; if not, your yeast may be expired.
While the yeast activates, warm the 0.25 cup Whole Milk to the same temperature range. In a separate bowl, whisk the 1 whole Large Egg until uniform. Melt the 2 tbsp Unsalted Butter and allow it to cool to room temperature. Having all wet ingredients at the correct temperature ensures even mixing and proper yeast development.
Step 2: Combine Dry Ingredients and Create the Dough
In a stand mixer fitted with the dough hook, combine the 4 cups Bread Flour, 2 tsp Sea Salt, 1 tbsp Erythritol, and 1 tbsp Vital Wheat Gluten. The vital wheat gluten strengthens the dough structure, compensating for the lack of sugar which normally aids in browning and texture.
Add the activated yeast mixture, warmed whole milk, whisked egg, and cooled melted butter to the dry ingredients. Mix on low speed for 2 minutes until the dough comes together, then increase to medium speed for 8-10 minutes until smooth and elastic. The dough should pull away from the bowl sides but still stick slightly to the bottom.
Step 3: First Rise and Shape the Loaf
Lightly grease a large bowl with the 1 tbsp Olive Oil. Transfer the dough to this bowl, turning once to coat all sides. Cover with a clean kitchen towel and let rise in a warm, draft-free place for 1 to 1.5 hours or until doubled in volume. I place my bowl in an unheated oven with the light on for consistent warmth.
Once doubled, punch down the dough to release air bubbles. Turn it onto a lightly floured surface and shape into a loaf by flattening into a rectangle, then rolling tightly from the short end. Pinch the seam and tuck under. This tight roll creates the classic sandwich bread shape.
Step 4: Second Rise and Bake to Golden Perfection
Place the shaped loaf seam-side down in a greased 9×5-inch loaf pan. Cover again with the towel and let rise for 45-60 minutes until the dough domes about 1 inch above the pan rim. Press gently with your finger—if the indentation springs back slowly, it’s ready to bake.
Preheat oven to 375°F. Bake for 25-30 minutes until the top is deep golden brown and the internal temperature reaches 190-200°F. For an even browner crust, brush the top with a bit of whole milk before baking. The loaf should sound hollow when tapped on the bottom.
Step 5: Cool Completely Before Slicing
Remove the bread from the pan immediately and transfer to a wire rack. Resist the temptation to slice while warm—this causes a gummy texture. Let it cool completely for at least 1 hour (I prefer 2 hours for optimal texture). The cooling process allows the crumb structure to set properly.
Once cooled, slice with a sharp serrated knife using a gentle sawing motion. This prevents crushing the loaf. Store in an airtight container at room temperature for up to 3 days, or freeze for longer storage. The erythritol provides subtle sweetness without affecting the bread’s soft, fluffy character.
Pro Tips For Making Sugar Free White Bread
- Proof the Yeast: Always activate your dry yeast in warm water (110°F) with a pinch of flour first—I learned this the hard way after several loaves that refused to rise.
- Warm the Milk: Take the chill off your whole milk before mixing; cold milk can shock the yeast and slow fermentation, and nobody wants a dense brick of bread.
- Skip Cold Butter: Use room temperature unsalted butter so it incorporates evenly into the dough; cold butter creates pockets that won’t blend properly.
- Check Oven Temp: Bake at 375°F for 25-30 minutes, but test doneness with a tap—if it sounds hollow, it’s ready, sounds weird but it works.
Pro Cooking Tips for This Dish
Yeast Activation Secrets
Always use a thermometer to verify your 110-115°F water temperature—too hot kills the yeast, too cold prevents activation. I learned this the hard way at my first local BBQ competition when my bread failed to rise. The water should feel warm but not hot to the touch.
Dough Consistency
The dough should pull away from the bowl but still stick slightly to the bottom during mixing. If it’s too sticky, add 1 tbsp bread flour at a time. If too dry, add 1 tsp warm water. This balance ensures proper gluten development for that perfect fluffy texture.
Rising Environment
For consistent results, I create a warm environment by placing my dough in an unheated oven with the light on. This maintains a steady 80-85°F temperature. Avoid drafty areas or direct sunlight, which can cause uneven rising and a dense loaf.
Shaping Technique
When shaping your loaf, roll it tightly from the short end to create surface tension. This helps the bread rise upward rather than outward. Pinch the seam securely and tuck it under—this prevents the loaf from splitting during the final rise and baking.
Baking Temperature
Bake at 375°F until the internal temperature reaches 190-200°F. I use an oven thermometer to verify my oven’s accuracy, as many home ovens run 10-15°F off. The loaf should sound hollow when tapped on the bottom when done. 🌡️
Cooling Patience
Let your bread cool completely for at least 1 hour before slicing. This allows the crumb structure to set properly. I know it’s tempting to dig in, but slicing too soon results in a gummy texture. The wait is worth it for that perfect fluffy bite. 💪
Nutrition Facts
Frequently Asked Questions
Why does the recipe use bread flour instead of all-purpose?
Bread flour has higher protein content (12-14%), creating stronger gluten for that perfect fluffy texture. All-purpose works in a pinch but may yield a denser loaf.
Can I make this bread without a stand mixer?
Yes! Knead by hand for 10-12 minutes until smooth and elastic. The dough should spring back when poked. Expect a good arm workout though!
What if my bread doesn’t rise properly?
Check your yeast freshness first—expired yeast is the top culprit. Also verify water temperature (110-115°F) and rising environment (80-85°F). Drafts or cold spots can stall the process.
How do I store leftovers to keep them fresh?
Cool completely, then store in an airtight container at room temperature for 3-4 days. For longer storage, freeze slices wrapped in plastic for up to 3 months.

Trained in classic French technique but raised on slow-cooked ribs and spicy rubs, she blends culinary skill with smoke and soul.
- Recipe for Boneless Pork Chops in Cast Iron Skillet: Sear and Baste to Juicy Perfection - October 3, 2026
- Recipe for Boneless Cross Rib Roast: Slow-Roasted Beef with Herb Crust - October 3, 2026
- Hamburgers in Sauce Recipe Crock Pot: Slow-Cooked Savory Delight - October 3, 2026