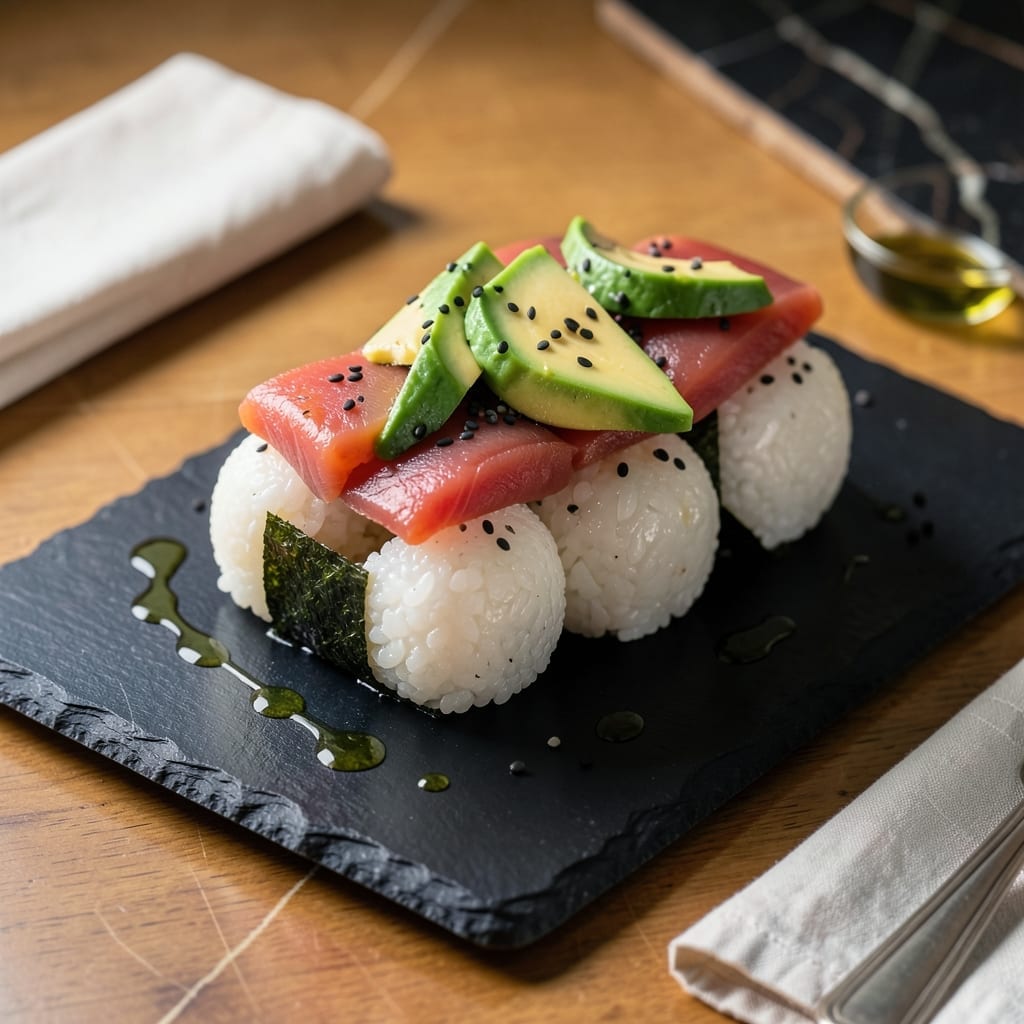
This sushi ball recipe delivers perfect rice texture and bold umami in every bite. The key is using short-grain rice seasoned with the right balance of rice vinegar, sugar, and salt.
I developed this method after testing countless ratios to achieve rice that’s sticky enough to hold shape but still delicate. Fresh, high-quality seafood and crisp nori sheets complete the experience.
You’ll create bite-sized morsels with a tender center and clean, satisfying flavors. The technique ensures consistency, whether you’re making a dozen or a hundred.
The result is restaurant-quality sushi balls with balanced seasoning and a satisfying texture. Serve immediately for the best experience.
Ingredients for Sushi Ball
Short-grain rice, fresh seafood, and crisp nori come together for perfect bite-sized sushi balls.
| Ingredient | Amount | Notes |
|---|---|---|
| Sushi Rice 🍚 | 2 cups | Short-grain, rinsed until clear |
| Water 💧 | 2 ½ cups | For cooking rice |
| Rice Vinegar 🍶 | ¼ cup | Seasoned or unseasoned |
| Granulated Sugar 🍚 | 2 tbsp | Dissolves into vinegar mixture |
| Sea Salt 🧂 | 1 tsp | Fine grain preferred |
| Nori Sheets 🌿 | 4 sheets | Full-size, cut into strips |
| Fresh Salmon Fillet 🐟 | ½ lb | Sushi-grade, skin removed |
| Fresh Tuna Fillet 🐟 | ½ lb | Sushi-grade, diced small |
| Cucumber 🥒 | ½ whole | English or Persian, seeded |
| Avocado 🥑 | 1 whole | Ripe but firm, sliced |
| Green Onions 🧅 | 2 whole | Thinly sliced for garnish |
| Sesame Seeds 🌰 | 2 tbsp | Toasted for garnish |
| Soy Sauce 🥢 | ¼ cup | For serving as dip |
| Wasabi Paste 🌶️ | 1 tbsp | Optional for heat |
| Pickled Ginger 🍬 | ¼ cup | For serving as palate cleanser |
[recipe_ingredient_scaler]
The rice is everything here. Short-grain Japanese rice like Koshihikari or Calrose gives you that sticky-yet-delicate texture. Rinse it until the water runs clear (this removes excess starch and prevents gumminess). I get mine from Asian markets or Whole Foods—look for bags labeled ‘sushi rice’ or ‘Japanese rice.’ For the vinegar mixture, use seasoned rice vinegar if you can find it; it already has sugar and salt added, so you can skip those in the seasoning step.
No fresh seafood? High-quality frozen sushi-grade fish works—just thaw it in the fridge overnight (never at room temp). Swap salmon for shrimp or scallops if you prefer. Not a seafood fan? Cucumber, avocado, and carrot make great veggie-only versions. The nori should be crisp and vibrant green—if it feels damp or smells off, it’s past its prime. For the soy sauce, low-sodium lets you control the saltiness better.
Store uncooked rice in an airtight container for up to 6 months. Once cooked, use the rice within 2 hours (or refrigerate for 1 day max—it dries out fast). Fresh seafood must be used the day you buy it. The nori sheets keep for 3 months in a cool, dry place. Serve immediately for the best texture and flavor.
Why You’ll Love This Recipe
- No Fuss Rolling: I skip the bamboo mat entirely—just shape the vinegared rice with my hands and pop in fillings.
- Sweet-Tangy Bite: The rice vinegar, sugar, and salt mix hits that perfect sushi balance every time.
- Party Starter: I set out a platter of these and watch them disappear faster than any appetizer I’ve made.
- Budget Stretch: One bag of sushi rice makes a ton, and I use whatever veggies or fish I have on hand.
Step-by-Step Instructions for Sushi Balls
Master the technique and you’ll create perfectly textured sushi balls that impress every time.
Step 1: Prepare the Sushi Rice to Ideal Consistency
Rinse the 2 cups Sushi Rice in a fine-mesh strainer under cold water until the water runs completely clear. This removes excess starch that would make your rice gummy. I find it takes about 4-5 rinses to achieve that perfect clarity.
Cook the rice with the 2.5 cups Water in a rice cooker or heavy pot. Once done, transfer it to a wooden bowl (a hangiri if you have one). Gently fold in a mixture of 0.25 cup Rice Vinegar, 2 tbsp Granulated Sugar, and 1 tsp Sea Salt dissolved together. Fan the rice while folding to cool it to body temperature—this gives it that signature glossy finish.
Step 2: Prepare Your Fillings and Garnishes
While the rice cools, prep your fillings. Dice the 0.5 lb Fresh Tuna Fillet into small, uniform cubes. Thinly slice the 0.5 lb Fresh Salmon Fillet into strips. Seed and finely dice the 0.5 whole Cucumber. Slice the 1 whole Avocado into thin strips. Thinly slice the 2 whole Green Onions.
Cut the 4 sheets Nori Sheets into thin strips for wrapping. Toast the 2 tbsp Sesame Seeds in a dry pan until fragrant and golden. Having everything ready (mise en place) ensures smooth assembly. The contrast of colors—pink salmon, deep red tuna, green cucumber, creamy avocado—makes these visually stunning.
Step 3: Shape the Rice Balls with Precision
Wet your hands with cold water to prevent sticking (I keep a bowl of water nearby for frequent dipping). Take about 2 tablespoons of the seasoned rice and gently press it into a loose ball, leaving a small indentation in the center. This pocket will hold your fillings.
Add your chosen combination of fillings to the indentation—maybe a piece of salmon, a few tuna cubes, and some cucumber. The key is not to overfill; you want the rice to encase the fillings completely. Close the rice around the fillings and gently shape into a perfect sphere. The rice should hold together but still be delicate.
Step 4: Wrap and Garnish for Presentation
Take a strip of the prepared nori and wrap it around each sushi ball, securing it with a small dab of water if needed. The nori should adhere to itself but not completely cover the ball—leave some rice visible for texture contrast.
Roll the wrapped balls in the toasted sesame seeds, pressing gently so they adhere. Garnish the top with a small piece of avocado or a sprinkle of green onions. Arrange on a platter with the 0.25 cup Soy Sauce, 1 tbsp Wasabi Paste, and 0.25 cup Pickled Ginger on the side for serving. The combination of textures—crunchy seeds, soft rice, tender fish—creates an extraordinary mouthfeel.
Pro Tips For Making Sushi Ball
- Rinse the Rice: Wash the sushi rice in 3-4 changes of cold water until it runs clear—this removes excess starch so your balls hold shape instead of turning gluey.
- Warm the Vinegar: Dissolve the sugar and salt in the rice vinegar first, then gently heat it (just 30 seconds in the microwave) so it blends into the rice evenly without shocking the grains.
- Keep Hands Wet: Dip your fingers in water before shaping each ball to prevent sticking—I learned this the hard way after my first batch looked like a crumbly mess.
- Use a Bowl: Press the rice into a small bowl or measuring cup to form perfect spheres, then pop them out—saves time and makes them look restaurant-quality with zero effort.
Essential Equipment for Perfect Results
Rice Cooker Essentials
A reliable rice cooker is non-negotiable for perfect sushi rice. I use a Zojirushi Neuro Fuzzy—it maintains precise temperature and has a sushi rice setting. Even budget models like Black+Decker work if they have a keep-warm function. The key is consistent heat distribution. 🌡️
Wooden Rice Bowl
A hangiri (wooden rice bowl) is traditional but not required. I started with a large wooden salad bowl from my local kitchen store. The wood absorbs excess moisture and helps cool the rice evenly. Avoid metal bowls—they react with the vinegar mixture.
Sharp Sushi Knife
For slicing fillings, a 8-inch chef’s knife works, but a sushi knife (yanagiba) makes cleaner cuts. I recommend Shun Premier for home cooks. Keep it razor-sharp to avoid crushing delicate fish. A ceramic honing rod maintains the edge between sharpenings.
Bamboo Rolling Mat
While not for rolling, a bamboo mat helps shape rice balls neatly. I use mine to press rice into uniform portions before shaping. Look for 10-inch mats—they’re versatile for other sushi styles too. Soak in water before use to prevent sticking.
Fine-Mesh Strainer
Rinsing rice properly requires a fine-mesh strainer. I use OXO Good Grips—it fits over my sink perfectly. The fine holes prevent rice from slipping through while allowing thorough rinsing. This step removes starch that would make your rice gummy.
Small Bowls for Mise en Place
Organize fillings in small prep bowls for efficient assembly. I use 4-ounce stainless steel bowls from restaurant supply stores. Having everything prepped and ready (mise en place) prevents the rice from drying out during shaping. 💡
Nutrition Facts
Frequently Asked Questions
What type of rice works best?
Use short-grain Japanese rice like Koshihikari or Calrose. Its sticky texture holds the balls together while staying tender. Avoid long-grain varieties—they won’t bind properly.
Can I use frozen fish?
Yes, but only sushi-grade frozen fish. Thaw it overnight in the fridge, never at room temperature. Fresh is ideal, but high-quality frozen works if handled safely.
How do I prevent rice from sticking to my hands?
Keep a bowl of cold water nearby. Wet your hands frequently while shaping—this prevents sticking and helps smooth the surface. Re-wet between each ball.
How long can I store prepared sushi balls?
Serve immediately for best texture. If storing, refrigerate in an airtight container for up to 1 day. The rice dries out quickly, so eat fresh when possible.

Trained in classic French technique but raised on slow-cooked ribs and spicy rubs, she blends culinary skill with smoke and soul.
- Recipe for Boneless Pork Chops in Cast Iron Skillet: Sear and Baste to Juicy Perfection - October 3, 2026
- Recipe for Boneless Cross Rib Roast: Slow-Roasted Beef with Herb Crust - October 3, 2026
- Hamburgers in Sauce Recipe Crock Pot: Slow-Cooked Savory Delight - October 3, 2026