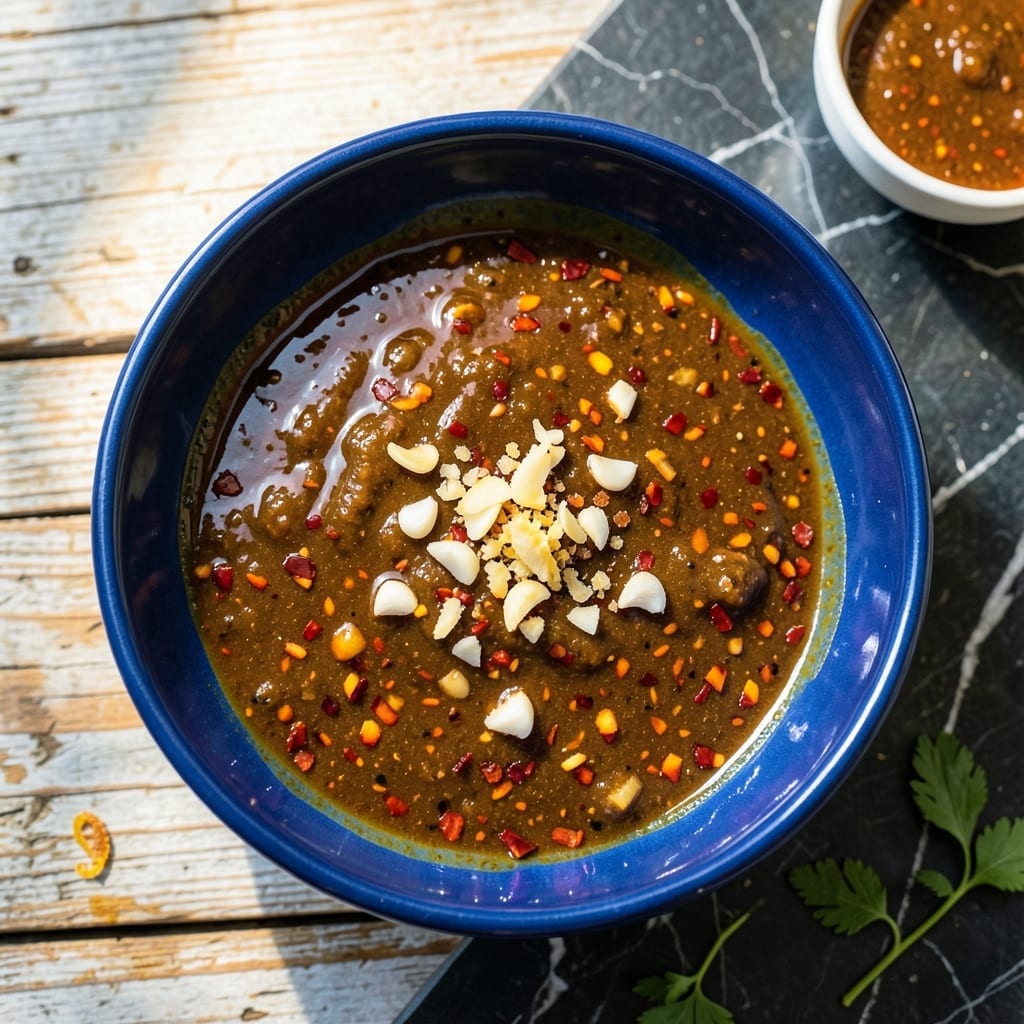
This Thai-inspired glaze brings sweet heat to any dish with its balanced blend of chili warmth and sticky sweetness.
I developed this sauce to bridge the gap between traditional barbecue and vibrant Southeast Asian flavors, creating a versatile condiment that elevates grilled meats and vegetables alike.
Ingredients for Sweet Chili Barbecue Sauce
Nine ingredients blend bold Thai flavors with classic barbecue sweetness.
| Ingredient | Amount | Notes |
|---|---|---|
| Red Chili Flakes 🌶️ | 1 tbsp | Adjust for heat preference |
| Garlic Cloves 🧄 | 4 cloves | Minced for depth |
| Fresh Ginger Root 🌿 | 1 tbsp | Peeled and grated |
| Brown Sugar 🍚 | ½ cup | Packed for sweetness |
| Rice Vinegar 💧 | ¼ cup | Balances sweetness with tang |
| Low-Sodium Soy Sauce 🫒 | ¼ cup | Tamari for gluten-free |
| Tomato Paste 🍅 | 2 tbsp | For thickness and depth |
| Lime Juice 🍋 | 2 tbsp | Freshly squeezed for brightness |
| Sesame Oil 🫒 | 1 tsp | Toasted for aroma |
[recipe_ingredient_scaler]
The chili flakes set the heat level—look for bright red, fresh ones at Asian markets or Whole Foods bulk section. I always grab mine from Trader Joe’s (they’ve got a good kick). Ginger and garlic are non-negotiable here; fresh is the only way to go. Brown sugar adds that sticky sweetness, but coconut sugar works too if you’re avoiding refined stuff.
No rice vinegar? Apple cider vinegar gets you close. Short on time? Pre-minced garlic and ginger from a jar works in a pinch (frozen works too). Tamari swaps in perfectly for soy sauce if gluten’s an issue. Want it sweeter? Add maple syrup or agave at the end. The tomato paste can be from a can—just make sure it’s plain, no herbs added.
Keeps in the fridge for 2 weeks in a sealed jar. Freezes for 3 months if you make a big batch. Stir before using—natural separation happens. I always double the recipe (worth the extra minute).
Why You’ll Love This Recipe
- Minimal Effort: I just dump everything in a pot and let it simmer—no fancy techniques, just stir and taste.
- Flavor Bomb: The brown sugar caramelizes with the vinegar while the ginger and garlic add that deep, warm kick.
- Endless Uses: I slather it on ribs, mix it into stir-fries, or even drizzle it over roasted veggies.
- Stays Fresh: Honestly, it keeps in the fridge for weeks, so I always have some ready for last-minute meals.
Step-by-Step Instructions for Sweet Chili Barbecue Sauce
This method delivers the perfect balance of sweet, spicy, and tangy flavors every time.
Step 1: Bloom the Aromatics in Oil
Heat the sesame oil in a medium saucepan over medium heat. Add the minced garlic cloves and grated fresh ginger root, stirring constantly for 30-45 seconds until fragrant but not browned.
This step wakes up the essential oils in the aromatics, creating a flavor base that’s intense without being bitter. Watch closely—you want the mixture to sizzle gently, not smoke. The moment you smell that warm, spicy aroma, you’re ready for the next addition.
Step 2: Build the Flavor Foundation
Stir in the tomato paste, red chili flakes, and brown sugar. Cook for 2-3 minutes, stirring frequently, until the mixture darkens slightly and the sugar begins to melt. You’ll notice the color deepen as the tomato paste caramelizes around the edges.
The 1 tbsp of chili flakes will give you noticeable heat without overwhelming the sweetness. If you’re sensitive to spice, you can reduce this slightly, but I find the full amount creates that perfect sweet-heat balance this sauce is known for.
Step 3: Add the Liquid Components
Carefully pour in the rice vinegar, low-sodium soy sauce, and lime juice. Stir well to combine, scraping up any browned bits from the bottom of the pan. These liquid ingredients will deglaze the pan, incorporating all those concentrated flavors.
The 0.25 cup of each liquid creates a harmonious balance: the vinegar adds tang, the soy sauce contributes umami depth, and the lime juice brings a bright, citrusy finish that cuts through the richness.
Step 4: Simmer to Perfection
Bring the mixture to a gentle boil, then reduce heat to low. Let it simmer uncovered for 15-20 minutes, stirring occasionally, until the sauce thickens enough to coat the back of a spoon.
As it simmers, the sauce will reduce and intensify in flavor. You’ll know it’s ready when it has a glossy sheen and leaves a clear trail when you drag a spoon through it. The volume will reduce by about a third, concentrating all those complex flavors.
Step 5: Cool and Store
Remove the sauce from heat and let it cool completely at room temperature. As it cools, it will thicken slightly more. Transfer to an airtight container—it will keep in the refrigerator for up to 2 weeks.
The flavors will continue to develop over the first 24 hours, so I always recommend making this sauce a day ahead if possible. When ready to use, give it a good stir, as the spices may settle during storage. This makes enough to generously coat 4 servings of your favorite grilled meats.
Pro Tips For Making Sweet Chili Barbecue Sauce
- Bloom the Spices: Toast the red chili flakes, garlic, and ginger in oil for 30 seconds before adding liquids—this wakes up their flavors and prevents a raw, harsh bite.
- Dissolve the Sugar: Whisk the brown sugar into the warm rice vinegar first to break up clumps; I learned this the hard way after fishing out stubborn sugar crystals from my sauce.
- Watch the Simmer: Keep the heat at a gentle simmer, not a rolling boil, or the vinegar will reduce too fast and leave your sauce bitter instead of balanced.
- Fresh Ginger Only: Skip the powdered stuff—fresh ginger grated fine (about 1 tablespoon) gives that bright, zippy kick that makes this sauce stand out.
Storing and Reheating This Dish
Refrigerator Storage
Let your sauce cool completely before transferring to a clean airtight container—I use 16-ounce mason jars from my local farmers market. In the fridge at 40°F or below, it stays fresh for up to 2 weeks. The flavors actually deepen over time as the spices meld together. ❄️
Freezer Storage
For longer storage, freeze in ice cube trays first, then transfer cubes to a freezer bag. This sauce freezes beautifully for up to 3 months without losing its vibrant flavor. I always label my bags with the date and sauce name for easy identification.
Thawing Methods
To thaw, simply move the container from freezer to fridge overnight. For quicker results, place the sealed container in a bowl of cold water, changing the water every 30 minutes. Never thaw at room temperature—this can compromise both safety and quality.
Reheating Tips
Gently warm the sauce in a small saucepan over low heat for 3-5 minutes, stirring occasionally. Avoid boiling to prevent the sugars from caramelizing too quickly. If it’s too thick, add 1-2 tbsp water to reach your desired consistency. 🔥
Reviving Separated Sauce
If the sauce separates during storage, don’t worry—this is natural. Simply give it a good stir before using. For stubborn separation, warm it slightly while whisking vigorously. I’ve found this happens more with homemade sauces, but it doesn’t affect the flavor at all.
Nutrition Facts
Frequently Asked Questions
Can I adjust the heat level?
Reduce the chili flakes to 1/2 tbsp for mild heat or increase to 2 tbsp for extra spice. The brown sugar helps balance the heat, so taste as you go.
What can I use instead of rice vinegar?
Apple cider vinegar works perfectly as a substitute. Avoid balsamic vinegar as its strong flavor may overpower the sauce. Maintain the 0.25 cup measurement for best results.
Is this sauce gluten-free?
It can be! Simply swap the soy sauce for tamari or a certified gluten-free soy sauce alternative. All other ingredients are naturally gluten-free.
How long does it take to thicken?
Simmer uncovered for 15-20 minutes on low heat. The sauce is ready when it coats the back of a spoon and leaves a clear trail when stirred.

Trained in classic French technique but raised on slow-cooked ribs and spicy rubs, she blends culinary skill with smoke and soul.
- Recipe for Boneless Pork Chops in Cast Iron Skillet: Sear and Baste to Juicy Perfection - October 3, 2026
- Recipe for Boneless Cross Rib Roast: Slow-Roasted Beef with Herb Crust - October 3, 2026
- Hamburgers in Sauce Recipe Crock Pot: Slow-Cooked Savory Delight - October 3, 2026